Liquidity Heatmap [Eˣ]💧 Liquidity Heatmap - Free Indicator
Overview
The Liquidity Heatmap reveals where stop losses are clustered in the market - the hidden liquidity zones that smart money targets. This indicator automatically identifies Buy-Side Liquidity (BSL) above price and Sell-Side Liquidity (SSL) below price, showing you exactly where institutional traders are likely to hunt for stops before major moves.
━━━━━━━━━━━━━━━━━━━━━━━━━━━━
🎯 What This Indicator Does
Identifies Liquidity Zones:
• Buy-Side Liquidity (BSL) - Stop losses from SHORT positions clustered above price
• Sell-Side Liquidity (SSL) - Stop losses from LONG positions clustered below price
• Automatically clusters nearby levels into high-probability zones
• Shows liquidity strength (1-5+) - higher numbers = more stops = bigger target
• Removes swept liquidity in real-time as price takes out stops
Visual Display:
• 🔴 Red Zones Above Price = Buy-Side Liquidity (shorts' stops)
• 🟢 Green Zones Below Price = Sell-Side Liquidity (longs' stops)
• Thicker/Darker Zones = Higher liquidity concentration
• BSL/SSL Labels = Show exact strength count
• Triangle Markers = Liquidity sweep alerts (when price takes stops)
Smart Features:
• Auto-removes old liquidity (customizable lookback period)
• Clusters nearby levels to reduce noise
• Tracks liquidity strength and age
• Updates in real-time as new swing points form
• Alerts when major liquidity zones are swept
━━━━━━━━━━━━━━━━━━━━━━━━━━━━
📊 How To Use This Indicator
Understanding Liquidity Concepts
What is Liquidity?
Liquidity refers to clusters of stop loss orders sitting in the market. These stops represent:
• Long traders' stop losses (below support) = Sell-Side Liquidity
• Short traders' stop losses (above resistance) = Buy-Side Liquidity
Why Does This Matter?
• Institutions NEED liquidity to fill large orders
• Price often "sweeps" liquidity zones before reversing
• Major liquidity = major target for smart money
• Understanding liquidity = understanding market maker behavior
The Liquidity Cycle:
1. Retail traders place stops at obvious levels (swing highs/lows)
2. Smart money identifies these clusters
3. Price is pushed to sweep the stops (liquidity grab)
4. Institutions fill their orders with this liquidity
5. Price reverses in the opposite direction
━━━━━━━━━━━━━━━━━━━━━━━━━━━━
💡 Trading Strategies
Strategy 1: Liquidity Sweep Reversals
Best For: Swing trading, catching reversals
Timeframes: 15min, 1H, 4H, Daily
Entry Setup:
1. Identify strong Sell-Side Liquidity (SSL) zone below price
2. Wait for price to sweep down into the SSL zone
3. Look for rejection/reversal candle pattern (pin bar, engulfing)
4. Enter LONG after sweep and reversal confirmation
5. Stop loss: Below the swept liquidity zone
6. Target: Opposite liquidity zone or key resistance
Why It Works: Smart money sweeps stops to fill buy orders, then pushes price higher
Example:
• SSL zone at $45,000 with strength 3
• Price drops to $44,950, sweeps the SSL
• Strong bullish reversal candle forms
• Enter long at $45,100
• Target: BSL zone at $47,000
Strategy 2: Liquidity-to-Liquidity Runs
Best For: Day trading, scalping
Timeframes: 5min, 15min, 1H
Entry Setup:
1. Price sweeps Sell-Side Liquidity below and reverses up
2. Identify Buy-Side Liquidity zone above
3. Enter LONG targeting the BSL zone above
4. Exit near/at the BSL zone (don't wait for sweep)
5. Stop loss: Below recent swing low
Why It Works: Price moves from liquidity pool to liquidity pool
Variation - Reverse for Shorts:
• BSL sweep above → Look for SSL zone below
• Enter short targeting lower liquidity
Strategy 3: Liquidity Avoidance (Stop Placement)
Best For: Improving win rate on existing strategies
Timeframes: All
Rules:
1. NEVER place stops exactly at obvious liquidity zones
2. Place stops beyond the liquidity zone with buffer
3. Or place stops before the liquidity zone (tighter, riskier)
4. Monitor liquidity strength - avoid zones with strength 3+
Why It Works: Market makers hunt obvious stop clusters
Example:
• Trading long, swing low at $100 (SSL zone, strength 4)
• Bad: Stop at $99.50 (will get swept)
• Better: Stop at $98.50 (beyond the liquidity)
• Alternative: Stop at $100.50 (tighter, before sweep zone)
Strategy 4: Confluence Trading
Best For: High probability setups
Timeframes: 1H, 4H, Daily
Entry Setup:
1. Find liquidity zone that aligns with:
• Major support/resistance level
• Fibonacci retracement (0.618, 0.786)
• Trendline
• Round psychological number ($50,000, $2,000, etc)
2. Wait for sweep of this high-confluence zone
3. Enter on reversal with multiple confirmations
4. Larger position size justified by confluence
Why It Works: Multiple factors = institutional interest = higher probability
━━━━━━━━━━━━━━━━━━━━━━━━━━━━
⚙️ Settings Explained
Core Settings
Swing Detection Length (Default: 10)
• Number of bars left/right to identify swing highs and lows
• Lower values (5-8): More sensitive, more liquidity zones, more noise
• Higher values (12-20): Less sensitive, only major swings, cleaner chart
• Recommended: 8-10 for intraday, 10-15 for swing trading
Liquidity Lookback Bars (Default: 100)
• How many historical bars to track liquidity zones
• Lower values (50-75): Shows only recent liquidity
• Higher values (100-200): Shows longer-term liquidity clusters
• Zones older than this are automatically removed
• Recommended: 100-150 for most timeframes
Zone Proximity % (Default: 0.5)
• Percentage threshold to group nearby levels into single zone
• Lower values (0.2-0.4): Keeps levels separate, more zones
• Higher values (0.6-1.0): Aggressive clustering, fewer zones
• Recommended: 0.4-0.6 for crypto, 0.3-0.5 for forex, 0.5-0.8 for stocks
Visualization Settings
Show Buy-Side Liquidity
• Toggle ON/OFF red zones above price
• Turn OFF if only interested in downside liquidity
Show Sell-Side Liquidity
• Toggle ON/OFF green zones below price
• Turn OFF if only interested in upside liquidity
Show Liquidity Labels
• Toggle BSL/SSL labels with strength numbers
• Turn OFF for cleaner chart appearance
• Keep ON to see exact liquidity strength
Display Style
• Boxes: Filled rectangular zones (best for visualizing strength)
• Lines: Horizontal dashed lines (minimal, clean look)
• Both: Boxes + Lines (maximum visibility)
Color Intensity
• Low: 85% transparency (subtle, less distracting)
• Medium: 75% transparency (balanced visibility)
• High: 65% transparency (bold, maximum visibility)
━━━━━━━━━━━━━━━━━━━━━━━━━━━━
📱 Info Panel Guide
Located in the top-right corner, the info panel provides real-time liquidity statistics:
Buy-Side Zones
• Count of active BSL zones above current price
• Higher number = More upside targets for price
Sell-Side Zones
• Count of active SSL zones below current price
• Higher number = More downside targets for price
Total Zones
• Combined count of all active liquidity
• Useful for gauging overall market structure
Nearest BSL
• Distance in % to closest Buy-Side Liquidity above
• Example: +2.5% means BSL is 2.5% above current price
• Quick reference for next upside target
Nearest SSL
• Distance in % to closest Sell-Side Liquidity below
• Example: -1.8% means SSL is 1.8% below current price
• Quick reference for next downside target
Liquidity Bias
• ⬆️ Bullish : More BSL than SSL (upside targets dominate)
• ⬇️ Bearish : More SSL than BSL (downside targets dominate)
• ↔️ Balanced: Equal liquidity on both sides (range-bound)
━━━━━━━━━━━━━━━━━━━━━━━━━━━━
🎓 Understanding Liquidity Strength
What Do The Numbers Mean?
Strength 1 : Single swing point
• Light liquidity, minor target
• Can be ignored in trending markets
• Useful in ranging/choppy conditions
Strength 2-3 : Moderate liquidity cluster
• Multiple nearby swing points merged
• Decent target for intraday moves
• Watch for potential sweeps
Strength 4-5 : Strong liquidity cluster
• Major cluster of stops
• High-probability target for institutions
• Expect reactions when swept
Strength 6+ : Extreme liquidity pool
• Massive stop cluster (rare)
• Critical zone - high probability of sweep
• Often marks major support/resistance
• Ideal for confluence setups
━━━━━━━━━━━━━━━━━━━━━━━━━━━━
📱 Alert Setup
This indicator includes 2 powerful alert types:
1. Buy-Side Liquidity Sweep
• Triggers when price sweeps BSL zone above
• Shows potential bullish reversal opportunity
• Often precedes upward continuation after sweep
2. Sell-Side Liquidity Sweep
• Triggers when price sweeps SSL zone below
• Shows potential bearish reversal opportunity
• Often precedes downward continuation after sweep
To Set Up Alerts:
1. Click the "Alert" button (clock icon) in TradingView
2. Condition: Select "Liquidity Heatmap"
3. Choose alert type: BSL Sweep or SSL Sweep
4. Configure notification method (push, email, webhook)
5. Click "Create"
Pro Tip: Set alerts for both BSL and SSL sweeps to catch opportunities in both directions
━━━━━━━━━━━━━━━━━━━━━━━━━━━━
💎 Pro Tips & Best Practices
✅ DO:
• Wait for confirmation - Don't enter immediately on sweep, wait for reversal pattern
• Combine with trend - SSL sweeps in uptrends = higher probability longs
• Check multiple timeframes - 1H liquidity + 4H liquidity = strongest zones
• Monitor strength - Focus on zones with strength 3+
• Use proper risk management - Liquidity sweeps can go further than expected
• Watch for re-sweeps - Sometimes liquidity zones get swept multiple times
• Consider volume - High volume sweeps = stronger reversal potential
⚠️ DON'T:
• Don't fade strong trends - In strong trends, sweeps often continue rather than reverse
• Don't overtrade - Not every sweep is a tradeable setup
• Don't ignore context - Check broader market conditions and news
• Don't use alone - Combine with price action, support/resistance, and other analysis
• Don't place stops at liquidity - Your stops will be hunted
• Don't expect perfection
Dönemler

VIX/VXV Ratio (TitsNany)This script plots the VXV/VIX ratio, which compares medium-term volatility (90-day fear) to short-term volatility (30-day fear). When the ratio rises above key levels like 1.16 or 1.24, it signals that traders expect future stress, often preceding market pullbacks. When the ratio falls toward or below 1.0, short-term fear is spiking, which typically occurs during active selloffs or volatility events. In short, elevated readings warn of potential market drops ahead, while sharp declines in the ratio reflect panic already hitting the market.

NoProcess PivotsNoProcess Pivots
Visualize the structural framework of price action with NoProcess Pivots, a precision tool for multi-timeframe confluence trading.
Pivots are mathematically derived levels where price statistically finds support, resistance, or equilibrium. Institutional order flow respects these levels as key decision points where liquidity pools form and inefficiencies seek rebalancing.
NoProcess Pivots displays historical pivot ranges as period-bounded zones across Daily, Weekly, and Quarterly timeframes—allowing you to observe how price has respected or violated these levels over time. By projecting ±33% extensions beyond R1/S1, traders can identify targets, retracement levels, and key reversal points.
Cross-reference pivots across multiple timeframes to find confluence zones where Daily, Weekly, and Quarterly levels stack. These high-conviction areas offer the clearest setups for entries and exits.
Features:
Multi-timeframe pivots: Daily, Weekly, Quarterly
Historical levels with adjustable depth
Period-bounded zones
±33% extensions
Adaptive light/dark mode table
Real-time Δ PP percentage
Pivot cross alerts
Built for traders who respect the math behind the markets.

Madrid Ribbon with ST/TEMA FilterHow the Combination Works
The script is combined by:
Porting to Pine Script v6: The Madrid Ribbon code was updated from v4 to v6 syntax (mainly changing study() to indicator(), change() to ta.change(), and using ta. prefixes for built-in functions like ema and sma).
Integrating SuperTrend Logic: The full calculation for the Zero-lag TEMA filtered SuperTrend's final_trend was copied into the combined script. This logic determines if the market is in a confirmed 1 (Uptrend) or -1 (Downtrend) based on the combined signal of the TEMA cross and the SuperTrend.
Filtering the Ribbon Color: The Madrid Ribbon's custom coloring function, maColor, was modified to include the final_trend as a filter:
If i_st_enabled is true, the original Madrid Ribbon color (LIME/GREEN for bullish, RUBI/MAROON for bearish) is only displayed if the final_trend confirms that direction.
If the final_trend is neutral or contradicts the ribbon's direction, the MA is colored GRAY.
Input Simplification: The numerous input options for the SuperTrend's source and MA type were simplified to use close and EMA by default to avoid excessive complexity, but the main parameters like TEMA periods, ATR Multiplier, and MA length were kept as inputs.
This results in a Madrid Ribbon that only shows its standard color signals when the longer-term, double-filtered SuperTrend confirms the same trend.

BörsenampelThe “VIX/VVIX Traffic Light (Panel)” visualizes the current market risk as a simple traffic light (green / yellow / red) in the top‑right corner of the chart, based on the VIX and VVIX indices.
How it works
The script loads the VIX and VVIX indices via request.security and evaluates them using user‑defined threshold levels.
Green: VIX and VVIX are below their “green” thresholds, indicating a calm market environment and more risk‑on conditions.
Red: VIX and VVIX are above their “red” thresholds, signalling stress or panic phases with elevated risk.
Yellow: Transitional zone between the two extremes.
Chart display
A small panel with the title “Traffic Light” is shown in the upper‑right corner of the chart.
The central box displays the current status (“GREEN”, “YELLOW”, “RED”) with a matching background color.
Optionally, the current VIX and VVIX values are shown below the status.
Inputs and usage
Symbols for VIX and VVIX can be freely chosen (default: CBOE:VIX and CBOE:VVIX).
The green/red thresholds can be adjusted to fit personal volatility rules or different markets.

⭐ Silver HUD v14.6 ⭐Silver HUD v14.6 is an enhanced Pine Script v5 indicator for micro silver futures (SIL) trading on TradingView, featuring a compact 2-column bottom-right HUD with weighted scoring across 5 engines (trend, flow, momentum, PB, turbo), 2H structure arbitration, divergence detection, volume surge analysis, BUY/SELL arrows, and risk warnings. Expanded from v14.5 with dedicated DIV/VOL rows for better signal context on 5m charts.
Multi-Engine Scoring
Trend Engine
EMA20/50 alignment + VWAP direction (1.001%/0.999% thresholds): UP/DOWN/MIXED scores 100/60/20.
Flow Engine
CCIOBV (CCI20 + OBV EMA13 sync) + QQE (RSI14 smoothed with trailing volatility): dual UP/DOWN = strong flow (100), mixed (60).
Momentum
RSI14/MFI14 >55 (UP=100), <45 (DOWN=100), else NEUTRAL (60).
PB (Pullback)
EMA20 deviation: -0.4% to +1.2% = OK (100), ≥1.2% CHASE (70/40), DEEP (30/80 for long/short).
Turbo
ATR14 percentile (>70 EXPANDING, <30 FADE) + BB20 width percentile (<20 SQ): SQ+EXPANDING=BREAKOUT (100).
Weighted Totals
BUY: flow(30%)+mom(25%)+PB(25%)+trend(10%)+turbo(10%); SELL adjusts turbo(20%)/PB(15%). Thresholds: BUY≥75, SELL≥72.
Advanced Features
2H Arbitration
Swing HH/HL/LL/LH detection resolves BUY/SELL conflicts; UP (HH/HL) favors longs, DOWN (LL/LH) shorts.
Divergence
RSI-based: price HH without RSI HH = BEAR DIV; price LL without RSI LL = BULL DIV.
Volume Surge
2x 20-SMA or 80th percentile: BULL/BEAR SURGE (directional), SURGE (neutral).
Signals & Risk
Raw triggers filtered (no DEEP PB BUY, no DOWN trend BUY, UP flow required); final uses 2H tiebreaker. RISK flags DIV, surges, DEEP PB, trend conflicts, score ties. Tiny BUY/SELL arrows on raw signals.
HUD Layout
14-row table: TREND/FLOW/MOM/PB/TURBO/FINAL/BUY*/SELL*/2H/DIV/VOL/RISK/Threshold. Stars rate scores (★★★★★=90+), color-coded statuses, gold FINAL. Perfect for SIL scalpers needing confluence + risk at a glance.

🟡 GOLD 4H HUD v12 — Time-Safe Nuclear Edition🟡 GOLD 4H HUD v12 — Time-Safe Nuclear Edition
A full–scale Smart Money Concepts (SMC) analytics engine designed exclusively for XAUUSD on the 4-Hour timeframe.
This script combines market structure, liquidity, displacement, order blocks, imbalance, volume profile, SMT divergence, and institutional behavior modeling into a single unified HUD.
Built with a time-safe architecture, all structural elements (OB/FVG/Sweep) are stored by timestamp to minimize repainting and preserve event integrity.
📌 Core Features (12 Modules + Full HUD)
1 — Market Structure Engine
Automatically detects:
HH / HL / LH / LL
BOS (Break of Structure)
MSS (Market Structure Shift)
CHOCH (Change of Character)
Real swing pivots & trend state
2 — Sweep Engine (Liquidity Grab Detection)
Identifies institutional liquidity grabs:
Break + reclaim of highs/lows
ATR-filtered invalidation
Displacement-backed sweeps
3 — Time-Safe FVG Engine
Detects Bullish/Bearish Fair Value Gaps
ATR-tolerant FVG logic
Automatic right-extension
Auto-delete when filled or invalid
4 — Time-Safe Order Block Engine
Demand & Supply OB detection
Strength classification (Weak vs Strong)
FVG-overlap confirmation
Timestamp-locked (non-repainting)
5 — Volume Profile Engine (HVN / LVN / POC)
Real-time micro-profile:
High Volume Node (HVN)
Low Volume Node (LVN)
Point of Control (POC)
6 — SMT Engine (Gold vs DXY Divergence)
Smart Money Divergence built-in:
Bullish SMT
Bearish SMT
Directional confirmation with zero lag
7 — Displacement Engine
Measures institutional impulse:
Body-based impulse detection
Multi-leg continuation signals
FVG continuation moves
Generates displacement score
8 — Premium / Discount Model
Auto-classifies price into:
Discount (Buy zone)
Premium (Sell zone)
9 — SMC Trend Engine (Score-Based)
Combines 10+ factors:
Structure
FVG
OB power
Displacement
POC positioning
SMT conditions
Outputs:
BULL / BEAR / RANGE
Full scoring system
10 — Institutional Imbalance Model (IMB Engine)
Combines:
PD zones
Sweep direction
Displacement
SMT
OB strength
CHOCH/MSS
A complete institutional bias filter.
11 — Entry Engine (Signal Fusion Model)
Entry conditions fuse:
Sweep
CHOCH
Displacement
OB strength
FVG alignment
SMT confirmation
Also outputs:
Suggested SL/TP
Entry score
12 — Trendline Engine
Auto-draws:
HL → HL bullish trendlines
LH → LH bearish trendlines
+ Full Nuclear HUD
Displays:
Market structure
Trend direction
SMT / CHOCH / MSS
FVG / OB zones
HVN / LVN / POC
Liquidity strength
Entry model
Liquidity Magnet direction
SL/TP map
A complete institutional dashboard in one place.
⚠ Usage Requirement
This script is designed ONLY for the 4H timeframe.
✨ Summary
GOLD 4H HUD v12 — Time-Safe Nuclear Edition
is not just an indicator.
It is a full institutional-grade SMC analysis system, built specifically for Gold.
If you trade XAUUSD on the 4H timeframe —
this is your complete market intelligence HUD

🟡 GOLD 4H HUD v8.9 — Loose ICT OB + Strong/Weak + FVG/HVN/LVNGOLD 4H HUD v8.9 is a clean, structured Smart Money Concepts (SMC)–based analysis tool designed exclusively for XAUUSD on the 4-hour timeframe.
It focuses on the three most important elements for institutional orderflow analysis:
✔ Loose ICT Order Blocks (Demand/Supply)
✔ Fair Value Gaps (FVG)
✔ Volume Profile Zones (HVN/LVN/POC)
The script builds a professional-style HUD that displays the key institutional regions and structural levels that matter most for gold traders.
📌 Key Features
1 — Market Structure Engine (HH/HL & BOS)
The indicator detects:
Minor swing Highs and Lows
Last confirmed HH / HL levels
Break of Structure (BOS) for directional bias
EMA-200 trend filter (UP / DOWN / NEUTRAL)
This gives traders a clean structural read without clutter or noise.
2 — Loose FVG Engine (Tolerance-Based ICT Gaps)
A soft-threshold FVG engine detects “loose” Fair Value Gaps using a 0.1% price tolerance.
This method ensures:
Fewer missed imbalances
Cleaner OB/FVG alignment
Higher accuracy on 4H gold displacement legs
FVGs automatically shift to the right side of the chart for clean visualization.
3 — Order Block Engine (Demand/Supply + Strong/Weak Classification)
A simplified ICT-style OB engine scans the past few candles whenever BOS is detected.
It identifies:
Demand OB during bullish BOS
Supply OB during bearish BOS
Strong OB if fully nested inside an active FVG
Weak OB otherwise
OB boxes include:
Clear color coding (strong vs. weak)
Price range labels inside each box
Automatic right-shift for visual clarity
4 — Volume Profile Engine (POC / HVN / LVN / VAH / VAL)
Based on a rolling window (default 120 bars), the script builds a lightweight volume distribution.
It displays:
POC (Point of Control)
HVN (High Volume Node)
LVN (Low Volume Node)
Value Area High / Low
HVN/LVN zones are shown as right-shifted colored boxes with price labels.
These zones help identify:
Institutional accumulation
Low-liquidity rejection points
Areas where price tends to react strongly
5 — Support / Resistance Mapping
The script automatically generates:
OB-based support/resistance
Swing-high/swing-low levels
HVN/LVN structural levels
These are displayed in the HUD for fast reference.
6 — Professional HUD Panel
A compact, easy-to-read HUD summarizes:
Trend direction
Latest HH/HL
OB ranges (Strong/Weak)
HVN/LVN price zones
POC
Multi-layer support & resistance
This turns the script into a fully functional analysis dashboard.
📌 What This Indicator Is NOT
To avoid misunderstanding:
It does not take entries or generate buy/sell signals
It does not auto-detect CHOCH, MSS, SMT, or sweeps
It is not a trading bot
This tool is designed as an institutional-style map and analysis HUD, not a strategy.
📌 Best Use Case
This indicator is ideal for traders who want to:
Read institutional structure on XAUUSD
Identify clean Demand/Supply zones
Visualize FVG/OB/HVN interactions
Track high-value liquidity levels
Build directional bias on 4H before dropping to execution timeframes
⚠ Important Note
This tool is designed exclusively for the 4H timeframe.
Using it on lower timeframes will display a warning.

Ultimate Trend System — FINAL MASTER EDITIONUltimate Trend System — FINAL MASTER EDITION
A complete, multi‑layered trend‑detection engine designed for precision execution and clarity.
This final edition fuses trend, momentum, volatility, and filtering into one symmetrical logic system — enabling traders to instantly visualize directional strength and avoid false signals during choppy markets.
🔹 System Overview
The Ultimate Trend System consolidates several classic trading frameworks into a unified model.
It dynamically generates BUY, SELL, and STOP tags directly on the chart — each derived from clean, interlinked conditions that measure both momentum and structure.
In addition, a built‑in information panel summarizes live indicator states for quick decision‑making without checking multiple indicators.
⚙️ Core Logic Components
SMA (20‑period): Identifies trend slope; rising → bullish bias, falling → bearish bias.
VWAP: Defines fair‑value position — Above, Below, or Inside volume‑weighted average price.
QQE‑Lite (RSI): Tracks internal momentum shifts by comparing RSI to its EMA smoothing.
ATR Strength: Classifies current volatility regime as Turbo, Strong, or Weak.
SuperTrend: Confirms structural trend direction using an ATR‑based trailing model.
Choppiness Filter: Suppresses signals when short‑term volatility contracts or range noise dominates.
Fakeout Detection: Prevents false triggers after deceptive breakouts or reversals.
🧩 Execution Logic
BUY Signal: All major trend engines align bullishly, with clean structure and momentum.
SELL Signal: All major engines align bearishly, with clean structure and momentum.
STOP Phase: Appears once per cycle to mark neutral or transition zones; automatically locks further stops until a new entry signal is confirmed.
🟩🟥 Visual Elements
Green Labels: Confirmed bullish entry (BUY).
Red Labels: Confirmed bearish entry (SELL).
Yellow Labels: STOP state (trend exhaustion or consolidation).
Panel: Displays live readings for VWAP, SMA, QQE, ATR regime, and SuperTrend direction.
🧠 Design Philosophy
Built for simplicity, speed, and precision — the Final Master Edition strips away noise without losing analytical depth.
It can serve as a standalone trend system or foundation layer for more advanced frameworks like auto‑execution or multi‑engine HUDs.

⭐ Silver HUD v15.1 — Full Notes Version (3-Column HUD)Silver HUD v15.1 is a comprehensive Pine Script v5 indicator designed for micro silver futures (SIL) trading on TradingView. It overlays a 3-column HUD table displaying real-time analysis across multiple engines including trend, flow, momentum, pullback, turbo (breakout), divergence, volume, and 2H structure. The system generates weighted BUY/SELL scores and final signals with risk warnings, optimized for 5m charts with 30m support/resistance levels.
Core Components
Support/Resistance & Trade Levels
Pulls 30m lowest low (support) and highest high (resistance) for entry/stop/TP calculation. Entry defaults to support, stop loss at support - 0.10, with ATR-based TPs (1x/2x/3x). Risk per lot factors SIL contract specs (1000oz, $5/tick). Alerts when price nears support within 0.05.
Multi-Engine Analysis
TREND: EMA20/50 + VWAP direction (UP/DOWN/MIXED).
FLOW: CCIOBV (CCI+OBV) + QQE momentum sync.
MOMENTUM: RSI/MFI >55 (UP) or <45 (DOWN).
PB (Pullback): EMA20 deviation (-0.4% to +1.2% = OK; flags CHASE/DEEP).
TURBO: ATR percentile + BB width squeeze for BREAKOUT/EXHAUST.
Scores weight flow (30%), momentum (25%), PB (25%), trend/turbo (10-20%). BUY ≥75, SELL ≥72 triggers raw signals.
Advanced Features
2H Structure: Detects HH/HL/LL/LH swings for macro bias (UP/DOWN/MIXED).
SELL System: Distinguishes SELL-ALERT (exhaustion) vs full SELL-REVERSAL (multi-condition bear flip).
Divergence & Volume: RSI-based bear/bull div on swing highs/lows; surge detection (>2x vol MA or 80th percentile).
Final Signal: Combines raw scores with filters (no DEEP PB for BUY, 2H tiebreaker); RISK flags conflicts like div or trend mismatches.
HUD Display & Usage
Renders a bottom-right table with metric, status (color-coded), and Chinese explanations. Stars rate scores (★★★★★=90+). Ideal for high-frequency SIL traders monitoring multi-timeframe confluence on 5m charts.

Session Highlighter Pro [Eˣ]🌍 Session Highlighter Pro - Free Indicator
Overview
Session Highlighter Pro brings institutional-level session analysis to your charts. This indicator automatically highlights the Asian, London, and New York trading sessions, marks high-volatility "Kill Zones", identifies profitable session overlaps, and tracks key session levels - all essential for timing your trades and understanding when the smart money is active.
━━━━━━━━━━━━━━━━━━━━━━━━━━━━
🎯 What This Indicator Does
Highlights Trading Sessions:
• 🟡 Asian Session (19:00-04:00 EST) - Lower volatility, range-bound
• 🔵 London Session (03:00-12:00 EST) - High volatility, trend moves
• 🟢 New York Session (08:00-17:00 EST) - Highest volume, major moves
• All times automatically adjust for EST/EDT (daylight saving)
Marks Kill Zones:
• 🔥 London Kill Zone (02:00-05:00 EST) - London market makers most active
• 🔥 NY Kill Zone (08:30-11:00 EST) - NY institutional activity peaks
• Highest probability setups occur during these windows
• Peak liquidity and volatility periods
Identifies Session Overlaps:
• ⚡ London-NY Overlap (08:00-12:00 EST) - Maximum volume period
• 💜 Asian-London Overlap (03:00-04:00 EST) - Early volatility spike
• Most explosive moves happen during overlaps
• Best time for breakout and momentum trading
Tracks Session Levels:
• Session High/Low lines (support and resistance)
• Session Open lines (key reference levels)
• Real-time range calculations
• Customizable line styles and colors
Smart Features:
• Statistics panel showing current session and ranges
• Fully customizable colors and display options
• Works on all timeframes (best on 5min to 1H)
• Built-in alerts for session starts and kill zones
• Clean, professional visualization
━━━━━━━━━━━━━━━━━━━━━━━━━━━━
📊 Understanding Trading Sessions
Why Sessions Matter
Different trading sessions have dramatically different characteristics:
• Volume: Sessions determine who's in the market (retail vs institutional)
• Volatility: Major sessions bring major moves
• Liquidity: Better fills and tighter spreads during active sessions
• Trends: Real trends start during London/NY, not Asian
• Reversals: Often happen at session opens/closes
Professional traders time their entries based on sessions - now you can too.
━━━━━━━━━━━━━━━━━━━━━━━━━━━━
🟡 Asian Session (19:00-04:00 EST)
Characteristics:
• Lowest volume of the three major sessions
• Range-bound, choppy price action
• Less institutional activity
• Tokyo, Hong Kong, Singapore markets open
• Good for range trading, poor for breakouts
Best For:
• Range trading strategies
• Scalping in established ranges
• Identifying support/resistance for London open
• Pairs: AUD/JPY, NZD/JPY, AUD/USD
Trading Tips:
• Avoid breakout trades - often false breakouts
• Trade between session high/low
• Watch for range compression before London
• Expect reversal at support/resistance
What To Avoid:
• Chasing breakouts (usually fail)
• Large position sizes (low liquidity)
• News trading (limited market participation)
━━━━━━━━━━━━━━━━━━━━━━━━━━━━
🔵 London Session (03:00-12:00 EST)
Characteristics:
• High volatility and volume
• Strongest trends develop here
• Major institutional activity
• European markets + early London traders
• Real breakouts happen during this session
Best For:
• Trend trading strategies
• Breakout trading (especially at open)
• Major currency pairs (EUR/USD, GBP/USD, EUR/GBP)
• Gold and oil trading
Trading Tips:
• Watch for breakout of Asian range at London open
• First hour (03:00-04:00 EST) often sets daily tone
• London Kill Zone (02:00-05:00) has highest win rate
• Session high/low often hold as support/resistance
Key Moments:
• 03:00 EST: London open - major volatility spike
• 02:00-05:00 EST: London Kill Zone - institutional orders
• 08:00 EST: London-NY overlap begins - explosive moves
━━━━━━━━━━━━━━━━━━━━━━━━━━━━
🟢 New York Session (08:00-17:00 EST)
Characteristics:
• Highest volume globally (when overlapping with London)
• US market open brings major moves
• Economic news releases (08:30 EST typically)
• Strong directional moves
• US institutional money flows
Best For:
• Trend continuation trades
• News trading (NFP, CPI, FOMC, etc.)
• US indices (ES, NQ, YM)
• Major pairs involving USD
Trading Tips:
• 08:30 EST = Most economic releases (high volatility)
• NY Kill Zone (08:30-11:00) = Highest probability window
• First 2 hours most volatile (08:00-10:00)
• After 12:00 (London close) volume drops significantly
Key Moments:
• 08:00 EST: NY open + London overlap begins
• 08:30 EST: Economic data releases
• 08:30-11:00 EST: NY Kill Zone - institutional activity
• 12:00 EST: London close - volume drops
• 16:00 EST: Stock market close - volatility spike
━━━━━━━━━━━━━━━━━━━━━━━━━━━━
🔥 Kill Zones Explained
What Are Kill Zones?
Kill Zones are specific time windows within sessions where institutional traders (banks, hedge funds, market makers) are most active. These periods consistently show:
• Highest win-rate setups
• Largest moves relative to risk
• Best liquidity for entries/exits
• Most reliable technical patterns
Popularized by ICT (Inner Circle Trader), these zones represent when smart money acts.
London Kill Zone (02:00-05:00 EST)
Why It Works:
• London banks and institutions place orders
• Pre-London positioning before official open
• Often runs stops before reversing
• Sets up the trend for London session
How To Trade:
1. Watch for sweep of Asian highs/lows
2. Look for reversal back into range
3. Enter in direction of reversal
4. Target: Opposite side of range or session high/low
Best Pairs: EUR/USD, GBP/USD, EUR/GBP, Gold
NY Kill Zone (08:30-11:00 EST)
Why It Works:
• Overlaps with London session (maximum volume)
• Economic data releases at 08:30
• US institutions enter positions
• Highest liquidity period globally
How To Trade:
1. Wait for news spike at 08:30 (if applicable)
2. Identify sweep and reversal patterns
3. Enter with momentum after confirmation
4. Target: Session high/low or previous day levels
Best Instruments: Indices (ES, NQ), USD pairs, Gold
━━━━━━━━━━━━━━━━━━━━━━━━━━━━
⚡ Session Overlaps
London-NY Overlap (08:00-12:00 EST)
The Golden Window:
• Highest trading volume of entire 24-hour cycle
• Both European and US traders active
• Maximum liquidity = tightest spreads
• Biggest moves of the day often occur here
• Best time for all trading styles
Trading Strategies:
• Breakout trading (high follow-through probability)
• Momentum trading (strong trends develop)
• News trading (major releases during this time)
• Scalping (high volatility + tight spreads)
What To Watch:
• Direction established in first hour often continues
• 08:30 economic data can reverse or accelerate trends
• After London close (12:00), expect consolidation
Asian-London Overlap (03:00-04:00 EST)
The Early Bird Window:
• Short overlap period
• Early volatility as Asian session ends
• London traders positioning before official open
• Often see reversal of Asian range
Trading Strategies:
• Fade Asian extremes (sell highs, buy lows)
• Play breakout of Asian range
• Quick scalps during volatility spike
• Position for London session trend
━━━━━━━━━━━━━━━━━━━━━━━━━━━━
📊 How To Use This Indicator
Strategy 1: Session Breakout Trading
Best For: Trend trading, catching major moves
Timeframes: 5min, 15min, 1H
Setup:
1. Note Asian session high/low (yellow lines)
2. Wait for London open (03:00 EST)
3. If price breaks Asian high/low with strong candle, enter breakout
4. Stop loss: Opposite side of Asian range
5. Target: 1.5-2x Asian range or session high/low
Why It Works: London volume breaks Asian consolidation
Strategy 2: Kill Zone Reversals
Best For: High win-rate setups
Timeframes: 5min, 15min
Setup:
1. Wait for Kill Zone to begin (red background)
2. Watch for stop hunt (sweep of recent high/low)
3. Look for rejection/reversal pattern
4. Enter when price reverses back into range
5. Stop: Beyond the swept level
6. Target: Opposite kill zone extreme
Why It Works: Institutions sweep stops then reverse
Strategy 3: Overlap Momentum
Best For: Riding strong trends
Timeframes: 15min, 1H
Setup:
1. Wait for London-NY overlap (08:00 EST, orange background)
2. Identify trend direction in first 30 minutes
3. Enter pullbacks in trend direction
4. Stop: Below recent swing low/high
5. Target: Session high/low or previous day levels
6. Hold until overlap ends (12:00 EST)
Why It Works: Maximum volume drives sustained moves
Strategy 4: Asian Range Trading
Best For: Low-risk scalping
Timeframes: 5min, 15min
Setup:
1. During Asian session (yellow background)
2. Let range establish (first 2-3 hours)
3. Buy at session low, sell at session high
4. Tight stops outside range
5. Exit before London open (03:00 EST)
Why It Works: Asian session typically ranges
Strategy 5: Session Level Trading
Best For: Support/resistance trading
Timeframes: All
Setup:
1. Previous session highs/lows become S/R levels
2. Watch for price reaction at these levels
3. Enter bounces (support) or rejections (resistance)
4. Use session open lines as confirmation
5. Stop: Slightly beyond session level
Why It Works: Traders watch session levels globally
━━━━━━━━━━━━━━━━━━━━━━━━━━━━
⚙️ Settings Explained
Sessions
Show Asian/London/NY Session
• Toggle each session on/off
• Customize background colors for each
• Adjust transparency to your preference
• Tip: Disable sessions you don't trade
Highlight Session Overlaps
• Shows when sessions overlap (different color)
• Critical for identifying high-volume periods
• Recommended: Keep ON
Overlap Color
• Customize the overlap background color
• Default: Orange (stands out from session colors)
Levels
Show Session High/Low Lines
• Displays horizontal lines at session extremes
• Acts as intraday support/resistance
• Choose line style: Solid, Dashed, or Dotted
• Recommended: Keep ON for level trading
Show Session Open Lines
• Displays line at session opening price
• Key reference level for traders
• Choose line style (default: Dashed)
• Useful for mean reversion strategies
Kill Zones
Show Kill Zones
• Master toggle for kill zone highlighting
• Turn OFF if you don't use kill zone strategies
London Kill Zone (02:00-05:00 EST)
• Toggle London KZ on/off
• Most important for forex traders
NY Kill Zone (08:30-11:00 EST)
• Toggle NY KZ on/off
• Most important for indices/stock traders
KZ Color
• Customize kill zone background color
• Default: Red (indicates high importance)
Display
Show Session Statistics
• Toggle the info panel (top-left)
• Displays current session and ranges
• Keep ON for session awareness
Show Session Labels
• Toggle session name labels on chart
• Shows session name + current range %
• Turn OFF for cleaner appearance
━━━━━━━━━━━━━━━━━━━━━━━━━━━━
📱 Statistics Panel Guide
Current Session
• Shows which session is currently active
• Color-coded for quick identification
• Displays "KILL ZONE 🔥" when applicable
• Shows "OVERLAP" during London-NY overlap
Session Table
Session Column:
• Lists all three major sessions
• Color-coded icons for quick reference
Time Column:
• Shows session hours in EST
• All times automatically adjust for daylight saving
Range Column:
• Current session range as percentage
• Updates in real-time during active session
• Shows "-" when session hasn't started
• Higher range = More volatility
Using The Stats:
• Compare daily ranges to historical average
• Larger ranges = More opportunity
• Small ranges in Kill Zones = Potential breakout coming
• Track which sessions are most profitable for your style
━━━━━━━━━━━━━━━━━━━━━━━━━━━━
📱 Alert Setup
This indicator includes 6 alert types:
1. Asian Session Open
• Fires when Asian session starts (19:00 EST)
• Useful for range traders
2. London Session Open
• Fires when London session starts (03:00 EST)
• Critical alert for breakout traders
3. NY Session Open
• Fires when NY session starts (08:00 EST)
• Important for US market traders
4. London Kill Zone Start
• Fires at 02:00 EST
• High-probability trading window begins
5. NY Kill Zone Start
• Fires at 08:30 EST
• Prime time for indices and USD pairs
6. London-NY Overlap Start
• Fires at 08:00 EST
• Maximum volume period begins
To Set Up Alerts:
1. Click "Alert" button (clock icon)
2. Select "Session Highlighter Pro"
3. Choose your alert type
4. Configure notification method
5. Click "Create"
Pro Tip: Set alerts for kill zones and overlaps - these are your highest probability trading windows
━━━━━━━━━━━━━━━━━━━━━━━━━━━━
💎 Pro Tips & Best Practices
✅ DO:
• Trade during your session - Match your schedule to high-volume sessions
• Focus on Kill Zones - Highest win-rate setups occur here
• Use session levels as S/R - Previous session highs/lows are watched globally
• Wait for overlaps - Best moves happen during London-NY overlap
• Fade Asian extremes - Asian highs/lows often reversed by London
• Watch the first hour - Sets tone for the entire session
• Track session ranges - Know if volatility is high or low
• Respect session transitions - Major reversals happen at opens/closes
⚠️ DON'T:
• Don't fight the session - Don't expect trends during Asian session
• Don't ignore overlaps - Missing London-NY overlap = Missing best moves
• Don't trade all sessions - Focus on one or two that fit your schedule
• Don't chase late session - After London close (12:00 EST), volume drops
• Don't ignore time - Same setup has different probability in different sessions
• Don't trade low-volume gaps - Between NY close and Asian open, stay flat
🎯 Session Selection By Trading Style:
• Scalpers: London-NY overlap (08:00-12:00 EST)
• Day Traders: London + NY sessions (03:00-17:00 EST)
• Swing Traders: Focus on London/NY opens for entries
• Range Traders: Asian session (19:00-04:00 EST)
• Breakout Traders: London open + Kill Zones
• News Traders: NY Kill Zone (08:30-11:00 EST)
🔥 Best Instruments By Session:
• Asian: AUD/JPY, NZD/JPY, AUD/USD, Nikkei
• London: EUR/USD, GBP/USD, EUR/GBP, Gold, FTSE, DAX
• New York: All USD pairs, ES, NQ, YM, Gold, Oil
• Overlap: Everything (maximum liquidity)
━━━━━━━━━━━━━━━━━━━━━━━━━━━━
🚀 What Makes This Different?
Unlike basic session indicators, Session Highlighter Pro includes:
• Kill Zones - ICT-style high-probability windows marked
• Session Overlaps - Automatically identifies peak volume periods
• Real-Time Statistics - Track session ranges and volatility
• Dynamic Levels - Session highs/lows update in real-time
• Full Customization - Colors, styles, toggle everything
• Clean Display - Professional look, not cluttered
• Smart Alerts - Never miss a session or kill zone
• EST Timezone - Standard format all pro traders use
Based On Professional Concepts:
• ICT Kill Zone methodology
• Institutional order flow timing
• Global market structure understanding
• Session-based trading psychology
━━━━━━━━━━━━━━━━━━━━━━━━━━━━
📈 Common Session Patterns
Pattern 1: Asian Range, London Breakout
• Asian session creates tight range
• London open breaks range with volume
• Trade breakout in direction of London move
Pattern 2: London Reversal At NY Open
• London trends one direction all session
• NY open (08:00) reverses the London trend
• Often happens at London highs/lows
Pattern 3: Kill Zone Sweep & Reverse
• Kill zone begins
• Price sweeps recent high/low (stop hunt)
• Immediately reverses in opposite direction
• Most reliable pattern in trading
Pattern 4: Overlap Continuation
• London establishes trend direction
• NY open (08:00) confirms and accelerates
• Trend continues through entire overlap
Pattern 5: Late Session Consolidation
• After London close (12:00 EST)
• Volume drops, price ranges
• Wait for next session instead of trading
━━━━━━━━━━━━━━━━━━━━━━━━━━━━
📈 Upgrade Your Trading Toolkit
This free indicator gives you professional session analysis. Want more?
🔥 Check out my premium scripts for:
• Automated entry signals timed to sessions
• Advanced multi-timeframe session analysis
• Kill zone-specific trading strategies
• Backtested session-based systems
• Complete trading solutions
• And much more...
👉 Visit my profile for institutional-grade tools!
━━━━━━━━━━━━━━━━━━━━━━━━━━━━
📝 Important Notes
• All times displayed in EST (Eastern Standard Time)
• Automatically adjusts for daylight saving time
• Works on all timeframes (best on 5min-1H)
• Designed for Forex, Indices, and Commodities
• Session times are approximate - liquidity varies
• Use with proper risk management
• Not all session patterns play out perfectly
• Market conditions vary - adapt accordingly
Timezone Note: This indicator uses EST/EDT. If you're in a different timezone, calculate the offset. For example, London traders should add 5 hours to all times displayed.
Disclaimer: For educational purposes. Trading involves risk. Session-based trading requires practice and proper risk management.
━━━━━━━━━━━━━━━━━━━━━━━━━━━━
🙏 Support This Work
If this indicator helps you time your trades better:
• ⭐ Give it a thumbs up
• 💬 Share your best session-based trades in comments
• 🔔 Follow for more free professional tools
• 🚀 Share with traders who need better timing
Questions about trading sessions? Drop a comment and I'll help!
━━━━━━━━━━━━━━━━━━━━━━━━━━━━
Developed with ❤️ for traders who understand that WHEN you trade matters as much as WHAT you trade
━━━━━━━━━━━━━━━━━━━━━━━━━━━━
Version History
• v1.0 - Initial release with sessions, kill zones, overlaps, and real-time statistics

Status + BollingersThis combined indicator provides a concise view of the market's current state, volatility, and momentum using key technical metrics displayed on a central dashboard and overlaid on the price chart.
The Bollinger Bands consist of a 20-period Simple Moving Average (SMA) as the middle line, bounded by an upper and lower band (typically $2.0$ Standard Deviations).
Function: Measures volatility.
CRSI (RSI) Red ($>70$), Lime ($<30$) - Indicates Overbought (Red) or Oversold (Lime) pressure, signaling possible reversals.
ADX Orange ($>30$), Gray ($<20$) - Measures Trend Strength, regardless of direction. Orange means strong trend (ideal for trend following); Gray means weak/ranging market.
Volume Status "Bang" (Red) Safe (Green) - Compares current volume to the average. "Patladı" indicates a significant volume spike (momentum confirmation), suggesting institutional activity or a decisive move.

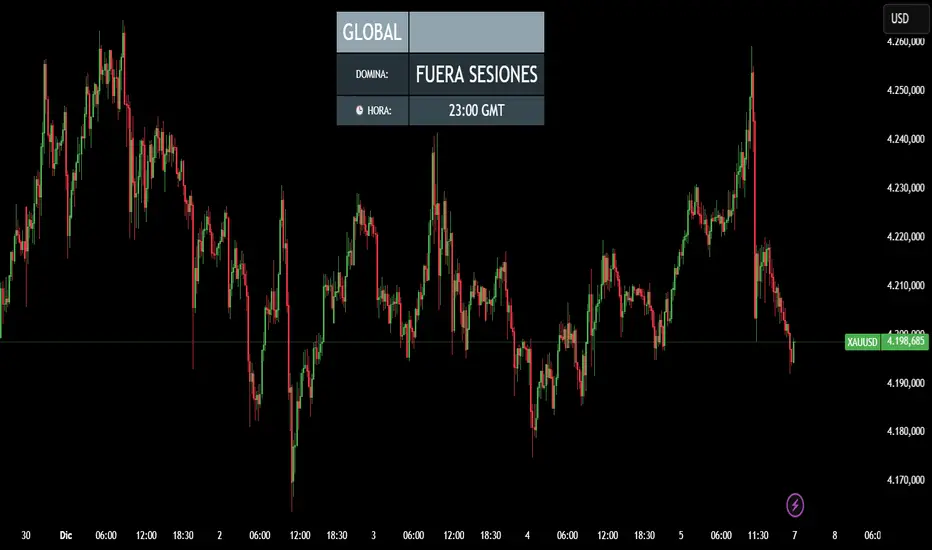
CRR - Reloj Sesiones & DominioIt uses simple rules:
00:00 – 07:00 → Tokyo / ASIA
07:00 – 12:00 → London / EUROPE
12:00 – 21:00 → New York / AMERICA
21:00 – 24:00 → Outside main sessions
Each session is assigned a color:
Tokyo → Blue
London → Yellow
New York → Green
Outside → Gray
2. Displays the current time in GMT format
Example: 14:32 GMT
3. Minimalist on-screen display (HUD)
The top center of the screen shows:
Continent (ASIA / EUROPE / AMERICA)
Which session is currently dominant (TOKYO / LONDON / NEW YORK)
The GMT time
All in a sleek table with dynamic colors based on the session.
🧠 In short:
A smart clock that tells you which session is dominant, which continent you're in, and what time it is in GMT, with a nice on-screen HUD.
Execution Heatmap v8 — Classic Blocks (Final Logic)This indicator visualizes real-time market context through a structured execution heatmap, representing multiple analytic dimensions in a compact on-chart panel. Designed for traders who rely on confluence-based decision making, it tracks the shifting behavior of price, volume, and structural regimes to help identify momentum shifts, exhaustion points, and directional conviction.
🔶 Overview
The Execution Heatmap v8 consolidates key elements from trend, volume, and momentum analysis into a single panel. Each row represents a core component of the execution model, colored dynamically to reflect bullish, bearish, neutral, or mixed states. The final block produces a BUY, SELL, or SELL-ALERT classification — fully aligned with the internal logic of the GOLDMASTER‑HUD framework.
🔸 Core Logic Components
VWAP Direction: Detects price bias relative to VWAP (overextended, below value, or neutral).
Impulse Engine: Evaluates momentum using RSI and MFI thresholds to determine directional energy.
Volume Surge: Highlights aggressive volume imbalances and determines the dominant side (bull or bear).
Fake Break Detection: Identifies false breakouts at recent swing extremes to flag potential reversals.
Regime Filter: Measures underlying trend structure using dual‑EMA alignment (20/50 EMA).
Pattern Recognition: Detects emerging HL (higher low) or LH (lower high) structures.
Structure Strength: Maps strong vs. weak structural phases based on regime and pattern alignment.
Final Signal Engine: Synthesizes all modules into actionable classifications:
BUY: Price structure supports trend continuation.
SELL‑ALERT: Early weakness or exhaustion detected within a strong up‑trend.
SELL: Confirmed reversal alignment (momentum, VWAP, volume, and structure all bearish).
WAIT: Caution when conditions remain inconclusive.
🟩🟥 Color‑Coded Heat Blocks
Each metric is represented as a colored cell:
Green: Bullish / upward bias
Red: Bearish / downward bias
Yellow: Neutral / weak / mixed
Dark gray: Undefined or transitional
⚙️ Customization
Adjustable panel position (bottom‑right, bottom‑left, top‑right, top‑left).
Non‑intrusive table layout optimized for overlaying on active charts.
Lightweight execution with minimal resource load, ideal for intraday use.

FX Fresh Momentum FX Fresh Momentum calculates the true strength and session momentum of the 8 major currencies using a 7-pair average and session resets (Tokyo, London, New York).
Each session opens with a zero-base, allowing you to see only the fresh momentum.
Includes pair-averaged strength, ×100 momentum scaling, vertical session dividers, and institutional color coding.
Ideal for FX day traders who want cleaner session-based momentum signals

Gap Zones with Unfilled AreasA very efficient scalping strategy for BTC. Both for the sell and buy. Take the trade when the price retraces back into 50% of the zone and and aim for a an easy 1:2

⚪ SILVER — RISK MATRIX + UQ vC (Final HUD)Silver RISK MATRIX + UQ vC is an advanced Pine Script v5 indicator for silver futures (SIL) trading, featuring a 3-column bottom-right HUD combining a 7-factor risk matrix with UQ predictive scoring. It quantifies position, structure, trend conflicts, impulse, volume, fake breaks, and VWAP deviation into total risk levels (LOW/MEDIUM/HIGH) while fusing predictive BUY/SELL probabilities with directional risk and multi-timeframe trend boosts.
Risk Matrix Breakdown
Position Risk
Measures % distance to 18-period support/resistance: <0.10% resistance = high risk (🟥🟥), <0.25% = medium (🟧⬜), <0.10% support = safe (🟩⬜). Silver-tuned for tight proximity sensitivity.
Structure Risk
Detects pivot-based CHoCH conflicts (close breaks prior HH/HL but structure opposes) or fake breaks, scoring 2 for conflicts using tight 2-left/2-right pivots suited to silver's volatility.
Other Factors
Trend Conf: 5m vs 30m EMA40 mismatch (2 points).
Impulse: Body >1.2x 4-period EMA abs body (exhaustion).
Volume: >3.2x/2.2x 20-SMA thresholds for extreme/obvious surges.
Fake Break: Wick >1.2x body (top/bottom).
VWAP: >1.2%/0.6% deviation. Total ≥6=HIGH (red), ≥3=MEDIUM (orange).
UQ Predictive Engine
Base Prediction
Averages flow (OBV+price), momentum (RSI/MFI), VWAP, trend (EMA20/50), turbo (BB width expansion) into pred_buy/sell (0-1 normalized).
Directional Risk
BUY risk weights fakeUp wicks, impulse, bear vol, low position; SELL mirrors. Clamped 0-1.
Trend Boost
Adds 15% for 2H alignment, 10% for 30m, 5% for VWAP (directional).
Final Fusion
BUY_FINAL = 55% pred + 25% risk + 20% boost; normalized vs SELL counterpart. Displays blocks (🟩🟩🟩🟩=≥80%) and stars (⭐⭐⭐⭐⭐=≥85%).
HUD Layout & Usage
20-row table separates RISK MATRIX (rows 1-10) from UQ (11-18): metric | visual box/block | Chinese explanation. Perfect for silver's high-volatility scalping, balancing exhaustive risk scanning with probabilistic edge quantification. Ready in both English and Chinese

Session Candle Hunter 🎯🎯 Session Candle Hunter — Precision Session Mapping for Smart Traders
Session Candle Hunter 🎯 is a powerful tool designed to help traders identify and track the most important session candle of the trading day—commonly used for liquidity grabs, range mapping, volatility zones, and breakout anticipation.
Whether you trade NY session, London session, or custom time windows, this indicator automatically detects the candle at your chosen New York Time, extracts its high and low, and visually projects these levels into the current session.
🔍 What This Indicator Does
1️⃣ Detects the Key Session Candle
You select:
Hour of the candle (NY Time)
Candle timeframe (1H, 4H, 15m, etc.)
The script automatically:
Identifies the candle when it forms
Stores its High/Low
Prepares levels for visual projection
🎨 2️⃣ Highlights the Candle Zone
Optionally displays a colored zone (box) between the candle’s high and low:
Helps visualize the liquidity pocket
Useful for session traps, expansion moves, and fair value interpretation
You can choose:
Zone color
Whether to show it or not
Whether it should update only for the latest candle
📈 3️⃣ Draws High/Low Lines With Extensions
High and Low of the detected candle can be plotted as:
Standard lines
Or infinitely extended to the right
Great for identifying:
Breakouts
Retests
Range boundaries
Session expansion models
Optional labels display exact price levels.
🕐 4️⃣ Delayed Display Logic
The indicator only shows levels after a user-defined NY time.
For example:
Show lines only after 8:30 NY — perfect for traders who want pre-session levels hidden until relevant.
🔄 5️⃣ “Show Only Last” Mode
A clean, uncluttered mode that removes all historical drawings and only displays:
The latest zone
The latest high/low lines
Latest labels
Perfect for minimal-chart traders.
⚠️ 6️⃣ Alert System
Receive alerts the moment the targeted session candle forms:
“New Candle Detected”
🧾 7️⃣ Info Panel (Top-Left Corner)
Displays:
Target session hour
Display start time
Candle timeframe
Stored High/Low
Indicator name
Always visible and automatically updates.
⭐ Why Traders Love This Tool
✔ Helps visualize major liquidity zones
✔ Works on all markets & timeframes
✔ Perfect for ICT-style session concepts
✔ Helps anticipate session expansion
✔ Automates manual level drawing
✔ Clean visuals with optional minimal mode

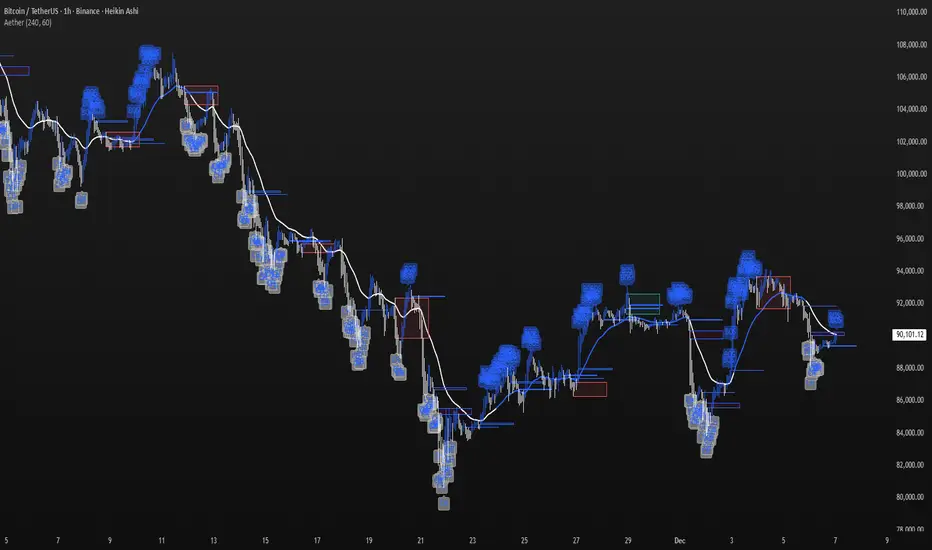
Aether Market MapAether Market Map A multi-component structure-based tool that aids chart analysis by visually displaying various market structure elements.
It combines order blocks, fair value gaps, liquidity segments, trend-shifting signals, and more to help users interpret the pricing structure more clearly.
This script does not provide specific trading strategies or investment advice and is a reference tool for chart analysis.
🔍 Key Features
1. Order Blocks (OB)
Displays the potential inflection sections in box form according to the specified conditions.
This feature helps to visually grasp the price segments that market participants have repeatedly responded to.
2. Fair Value Gaps (FVG)
It detects the area where the imbalance between the candles has occurred and displays it in a box form.
The area represents the section where there has been a fast movement or abnormal flow of prices.
3. Liquidity Levels
Shapes the points where liquidity was gathered through a short-term high-point and low-point pivot structure.
You can see the structural levels at which prices can react repeatedly.
4. BOS / CHOCH (Structural Change Detection)
Label changes in market structure based on recent high/low breakthroughs.
This is not just trend tracking, it helps us to visually grasp the changes in the structure itself.
📈 Analysis of multi-time frame trends
We compute the comprehensive trend state by leveraging the moving average slope of the swing and macro higher order time frames.
These values are reflected in chart background and EMA color changes to intuitively display the overall market mood.
Positive Environment (Regime > 0) → Green Family
Negative Environment (Regime < 0) → Red Series
This is a simple visualization of the flow of the market to the user, not a specific trading direction.
🔧 Signal Engine (Confluence-Based Visual Tool)
The script does not provide a transaction signal and does not induce a particular trading decision.
The Signal feature is a visual notification element that appears on the chart when a number of conditions overlap.
a change in the ratio of trading volume
Structural activities in recent analysis sections
Trending Environment
short-term momentum change
This feature is a reference visual element for interpreting market data from multiple perspectives.
🎛 Setting Items
Show Order Blocks — Visualize Order Blocks
Show Fair Value Gaps — Show FVG Detection
Show Liquidity Levels — Show pivot-based liquidity areas
Show BOS/CHoCH — Show Structural Switching Points
Show Trade Signals — Display visual signal notifications
HTF Settings — Enter parent timeframe analysis values
💡 Precautions for Use
This script is a market structure visualization tool and does not guarantee specific trading strategies, forecasts, or returns.
Components are calculated based on historical data and may not fully reflect real-time market changes.
All features are intended for research and chart analysis assistance purposes.
📌 Official Disclaimer
This script does not provide investment, finance, or trading advice.
All trading judgments made by the user and their consequences are the user's own responsibility.
This tool only provides a reference visualization function to assist with analysis.
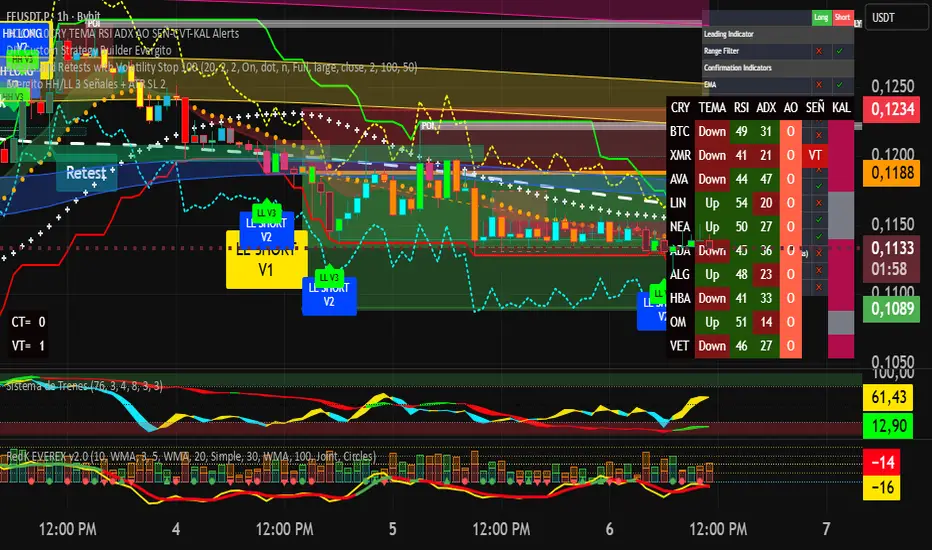
Evergito HH/LL 3 Señales + ATR SL 2How to trade with the Evergito HH/LL 3 Signals + ATR SL indicator? Brief and direct explanation: General system logic: The indicator looks for actual breakouts of the high/low of the last 20 bars (HH/LL) and combines them with the position relative to the 200 SMA to filter the underlying trend. You have 3 types of signals that you can activate/deactivate separately: Signal
When it appears
What it means in practice
Entry type
V1
HH breakout + the close crosses above the 200 SMA (or the opposite in a short position)
Very safe entry confirmed. The price has just validated the long/flat trend → safer and with a better ratio
The most reliable (the original)
V2
HH breakout but the price was already above the 200 SMA (or already below in a short position)
Entry in an already established trend. Fewer “surprises”, more continuity
Ideal for strong trends
V3
Only the breakout of the HH or LL, without looking at the 200 SMA
Aggressive entry/scalping on explosive breakouts. More signals, more noise.
For times of high volatility.
How to enter the market (simple rule): Wait for any of the 3 labels (V1, V2, or V3) to appear, depending on which ones you have activated.
Enter at the close of that candle (or at the open of the next one if you are conservative).
Automatic Stop Loss → the blue (long) or yellow (short) line that represents the ATR x2.
Take Profit → you decide, but the indicator already gives you the visual reference for the risk (ATR x2), so 1:2 or 1:3 is usually very convenient.
Practical example: You see a large green label “HH LONG V1” → you go long at the close of that candle. Stop right at the blue line (ATR x2 below the price).
Typical target: 2x or 3x the risk (very common to reach it in a trend).
Recommended use: Most traders leave only V1 activated → fewer signals but very high quality.
Those who trade intraday or crypto usually combine V1 + V2.
V3 only for news events or very volatile openings.
In summary:
Label = immediate entry
Blue/yellow line = automatic stop
And enjoy the move.
Global Liquidity Index LITEGlobal Liquidity Index (GLI LITE) is an indicator that measures global liquidity by combining the balance sheets of major central banks (FED, ECB, PBOC, BOJ) and the M2 money supply of the world’s largest economies (USA, Europe, China, Japan).
Since liquidity directly influences the price of risk assets (BTC, NASDAQ, SPX, etc.), GLI is one of the most important macro signals for identifying market bull/bear regimes.
What the indicator shows:
GLI momentum line (green = liquidity expansion, orange = contraction)
Fast & Slow MA lines that define the liquidity trend
Bull/Bear background coloring
Green → global liquidity is expanding
Red → liquidity is tightening
Correlation between GLI and the asset price (e.g., BTC)
Macro trend panel (Bull / Bear / Neutral)
How to use the indicator:
Bull regime (Fast MA > Slow MA)
Liquidity is expanding and the market has a natural tailwind. Risk assets tend to perform better.
Bear regime (Fast MA < Slow MA)
Liquidity is tightening — higher risk, increased volatility, and more downside pressure.
GLI ↔ Price Correlation
If correlation is high (e.g., > 0.6), GLI can be an excellent leading indicator for price movement.

ATR/ADR MTF Projection ArrayATR/ADR MTF Projection Array
Overview
A powerful predictive tool that projects ATR (Average True Range) and ADR (Average Daily Range) levels as clean support and resistance arrays on your chart. Designed for traders who want to anticipate the high and low of the day using volatility-based projections with multi-timeframe confluence.
This indicator combines traditional ATR analysis with ICT-style ADR methodology, giving you institutional-grade level projections from a single, customizable tool.
Key Features
🎯 Dual Volatility Metrics
ATR Projections — Classic volatility-based levels with full multi-timeframe support
ADR Projections (ICT Style) — Average Daily Range levels using Inner Circle Trader methodology
Enable/disable each independently based on your trading preference
📊 Multi-Timeframe ATR Analysis
Plot ATR levels from up to 3 timeframes simultaneously (Daily, Weekly, Monthly or custom)
Each timeframe displays with distinct styling for easy identification
Perfect for confluence trading across multiple time horizons
⚡ ICT ADR Methodology
NY Midnight calculation mode (ICT standard) or Classic Daily
Key ICT levels built-in:
1/3 ADR (Judas Swing) — Critical manipulation level where fake moves often terminate
1/2 ADR — Mid-range reference
2/3 ADR — Trending day continuation target
100% ADR — Full daily range completion
150% ADR — Extension target for expansion days
Two projection modes: Static (from anchor) or Dynamic (from session high/low)
🔧 Flexible Anchor Points
Previous Close (default)
Daily Open
Weekly Open
Monthly Open
Session Open
📈 Range Completion Tracking
Real-time display of how much of the expected daily range has been consumed
Visual status indicator helps identify when the day's move may be exhausted
How To Use
For Bias Confirmation:
Establish your directional bias using your preferred method (trigger day, market structure, etc.)
Monitor the 1/3 ADR level during London/NY open for potential Judas Swing (manipulation move)
Target 2/3 to 100% ADR for your HOD/LOD objective
For Target Setting:
Use ATR levels as volatility-based profit targets
ADR 100% level often marks session extremes
When Range Used reaches 100%+, expect consolidation or reversal
For Multi-Timeframe Confluence:
Enable Weekly/Monthly ATR levels alongside Daily
Look for clustering of levels across timeframes for high-probability zones
Settings Guide
Master Controls — Toggle ATR/ADR systems and bull/bear levels independently
ATR Settings — Configure period, multiplier, anchor point, and select which timeframes to display
ATR Level Multipliers — Choose which projection levels to show (0.5x, 0.75x, 1.0x, 1.25x, 1.5x)
ADR Settings (ICT Style) — Select calculation mode (NY Midnight recommended), period (5 days is ICT standard), and projection mode
ADR Level Selection — Toggle individual ICT levels (1/3, 1/2, 2/3, 100%, 150%)
Visual Settings — Customize colors, line styles, labels, and info table position
Alerts Included
ATR 1.0x Bull/Bear Cross
ADR 1/3 Judas Swing Zone (Bull/Bear)
ADR 100% Range Completion (Bull/Bear)

Sree Daily RangeVery simple indicator to draw support and resistance levels given the price. It creates a given lebel at the level
