ICT Power Of Three | Flux Charts💎 GENERAL OVERVIEW
Introducing our new ICT Power Of Three Indicator! This indicator is built around the ICT's "Power Of Three" strategy. This strategy makes use of these 3 key smart money concepts : Accumulation, Manipulation and Distribution. Each step is explained in detail within this write-up. For more information about the process, check the "HOW DOES IT WORK" section.
Features of the new ICT Power Of Three Indicator :
Implementation of ICT's Power Of Three Strategy
Different Algorithm Modes
Customizable Execution Settings
Customizable Backtesting Dashboard
Alerts for Buy, Sell, TP & SL Signals
📌 HOW DOES IT WORK ?
The "Power Of Three" comes from these three keywords "Accumulation, Manipulation and Distribution". Here is a brief explanation of each keyword :
Accumulation -> Accumulation phase is when the smart money accumulate their positions in a fixed range. This phase indicates price stability, generally meaning that the price constantly switches between up & down trend between a low and a high pivot point. When the indicator detects an accumulation zone, the Power Of Three strategy begins.
Manipulation -> When the smart money needs to increase their position sizes, they need retail traders' positions for liquidity. So, they manipulate the market into the opposite direction of their intended direction. This will result in retail traders opening positions the way that the smart money intended them to do, creating liquidity. After this step, the real move that the smart money intended begins.
Distribution -> This is when the real intention of the smart money comes into action. With the new liquidity thanks to the manipulation phase, the smart money add their positions towards the opposite direction of the retail mindset. The purpose of this indicator is to detect the accumulation and manipulation phases, and help the trader move towards the same direction as the smart money for their trades.
Detection Methods Of The Indicator :
Accumulation -> The indicator detects accumulation zones as explained step-by-step :
1. Draw two lines from the lowest point and the highest point of the latest X bars.
2. If the (high line - low line) is lower than Average True Range (ATR) * accumulationConstant
3. After the condition is validated, an accumulation zone is detected. The accumulation zone will be invalidated and manipulation phase will begin when the range is broken.
Manipulation -> If the accumulation range is broken, check if the current bar closes / wicks above the (high line + ATR * manipulationConstant) or below the (low line - ATR * manipulationConstant). If the condition is met, the indicator detects a manipulation zone.
Distribution -> The purpose of this indicator is to try to foresee the distribution zone, so instead of a detection, after the manipulation zone is detected the indicator automatically create a "shadow" distribution zone towards the opposite direction of the freshly detected manipulation zone. This shadow distribution zone comes with a take-profit and stop-loss layout, customizable by the trader in the settings.
The X bars, accumulationConstant and manipulationConstant are subject to change with the "Algorithm Mode" setting. Read the "Settings" section for more information.
This indicator follows these steps and inform you step by step by plotting them in your chart.
🚩UNIQUENESS
This indicator is an all-in-one suite for the ICT's Power Of Three concept. It's capable of plotting the strategy, giving signals, a backtesting dashboard and alerts feature. Different and customizable algorithm modes will help the trader fine-tune the indicator for the asset they are currently trading. The backtesting dashboard allows you to see how your settings perform in the current ticker. You can also set up alerts to get informed when the strategy is executable for different tickers.
⚙️SETTINGS
1. General Configuration
Algorithm Mode -> The indicator offers 3 different detection algorithm modes according to your needs. Here is the explanation of each mode.
a) Small Manipulation
This mode has the default bar length for the accumulation detection, but a lower manipulation constant, meaning that slighter imbalances in the price action can be detected as manipulation. This setting can be useful on tickers that have lower liquidity, thus can be manipulated easier.
b) Big Manipulation
This mode has the default bar length for the accumulation detection, but a higher manipulation constant, meaning that heavier imbalances on the price action are required in order to detect manipulation zones. This setting can be useful on tickers that have higher liquidity, thus can be manipulated harder.
c) Short Accumulation
This mode has a ~70% lower bar length requirement for accumulation zone detection, and the default manipulation constant. This setting can be useful on tickers that are highly volatile and do not enter accumulation phases too often.
Breakout Method -> If "Close" is selected, bar close price will be taken into calculation when Accumulation & Manipulation zone invalidation. If "Wick" is selected, a wick will be enough to validate the corresponding zone.
2. TP / SL
TP / SL Method -> If "Fixed" is selected, you can adjust the TP / SL ratios from the settings below. If "Dynamic" is selected, the TP / SL zones will be auto-determined by the algorithm.
Risk -> The risk you're willing to take if "Dynamic" TP / SL Method is selected. Higher risk usually means a better winrate at the cost of losing more if the strategy fails. This setting is has a crucial effect on the performance of the indicator, as different tickers may have different volatility so the indicator may have increased performance when this setting is correctly adjusted.
3. Visuals
Show Zones -> Enables / Disables rendering of Accumulation (yellow) and Manipulation (red) zones.
"smart" için komut dosyalarını ara

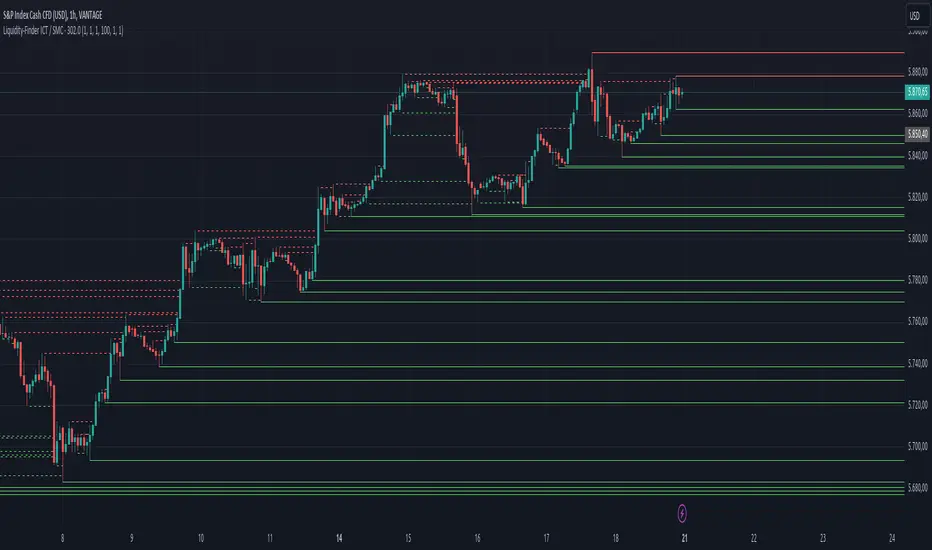
Liquidity-Finder ICT / SMCIn the context of ICT and the Smart Money Concept, liquidity is likely viewed as a crucial factor for determining the strength and sustainability of a market move. Smart Money is often associated with large institutional traders who have the ability to influence liquidity.
Liquidity Sweep:
A liquidity sweep in this context might involve Smart Money intentionally executing trades across various price levels to assess market depth and liquidity. This information can be used to identify potential areas of interest for Smart Money to initiate or exit positions without causing significant price disruptions.
Stop Hunt:
Stop hunting is a concept that Smart Money traders may employ to deliberately trigger stop orders in the market. By doing so, they can create temporary price movements that allow them to accumulate or liquidate positions at more favorable prices before the market reacts.
Smart Money Concept (SMC):
The Smart Money Concept revolves around the idea that large institutional traders (Smart Money) have superior information and resources compared to retail traders. Understanding the behavior of Smart Money, as taught in ICT and SMC, involves analyzing market dynamics, order flow, and liquidity to make more informed trading decisions.
Liquidating:
Liquidating refers to the process of selling or closing out existing positions. In the context of Smart Money, the term could imply that institutional traders are actively managing their positions, either taking profits or cutting losses strategically based on their analysis of market conditions.
The Indicator
The Indicator show open liquidity as solid lines and liquidates liquidity as dashed lines
Is able to send alerts for liquidity level was liquidated, liquidity level was dipped or the next close is on the other side
ATR VisualizerAdvance Your Market Analysis with the True Range Indicator
The True Range Indicator is a sophisticated screener meticulously developed to bolster your trading execution by presenting an exceptional understanding of the market direction. The centerpiece of this instrument is a distinctive candle configuration depicting the Average True Range (ATR) and the Bear/Bull range. However, it traverses beyond the conventional channels to offer specific market settings to boost your trading decisions.
User-Defined Settings
Broadly, the indicator offers five dynamic settings:
Bear/Bull Range
The Bear/Bull Range outlines the ATR for each candle type - bearish and bullish - and then smartly opts for the pertinent one based on the prevalent market circumstances. This feature aids in comparing the range of bullish and bearish candlesticks, which deepens your understanding of the price action and volatility.
Bearish Range
The Bearish Range isolates and computes the ATR for bearish candles solely. Utilizing this option spots the bear-dominated periods and provides insights about potential market reversals or downward continuations.
Bullish Range
Opposite to the Bearish Range, the Bullish Range setting tabulates the ATR exclusively for bullish candles. It assists in tracking the periods when bulls control, enlightening traders about the possibility of upward continuations or trend reversals.
Average Range
The Average Range provides an unbiased measure of range without prioritizing either bull or bear trends. This model is ideal for traders looking for a holistic interpretation of market behavior, regardless of direction.
Cumulative Average Range
Equally significant is the Cumulative Average Range which calculates the aggregate moving average of the true ranges for an expressed period. This setting is extremely valuable when evaluating the long-term volatility and spotting potential breakouts.
Dual Candle Configuration
Going a step ahead, the True Range Indicator uniquely offers the possibility to incorporate more than one candle estimate on your screen. This ensures simultaneous analysis of multiple market dynamics, thereby enhancing your trading precision multifold.
Concluding Thoughts
In essence, the True Range Indicator is an indispensable companion for traders looking to not only leverage market volatility but also make educated predictions. Equipped with an array of insightful market settings and the ability to display dual candle estimates on-screen, you can customize the functionality to suit your unique trading style and magnify your market performance dramatically.
OSPL Volume [Community Edition]NSE:BANKNIFTY1!
This indicator is based on the concepts popularized by @OptionsScalper123 "Siva" of OiPulse. His ideology Is that large moves come after high volume candles. For Nifty, high volume is considered to be a candle above 125k volume and for BankNifty it’s 50k.
This indicator allows you to cut the noise and focus only on the high volume candle. It shows high volume candle in a brighter shade and lower volume candles in a less visible shade.
You can set the minimum volume threshold limit for Nifty and BankNifty. The indicator smartly recognizes which index you are using it in and uses the respective threshold volume limit.
All colors are customizable.
Thanks for Siva for all the ideas and wonderful products he has given to the community
Thanks to all the wonderful Pinescipters for developing awesome indicators and keeping the source open.
The source code of this indicator is just a few lines. Hope you can use it in your projects and learn something from this just how I learned from other scripts.
Any changes or updates needed in this indicator, please suggest. I was thinking some kind of alerts can be added when volume crosses the threshold. Let me know.
Boost/like this indicator and comment if you find this useful. Cheers and happy trading!!!

Price alertThis indicator is an indicator for setting alerts.
Set alerts after adding them to the chart.
By setting an alert, you can notify the closing price to your smartphone or smartwatch.

Inside Bar Zones by AAK (V6)📦 Smart Inside Bar Zones
Smart Inside Bar Zones is a price-action–based indicator designed to automatically detect, track, and visualize inside bar consolidation zones with full historical context.
Instead of marking single inside candles, this indicator groups consecutive inside bars into structured zones, locking the original mother candle range and extending it until price breaks out. This allows traders to clearly identify areas of compression, balance, and potential expansion.
🔍 Key Features
Automatic Inside Bar Detection
Identifies inside bars using candle bodies within the mother candle range, with an optional tick buffer.
Smart Zone Creation
Consecutive inside bars are grouped into a single zone, anchored to the original mother candle.
Unlimited Historical Storage (Data)
All previous inside bar zones are stored internally, enabling long-term analysis and backtesting.
Safe & Optimized Drawing
Zones are drawn using recyclable boxes to respect TradingView object limits while maintaining performance.
Highlight Inside Bars
Optional candle coloring for quick and clear visual confirmation.
Flexible Display Options
Show only the latest zone
Or display multiple zones with automatic recycling
📈 How Traders Use It
Identify consolidation before expansion
Spot compression zones for breakout or fakeout scenarios
Combine with SMC, order flow, support & resistance, or liquidity concepts
Use higher-timeframe zones for directional bias
Use lower-timeframe zones for entries and scalps
⚠️ Important Notes
This indicator does not predict direction — it highlights structure
Zones represent price balance, not buy or sell signals
Best used in confluence with your trading strategy and risk management
🧠 Designed For
Price action traders
SMC / market structure traders
Forex, crypto, indices, and futures
Any timeframe
⚠️ Risk Disclaimer
This indicator is for educational purposes only and is not financial advice. Trading involves significant risk, and losses may exceed expectations. Past performance does not guarantee future results. Always use proper risk management and trade at your own discretion.

Ultimate CVD Suite Pro [DAFE]Ultimate CVD Suite Pro : The Institutional Flow Engine
High-Fidelity Microstructure Delta. The Revolutionary MTF Horizon Display. This is not just CVD. This is an X-Ray into the Market's Auction.
█ PHILOSOPHY: PRICE IS THE ADVERTISEMENT. ORDER FLOW IS THE TRUTH.
Standard technical analysis is a conversation with a shadow. It looks at price—the final, often deceptive, result of a hidden battle. But the professionals, the institutions, the "smart money"—they don't trade the shadow. They operate in the real world of the auction, a world of aggressive market orders and passive limit orders, a world of absorption, exhaustion, and imbalance.
The Ultimate CVD Suite Pro was engineered to give you a direct, unfiltered view into this hidden world. This is not another lagging indicator that repaints the past. It is a real-time intelligence engine. By reconstructing a high-fidelity view of the market's microstructure, it allows you to track the institutional footprint, anticipate reversals before they appear in price, and identify high-probability "kill zones" where major market players are defending their positions.
We do not chase price. We anticipate its next move by understanding the forces that create it.
█ WHAT MAKES THIS THE "ULTIMATE" SUITE? THE CORE INNOVATIONS
This is not a simple CVD indicator. It is a multi-layered, professional-grade analytics engine that stands in a class of its own.
High-Fidelity Microstructure Delta Engine: This is the heart of the suite and its greatest innovation. Standard CVD indicators are flawed because they use data from the current chart's timeframe. This engine is different. It requests data from a Lower Timeframe (LTF) and reconstructs the order flow with near tick-level precision. This provides a vastly superior, more accurate, and more responsive picture of the real buying and selling aggression.
The MTF Horizon Display: A revolutionary leap in data visualization. The Horizon projects up to three "holographic" displays of higher-timeframe metrics (CVD, Volume, RSI, etc.) directly onto your main price chart. You can now see the "Macro Flow" of the 1-Hour, 4-Hour, and Daily charts without ever leaving your 5-minute screen, allowing for instant, intuitive multi-timeframe analysis.
The Sequence Analysis Engine (E/M/L): This proprietary algorithm analyzes the DNA of order flow within each price bar. It identifies and marks the three critical phases of participation: Early (Smart Money), Mid (Trend Followers), and Late (Exhaustion/Bag Holders) with glowing "sparkles," giving you a narrative of who is in control.
Smart Kill Zone Detection: The indicator automatically identifies, plots, and tracks high-probability Supply and Demand zones. These are not based on simple price pivots. They are generated by identifying price levels where an overwhelming amount of aggressive order flow was forcefully absorbed, marking a true, institutionally defended level.
Advanced Signal Processing: It goes beyond simple CVD to detect statistically significant Imbalances (Delta spikes >3 Sigma from the mean) and Absorption (high-volume, high-delta moves that fail to move price), providing you with a complete toolkit of professional order flow concepts.
The Visualization Core: Data should be intuitive and beautiful. Choose from six distinct, animated, and theme-aware rendering modes. From the glowing "Nebula Pulse" and flowing "Aurora Borealis" to the abstract "DNA Helix," you can transform raw data into interactive data art.
█ DEEP DIVE: INTERPRETING THE FLOW
The Lower Indicator Pane: Your Engine Roo
The Delta Histogram: This is your primary readout of aggression. Tall Green bars signify aggressive buying. Tall Red bars signify aggressive selling. Look for shifts and divergences.
The Sequence Sparkles (✦ E/M/L): These glowing orbs appear within the histogram, telling you the story of the auction.
E (Early): Low volume, but directional delta. Smart money is likely initiating a position.
M (Mid): Expanding volume and strong delta. The trend is healthy and has public participation.
L (Late): Highest volume, but delta may start to weaken or reverse. This often marks the exhaustion point of a move.
The Delta Acceleration Area: A subtle background fill that shows the rate of change of the delta. A rising green fill shows that buying pressure is not just present, but increasing.
Peak/Trough Markers (✚): Automatically marks significant peaks and troughs in the cumulative delta flow, making it easy to spot divergences.
The Main Chart Overlays: Actionable Intelligence
The CVD Wave: This is the Cumulative Volume Delta, plotted and scaled directly onto your price chart. It visualizes the running total of buying vs. selling pressure. Its slope is your primary trend confirmation.
Smart Kill Zones:
Demand Zones (Green Boxes): These are areas where aggressive selling was forcefully absorbed by passive buyers. When price revisits these zones, they are high-probability areas for a bounce.
Supply Zones (Red Boxes): Areas where aggressive buying was absorbed by passive sellers. These are high-probability rejection zones.
Imbalance & Absorption Lines: These lines are projected forward from bars that showed statistically significant events. They mark precise price levels of extreme order flow that are likely to act as future support or resistance.
█ THE MTF HORIZON DISPLAY: A COMMAND CENTER FOR TIME
This is a game-changer. The MTF Horizon projects up to three fully functional, real-time indicator displays from higher timeframes directly onto your chart. You can customize each of the three "Horizons" to display any of 10 different metrics (CVD, Volume, RSI, MACD, etc.) from any timeframe you choose.
How It Works: Each Horizon is a self-contained box with a header showing the timeframe and metric. Inside, a visual representation (e.g., a "Flowing Wave" or "Gradient Bars") shows the historical and current value of that metric.
The Strategy: This allows for instant, effortless multi-timeframe analysis. Are you seeing a buy signal on your 5-minute chart? A quick glance at the Horizon tells you if the 1-Hour CVD is rising, if the 4-Hour Volume is expanding, and if the Daily RSI is in a bullish regime—all without ever leaving your chart. Confluence across all Horizons is the signature of an A++ trade setup.
█ HIGH-PROBABILITY SIGNALS: TRADING THE FLOW
🔄 Divergence (The "Trap"): The highest conviction signal. When price makes a Lower Low, but the CVD Wave on your chart makes a Higher Low, it means sellers are aggressive but failing. A short squeeze is imminent. This is a powerful long entry signal.
🧲 Absorption (The "Wall"): Detected when volume is massive, delta is high, but the price candle is small. This indicates a huge wall of passive limit orders absorbing all the aggression. Fade the aggression; trade with the wall.
⚖️ Imbalance (The "Surge"): A delta bar that is statistically extreme (e.g., >3 Sigma from the mean). This signals that one side of the market has completely overwhelmed the other. This is often a powerful trend continuation signal.
Zone Retests: When price pulls back to test a previously formed Demand or Supply Zone, it provides a low-risk, high-probability entry in the direction of the original defense.
█ DEVELOPMENT PHILOSOPHY
The Ultimate CVD Suite Pro was born from a single, guiding principle: to win in modern markets, you must stop listening to the noise of price and start analyzing the signal of flow. Price is where amateurs look; flow is where professionals find their edge. By reconstructing order flow with a precision previously unavailable on this platform and fusing it with a revolutionary multi-timeframe visualization system, this tool aims to level the playing field. It translates the opaque, complex world of the institutional auction into a clear, intuitive, and actionable intelligence system.
This tool is designed to identify the moments when the market is becoming rational again—when the underlying flow of money is so strong that it forces irrational price action to bend to its will.
█ DISCLAIMER AND BEST PRACTICES
THIS IS AN ADVANCED ANALYTICAL TOOL: This indicator provides intelligence on order flow, not financial advice. It is designed to be a core component of a comprehensive trading strategy.
RISK MANAGEMENT IS PARAMOUNT: All trading involves substantial risk. Never risk more capital than you are prepared to lose.
LTF IS KEY: For the best results, set your Lower Timeframe (LTF) appropriately. For a 15-minute chart, use 1m or 3m. For a 1-Hour chart, use 5m.
USE CONFLUENCE: The highest probability signals come from confluence. A Bullish Divergence that forms inside a Smart Demand Zone while the MTF Horizon shows bullish alignment is an A++ setup.
"The market can remain irrational longer than you can remain solvent."
— John Maynard Keynes
Taking you to school. - Dskyz, Trade with Anticipation. Trade with Volume. Trade with CVD: Suite Pro

ICT Pro [KTY]Hi, I'm Kim Thank You 👋
KTY = Kim Thank You (김땡큐)
【ICT Pro】📊
Essential ICT tools for Smart Money trading.
5 core features to identify institutional order flow and high-probability trade setups.
━━━━━━━━━━━━━━━━━━━━━━━━━━━━━━━
💡 NEW TO THIS INDICATOR?
Open Settings and hover over the (i) icon on each feature for detailed tooltips.
Check the 📚 User Guide section at the bottom of Settings for quick reference.
━━━━━━━━━━━━━━━━━━━━━━━━━━━━━━━
📊 FEATURES
━━━━━━━━━━━━━━━━━━━━━━━━━━━━━━━
✅ Order Block (OB)
Price zones where Smart Money executed large buy/sell orders, acting as strong support/resistance levels.
- Bullish OB: Last bearish candle before an up move → Support
- Bearish OB: Last bullish candle before a down move → Resistance
📈 Box Display Info
- Vol: Volume at OB formation
- (%): Upper/Lower volume balance ratio
- Closer to 100% = Balanced buy/sell
- Lower = Strong one-sided order flow → Stronger S/R zone
📍 OB Body Lines
- Dotted lines showing candle body position within OB
- Use for precise entry points
━━━━━━━━━━━━━━━━━━━━━━━━━━━━━━━
✅ Liquidity Zone
Areas where stop-loss orders are clustered around swing highs/lows, becoming targets for Smart Money.
- Buyside Liquidity: Stop-losses above highs where shorts get liquidated
- Sellside Liquidity: Stop-losses below lows where longs get liquidated
- Liquidity Sweep: Price hunts stops then reverses sharply
📈 Box Display Info
- (%): Relative size compared to recent volume
- Higher = More stop orders clustered
- More likely to be a major target for Smart Money
💡 Quick reversal after liquidity break = Reversal signal
━━━━━━━━━━━━━━━━━━━━━━━━━━━━━━━
✅ Fair Value Gap (FVG)
A gap created when price moves rapidly between 3 candles, where price tends to return to fill this zone.
- Bullish FVG: Forms during sharp rallies → Acts as support on pullbacks
- Bearish FVG: Forms during sharp drops → Acts as resistance on bounces
- CE (Consequent Encroachment): 50% level of FVG, key reaction level
📈 Box Display Info
- (%): Relative size compared to recent volume
- Higher = FVG formed by stronger move
- Acts as stronger S/R zone
💡 FVG overlapping with OB = Higher reliability
━━━━━━━━━━━━━━━━━━━━━━━━━━━━━━━
✅ Market Structure
Analyzes price swing highs/lows to identify current trend and reversal points.
- CHoCH (Change of Character): Trend reversal signal - first sign of direction change
- BOS (Break of Structure): Trend continuation signal - structure break in existing direction
⚙️ Structure Options
- INTERNAL: Short-term structure (fast reaction, more signals)
- EXTERNAL: Long-term structure (slower reaction, higher reliability)
- ALL: Display both internal + external structure
💡 CHoCH = Look for reversal | BOS = Trend continues
━━━━━━━━━━━━━━━━━━━━━━━━━━━━━━━
✅ Trend Candles
Candle colors change based on market structure (BOS/CHoCH) direction.
- Bullish Color: After bullish structure break
- Bearish Color: After bearish structure break
💡 Color change = Potential trend shift
💡 Quickly identify overall market direction at a glance
━━━━━━━━━━━━━━━━━━━━━━━━━━━━━━━
📈 HIGHER RELIABILITY SETUPS
━━━━━━━━━━━━━━━━━━━━━━━━━━━━━━━
- Higher timeframe = More reliable signals
- Multiple features pointing to same price zone
(e.g. OB + FVG overlap = Strong confluence)
- Trend Candles + Market Structure direction aligned
- Quick reversal after Liquidity sweep
━━━━━━━━━━━━━━━━━━━━━━━━━━━━━━━
💡 TRADING TIPS
━━━━━━━━━━━━━━━━━━━━━━━━━━━━━━━
1. Identify Liquidity targets first
2. Wait for price to reach OB or FVG zone
3. Confirm with Market Structure (CHoCH/BOS)
4. Enter at OB body lines or FVG CE level
5. Stop loss below/above the zone
━━━━━━━━━━━━━━━━━━━━━━━━━━━━━━━
⚠️ DISCLAIMER
This indicator is for educational purposes only.
Not financial advice. Always do your own research.
Past performance does not guarantee future results.

ICT Liquidity Zone [KTY]ICT Liquidity Zone Indicator
Overview
This indicator automatically detects and displays Liquidity Zones based on ICT (Inner Circle Trader) methodology.
Liquidity zones are areas where stop-loss orders cluster around swing highs and lows. Smart money targets these zones to grab liquidity before reversing price direction.
Key Features
Multi-Timeframe Support
Display liquidity zones from two different timeframes simultaneously (LTF & HTF)
HTF liquidity zones represent more significant levels
Buyside & Sellside Liquidity
Buyside Liquidity: Areas above swing highs where short sellers' stops accumulate → Smart money sweeps these before selling
Sellside Liquidity: Areas below swing lows where long buyers' stops accumulate → Smart money sweeps these before buying
Volume Analysis
Displays relative volume percentage at liquidity formation
Higher percentage indicates stronger liquidity concentration
Mitigation Tracking
Liquidity zones are automatically removed when price sweeps through
Option to display swept zones for reference
How to Use
Identify liquidity pools above recent highs or below recent lows
Wait for a sweep — price breaks the level then quickly reverses
Look for confirmation using CHoCH, Order Blocks, or FVGs
Enter on the reversal, set stop beyond the swept level
Pro Tips:
Multiple equal highs/lows create stronger liquidity pools
Liquidity sweep + immediate reversal = high probability setup
Combine with Order Blocks and FVGs for confluence
HTF liquidity is more significant than LTF liquidity
Asian session highs/lows often become liquidity targets
Settings
SettingDescriptionLTF / HTFEnable and select timeframes for liquidity detectionBuyside Liquidity CountNumber of buyside zones to displaySellside Liquidity CountNumber of sellside zones to displayShow Mitigated LiquidityRemove or Show swept liquidity zonesLabel ColorCustomize text color inside liquidity boxes
Alerts
🔴 Buyside Liquidity Detected
🟢 Sellside Liquidity Detected
🔴 Buyside Liquidity Break
🟢 Sellside Liquidity Break
🔴 Buyside Liquidity Touched
🟢 Sellside Liquidity Touched
Notes
This indicator is designed for educational purposes
Distinguish between genuine breakouts and liquidity sweeps
Always combine with proper risk management
If you find this indicator helpful, please leave a like and follow for more ICT-based tools!

Koko's Capital Flow Channel Koko’s Capital Flow Channel is a structured EMA channel system designed to reduce over-trading and eliminate chase entries. It separates Early Direction signals (clearing bars) from Smart Entries (inside-channel confirmations), helping traders execute with patience and clarity.
Koko’s Capital Flow Channel™ provides a clean, psychology-friendly framework for traders transitioning from fast scalping to higher timeframes.
What it does
This indicator uses an EMA-based channel to define structure and trend flow, then delivers two tiers of signals:
Early Direction Signals (Early BUY / Early SELL)
Trigger on a clearing bar (break/close condition depending on your setting)
Used for directional awareness and early positioning
Smart Entry Signals (BUY-S / SELL-S)
Trigger only when price returns inside the channel and prints a qualifying candle
Designed to reduce impulsive entries and improve execution quality
Why it’s different
Many tools fire signals everywhere. This channel is built to create clarity and restraint:
Less noise
Fewer, higher-quality signals
Built-in structure + intent filters
Optional ATR filtering to avoid low-quality breaks
Best use cases
Daily / swing trading
Trend continuation and pullback entries
Traders learning discipline and consistency
Burned-out scalpers who want calmer, higher-quality setups
Recommended settings
Timeframe: Daily (works on others but Daily is the intended home)
Start with:
Clearing Bar Mode: Cross (or Over/Under “event” logic if enabled)
Candle Body: Body Only
Intent: Bullish/Bearish Candle
ATR Filter: Clearing Bar Strength, ATR(14), Multiplier 1.0
Signal Key
BUY-E / SELL-E = Early Direction signal (clearing bar)
BUY-S / SELL-S = Smart Entry signal (inside-channel confirmation)
5) How to Use It (simple instructions section)
Workflow
Wait for Early BUY-E / SELL-E to confirm flow direction
Only take Smart Entries (BUY-S / SELL-S) when price returns inside the channel
Use the channel boundaries for structure (helps avoid chasing)
Alerts
You can create alerts for:
Early BUY / Early SELL
Smart BUY / Smart SELL
Risk Disclaimer (safe + standard)
Disclaimer: This indicator is for educational and informational purposes only and is not financial advice. Markets involve risk. Always manage risk appropriately and test settings before live use.

SMC Louis 4H-15M V6为了方便你将这个脚本分享到 TradingView 社区或私人收藏,我为你准备了一份中英文对照的专业描述。这份描述突出了脚本的技术核心——**Louis Trading 的 SMC 进场逻辑**。
---
## 📝 脚本描述 / Script Description
### 中文描述:SMC Louis 实战进场辅助工具 (V6版本)
**核心理念:**
本脚本根据 Louis Trading 的 SMC(Smart Money Concepts)交易教学编写,专注于 **4H 趋势过滤 + 15M 结构突破** 的高胜率进场逻辑。它通过自动化的绘图,将复杂的盘面观察简化为清晰的视觉信号。
**主要功能:**
* **多时段趋势追踪**:内置 200 EMA 动态过滤大周期方向,确保你始终顺势交易。
* **自动 BOS (结构突破) 检测**:实时标记市场结构的改变,识别潜在的反转或延续机会。
* **动态 0.715 进场参考线**:当 15M 级别发生 BOS 突破时,脚本自动根据波段高低点计算并绘制 Louis 教学中的 **0.715 黄金回撤位**,无需手动拉斐波那契线。
* **失衡区 (FVG) 视觉化**:自动高亮显示价格快速移动留下的真空区域,帮助识别高概率的订单回踩区。
* **实时仪表盘**:右上角直观显示当前大周期方向与行动建议(等待回踩或反弹)。
**使用说明:**
1. 建议在 **15分钟 (15M)** 周期下使用。
2. 观察仪表盘的趋势方向。
3. 当绿色 **BOS** 出现后,等待价格回踩 **黄色虚线 (0.715)** 且该线位于 **FVG** 区域内时考虑进场。
---
### English Description: SMC Louis Strategy Entry Assistant (V6)
**Core Concept:**
This script is meticulously designed based on the SMC (Smart Money Concepts) methodology taught by Louis Trading. It focuses on the high-probability **4H Trend Filter + 15M Market Structure Break (BOS)** execution workflow. It automates the complex manual charting process into clear, actionable visual cues.
**Key Features:**
* **MTF Trend Filtering**: Integrated 200 EMA helps you stay on the right side of the 4H higher-timeframe trend.
* **Automated BOS Detection**: Real-time identification of Market Structure Breaks (BOS), highlighting potential trend reversals or continuations.
* **Dynamic 0.715 Entry Level**: When a BOS occurs on the 15M timeframe, the script automatically calculates and plots the **0.715 Fibonacci retracement level**—a signature entry point from Louis's strategy.
* **Fair Value Gap (FVG) Visualization**: Automatically highlights price imbalances (FVGs), helping you spot where "Smart Money" is likely to mitigate orders.
* **Live Dashboard**: A clean UI in the top-right corner provides immediate context on trend direction and actionable advice.
**How to Use:**
1. Best used on the **15-Minute (15M)** timeframe.
2. Check the dashboard for the overall trend bias.
3. Wait for a **BOS** label; look for price to retracing into the **Yellow Dashed Line (0.715)**, especially if it aligns with a plotted **FVG box**.
---
### 💡 建议
如果你打算发布这个脚本,建议在 TradingView 的设置中将“15M 摆动回溯周期”默认设置为 **10-15**,这通常能最准确地过滤掉市场杂讯。
**你想让我为你生成一份专门针对“移动端使用”的简化版界面代码吗?(去掉了复杂的仪表盘,只保留核心线条,适合手机查看)**

AI Academy: Volume k-NN [PhenLabs]📊 AI Academy: Volume k-NN
Version: PineScript™ v6
━━━━━━━━━━━━━━━━━━━━━━━━━━━━━━━━━━
━━━━━━━━━━━━━━━━━━━━━━━━━━━━━━━━━━
📌 Description
AI Academy: Volume k-NN (Theory Edition) is an educational indicator designed to demystify how artificial intelligence pattern recognition works directly on your TradingView charts. Rather than being a black-box signal generator, this tool visualizes the entire k-Nearest Neighbors algorithm process in real-time, showing you exactly how AI identifies similar historical patterns and generates predictions.
The indicator scans up to 2,000 historical bars to find patterns that match your current price action, then uses an ensemble of the closest matches to project potential future movement. What sets this apart is the integrated “AI Grimoire”—an interactive educational book overlay that teaches core machine learning concepts through four illuminating chapters.
Whether you’re a trader curious about AI methodology or a developer learning algorithmic concepts, this indicator transforms abstract machine learning theory into tangible, visual understanding.
━━━━━━━━━━━━━━━━━━━━━━━━━━━━━━━━━━
━━━━━━━━━━━━━━━━━━━━━━━━━━━━━━━━━━
🚀 Points of Innovation
• First TradingView indicator to visualize k-NN algorithm execution in real-time with full transparency
• Interactive “AI Grimoire” educational overlay teaches machine learning concepts while you trade
• Dual-mode pattern matching combines price action with optional volume confirmation
• Confidence-based opacity system visually communicates prediction reliability
• Historical match visualization shows exactly which past patterns informed the prediction
• Ghost bar projections display averaged ensemble predictions with adjustable forecast horizons
━━━━━━━━━━━━━━━━━━━━━━━━━━━━━━━━━━
🔧 Core Components
• Pattern Capture Engine: Converts recent price action into logarithmic returns for normalized comparison across different price levels
• k-NN Search Algorithm: Calculates Euclidean distance between current pattern and historical patterns to find closest matches
• Volume Weighting System: Optional feature that incorporates volume patterns into distance calculations with adjustable influence
• Ensemble Predictor: Averages future returns from k-nearest historical matches to generate consensus forecast
• Confidence Calculator: Measures average distance of top matches to determine prediction reliability on 0-100% scale
• AI Grimoire Display: Table-based educational overlay rendering book-style content with chapter navigation
━━━━━━━━━━━━━━━━━━━━━━━━━━━━━━━━━━
🔥 Key Features
• Adjustable Pattern Length: Define how many bars constitute the current pattern for matching (5-100 bars)
• Configurable Search Depth: Control how far back the algorithm searches for historical matches (500-4,900 bars)
• Flexible k-Neighbors: Select how many closest matches inform the prediction (1-20 neighbors)
• Volume Toggle: Enable or disable volume pattern matching for different market conditions
• Volume Influence Slider: Fine-tune the weight given to volume vs. price patterns (0-100%)
• Ghost Bar Count: Adjust how many future bars the indicator projects (3-15 bars)
• Minimum Confidence Filter: Set threshold to hide low-confidence predictions
• Historical Match Display: Toggle visibility of colored boxes marking source patterns
━━━━━━━━━━━━━━━━━━━━━━━━━━━━━━━━━━
🎨 Visualization
• Blue Scanner Box: Highlights current pattern being analyzed labeled “AI INPUT (The Prompt)”
• Green Historical Boxes: Mark past patterns where price subsequently moved bullish
• Red Historical Boxes: Mark past patterns where price subsequently moved bearish
• Ghost Bars: Semi-transparent candles projecting into the future showing predicted price path
• Confidence Label: Displays prediction confidence percentage and number of matches used
• AI Grimoire Book: Leather-bound book overlay in top-right corner with navigable chapters
━━━━━━━━━━━━━━━━━━━━━━━━━━━━━━━━━━
📖 Usage Guidelines
Algorithm Settings
• Pattern Length — Default: 20 | Range: 5-100 | Controls how many recent bars define the pattern. Shorter values find more matches but less specific. Longer values find fewer but more precise matches.
• Search Depth — Default: 2000 | Range: 500-4900 | Determines how many historical bars to scan. Higher values find more potential matches but increase computation time.
• k-Neighbors — Default: 5 | Range: 1-20 | Number of closest matches to use for prediction. Higher values smooth predictions but may dilute strong signals.
• Ghost Bar Count — Default: 5 | Range: 3-15 | How many future bars to project. Shorter horizons are typically more reliable.
• Use Volume Matching — Default: Off | When enabled, patterns must match on both price AND volume characteristics.
• Volume Influence — Default: 30% | Range: 0-100% | Weight given to volume pattern when volume matching is enabled.
Visualization Settings
• Bullish/Bearish Match Colors — Customize colors for historical match boxes based on outcome direction.
• Min Confidence % — Default: 60 | Predictions below this threshold will not display.
• Show Historical Matches — Default: On | Toggle visibility of source pattern boxes on chart.
Education Settings
• Select Chapter — Navigate through AI Grimoire chapters or keep book closed for clean chart view.
━━━━━━━━━━━━━━━━━━━━━━━━━━━━━━━━━━
✅ Best Use Cases
• Learning how k-Nearest Neighbors algorithm functions in a trading context
• Understanding the relationship between historical patterns and forward predictions
• Identifying when current market conditions resemble past scenarios
• Supplementing discretionary analysis with pattern-based confluence
• Teaching others machine learning concepts through visual demonstration
• Validating whether volume confirms price pattern formations
• Building intuition for what AI “sees” when analyzing charts
━━━━━━━━━━━━━━━━━━━━━━━━━━━━━━━━━━
⚠️ Limitations
• Past pattern similarity does not guarantee future outcome similarity
• Requires sufficient historical data (minimum 500+ bars) to function properly
• Computation-intensive on lower timeframes with maximum search depth
• Cannot predict truly novel “black swan” events not represented in historical data
• Volume matching less effective on assets with inconsistent volume reporting
• Predictions become less reliable as forecast horizon extends further out
• Educational overlay may obstruct chart view on smaller screens
━━━━━━━━━━━━━━━━━━━━━━━━━━━━━━━━━━
💡 What Makes This Unique
• Full Transparency: Unlike black-box AI tools, every step of the algorithm is visualized on your chart
• Integrated Education: The AI Grimoire teaches machine learning concepts without leaving TradingView
• Theory Meets Practice: See exactly which historical patterns inform each prediction
• Honest Uncertainty: Confidence scoring and opacity fading acknowledge when the AI “doesn’t know”
• Dual-Mode Analysis: Optional volume weighting adds institutional-quality analysis dimension
━━━━━━━━━━━━━━━━━━━━━━━━━━━━━━━━━━
🔬 How It Works
1. Pattern Capture: On each bar, the indicator captures the most recent price changes as logarithmic returns, creating a normalized “fingerprint” of current market behavior. If volume matching is enabled, volume changes are captured similarly.
2. Historical Search: The algorithm iterates through up to 2,000 historical bars, calculating the Euclidean distance between the current pattern fingerprint and each historical pattern. Distance combines price similarity and optional volume similarity based on weight settings.
3. Neighbor Selection: All historical patterns are ranked by similarity (lowest distance = most similar). The k-closest matches are selected as the “ensemble council” that will inform the prediction.
4. Confidence Calculation: Average distance of top-k matches determines confidence. Tighter clustering of similar patterns yields higher confidence scores, while scattered or distant matches produce lower confidence.
5. Prediction Generation: Future returns from each historical match (what happened AFTER those patterns) are averaged together. This ensemble average is applied to current price to generate ghost bar projections.
6. Visualization: Historical match locations are marked with colored boxes (green for bullish outcomes, red for bearish). Ghost bars render with opacity tied to confidence level—higher confidence means more solid bars.
━━━━━━━━━━━━━━━━━━━━━━━━━━━━━━━━━━
💡 Note:
This indicator is designed primarily for educational purposes —to help traders understand how AI pattern recognition algorithms function. While the predictions can supplement your analysis, they should never be used as the sole basis for trading decisions. The AI Grimoire chapters explain key concepts including why AI “hallucinates” during unprecedented market events. Always combine with proper risk management and additional confirmation.
━━━━━━━━━━━━━━━━━━━━━━━━━━━━━━━━━━

Advanced Scalping Navigator free by S B PrasadAdvanced Scalping Navigator Lite • Features
by S B Prasad
Advanced Scalping Navigator Lite is a powerful multi-factor scalping and intraday indicator designed to generate high-probability BUY and SELL signals using trend, momentum, volatility, and smart-money concepts.
This FREE version retains the complete core signal engine while limiting certain premium visual and channel features.
🚀 Core Features (Included in Lite Version)
✅ High-Accuracy BUY & SELL Signals
Signals are generated only when multiple technical and structural conditions align, including:
ATR-based trend direction & strength
EMA trend bias
MACD momentum
RSI confirmation
VWAP institutional bias
Ribbon & Hull MA filters
Higher-timeframe (HTF) trend confirmation
Smart-money liquidity sweep validation
Supply & demand zone filtering
Session-based trading filter
✅ Smart-Money Liquidity Sweeps
Detects equal highs/lows and stop-hunt behavior to identify institutional accumulation or distribution before issuing signals.
✅ Supply & Demand Zones
Automatically plots demand and supply zones using pivot-based market structure to improve trade location quality.
✅ Higher-Timeframe (HTF) Confirmation
Filters trades in the direction of the dominant higher-timeframe trend for better probability alignment.
✅ Session Filter (Market Timing Control)
Limits signals to selected market sessions:
Indian Market
London Session
New York Session
✅ Multi-Factor Confirmation Engine
Combines EMA, MACD, RSI, VWAP, Ribbon, and HMA into a weighted factor score to avoid low-quality trades.
✅ Real-Time Dashboard Panel
On-chart dashboard displaying:
Trend direction
Trend strength
Factor alignment score
HTF bias
Zone context
Signal state
Session status
🔒 Features Limited or Disabled in Lite Version
The following premium visuals and channels are not available in the FREE version:
❌ ATR trendline (dynamic support / resistance)
❌ ATR trendline strength coloring
❌ Full ATR channel (upper / average / lower)
❌ Channel fills & premium visual layers
❌ Pivot ATR trend channel visuals
❌ Enhanced trend-zone background fills
🎯 Best For
Intraday traders
Scalpers
Index & stock traders
Futures and options traders
Traders who prefer clean charts with powerful signals
📣 Join Our Telegram (Updates & PRO Access)
👉 Telegram: t.me
💬 For updates, support & PRO version access, join our Telegram.
⚠️ Disclaimer
This indicator is for educational and informational purposes only.
It does not constitute financial advice.
Trading involves risk. Always use proper risk management.

SMC Liquidity Engine Pro SMC Liquidity Engine Pro - Complete Trading Guide & Documentation
📊 Introduction: Understanding Smart Money Concepts
The SMC Liquidity Engine Pro is a comprehensive, institutional-grade trading indicator that brings professional Smart Money Concepts (SMC) methodology directly to your TradingView charts. This isn't just another technical indicator—it's a complete framework for understanding how institutional traders, market makers, banks, and hedge funds manipulate and move the markets.
What Makes This Different?
While most retail traders rely on lagging indicators like moving averages or RSI, this indicator reveals the real-time footprints of institutional activity. It shows you:
Where large players are accumulating or distributing positions
How they engineer liquidity to trigger retail stop losses
When they're shifting from one directional bias to another
Where price inefficiencies exist that institutions will likely revisit
The markets don't move randomly—they move based on liquidity. Understanding this fundamental truth is what separates consistently profitable traders from those who struggle. This indicator decodes that liquidity-driven behavior and presents it in clear, actionable visual signals.
The Philosophy Behind Smart Money Concepts
Smart Money Concepts is built on several core principles:
1. Liquidity is King: Price doesn't move because of patterns or indicators—it moves to collect liquidity (stop losses and pending orders). Institutions need massive liquidity to fill their large positions, so they engineer price movements to create that liquidity before making their real directional move.
2. Market Structure Reveals Intent: The way price forms highs and lows tells a story about who's in control. When structure breaks, it signals a shift in institutional positioning.
3. Inefficiencies Get Filled: When price moves too quickly in one direction, it leaves behind "fair value gaps"—areas of imbalance. Institutions frequently return to these areas to fill orders and restore balance.
4. Manipulation Precedes True Moves: The most explosive directional moves are often preceded by liquidity sweeps in the opposite direction—trapping retail traders before the real move begins.
This indicator automates the identification of all these concepts, allowing you to trade alongside the smart money rather than being their exit liquidity.
🎯 Core Features - Deep Dive
1. Market Structure Detection & Visualization
What It Is: Market structure forms the foundation of all Smart Money analysis. This indicator automatically identifies and tracks swing highs and swing lows using a sophisticated pivot detection algorithm. These aren't just any price points—they represent areas where the market showed a significant shift in supply and demand dynamics.
How It Works: The indicator uses a customizable lookback period to identify valid swing points. A swing high must have lower highs on both sides within the lookback period, and a swing low must have higher lows on both sides. This ensures that only significant structural points are marked, filtering out minor noise and consolidation.
Visual Presentation:
Bullish Structure (Cyan Lines): Horizontal lines extending from each identified swing high, showing resistance levels that price previously respected
Bearish Structure (Red Lines): Horizontal lines extending from each identified swing low, showing support levels where buying pressure emerged
Trading Application: These structure levels serve multiple purposes:
Target Zones: Previous highs become targets in uptrends; previous lows become targets in downtrends
Invalidation Levels: If expecting a bullish move, breaking below the last swing low invalidates the setup
Context for Other Signals: All BOS, CHOCH, and liquidity sweep signals gain meaning from their relationship to structure
Multi-Timeframe Anchors: Higher timeframe structure provides context for lower timeframe entries
Advanced Tip: When multiple timeframe structures align (e.g., a daily swing low coincides with a 4-hour swing low), these levels carry significantly more weight and are more likely to be defended or, when broken, lead to explosive moves.
2. Break of Structure (BOS) - Trend Confirmation
What It Is: A Break of Structure occurs when price definitively closes beyond a previous swing high (bullish BOS) or swing low (bearish BOS). This signals that the current trend maintains its momentum and is likely to continue in the same direction.
The Institutional Perspective: When institutions want to continue pushing price in a direction, they need to break through previous resistance or support. A clean BOS indicates that:
There's sufficient institutional buying/selling to overcome the supply/demand at previous structure
The trend has enough momentum to attract more participants
Stop losses above/below structure have been triggered, providing liquidity for continuation
Signal Characteristics:
Bullish BOS Label: Appears below the bar that closes above the previous swing high
Bearish BOS Label: Appears above the bar that closes below the previous swing low
Confirmation: Requires a full candle close, preventing false signals from wicks
Trading Strategies:
Trend Continuation Entries: After a BOS, wait for a pullback to a Fair Value Gap or minor structure, then enter in the direction of the break
Breakout Trading: Enter immediately on BOS confirmation with a stop below the broken structure
Momentum Confirmation: Use BOS to confirm that your existing position is aligned with institutional flow
Scaling Strategy: Add to positions on each successive BOS in trending markets
What to Watch For:
Volume: Strong BOS movements should be accompanied by above-average volume
Speed: Rapid price movement through structure suggests institutional urgency
Follow-Through: The best BOS signals see price continue strongly without immediately reversing
Higher Timeframe Alignment: BOS on higher timeframes (4H, Daily) carry more weight than lower timeframe breaks
Common Pitfalls:
Not all structure breaks are equal—BOS during ranging markets are less reliable
A BOS immediately followed by a reversal back into the range may indicate a failed breakout
During major news events, structure can be broken temporarily without institutional intent
3. Liquidity Sweep Detection - Spotting Manipulation
What It Is: Liquidity sweeps (also called "stop hunts" or "liquidity grabs") occur when price temporarily breaks beyond a key level to trigger stop losses and pending orders, then immediately reverses back. This is one of the most important concepts in SMC trading because it reveals intentional manipulation.
Why Institutions Do This: Large institutional orders can't be filled at a single price point—they need massive liquidity. The biggest pools of liquidity sit just beyond obvious highs and lows where retail traders place their stops. By briefly pushing price into these zones, institutions:
Trigger retail stop losses (creating market orders)
Activate pending buy/sell orders
Fill their large positions at favorable prices
Trap late breakout traders before reversing
Detection Methodology: The indicator identifies sweeps using multiple criteria:
Price must penetrate beyond the structural high/low (creating the sweep)
The candle must close back on the opposite side of the structure (confirming rejection)
The sweep distance is measured against ATR to distinguish manipulation from normal volatility
The sweep multiplier setting allows you to adjust sensitivity based on market conditions
Visual Indicators:
Orange Down Arrows: Mark liquidity sweeps above structural highs
Lime Up Arrows: Mark liquidity sweeps below structural lows
Liquidity Zone Boxes: Semi-transparent colored boxes highlight the exact range of the swept area
Persistent Display: Zones remain visible for several bars to maintain context
Trading Applications:
Reversal Trading: Liquidity sweeps often mark excellent reversal points. After a sweep:
Wait for the sweep to complete (candle closes back inside structure)
Look for a Change of Character signal for confirmation
Enter in the direction opposite to the sweep
Place stops beyond the sweep high/low
Target the opposite side of the range or next structural level
Continuation Filtering: Not all sweeps lead to reversals. During strong trends:
Sweeps of minor structure in a trending market often precede continuation
Use higher timeframe structure to determine if a sweep is counter-trend (likely reversal) or with-trend (likely continuation)
Entry Refinement: In ranging markets, trade from swept lows to highs and vice versa, as institutions accumulate at the extremes.
Advanced Sweep Analysis:
Double Sweeps: When both sides of a range are swept, expect a strong breakout
Sweep Rejection Quality: Fast, strong rejections of sweeps are more reliable than slow grinding returns
Timeframe Consideration: Daily timeframe sweeps are significantly more important than 15-minute sweeps
Volume Profile: Sweeps with low volume followed by high volume reversals confirm manipulation
What Makes a High-Quality Sweep Signal: ✅ Penetrates structure by at least 0.5-1x ATR
✅ Strong rejection candle (long wick, decisive close)
✅ Occurs at a higher timeframe structural level
✅ Creates a Change of Character on the following move
✅ Sweeps an obvious level where retail stops cluster
4. Change of Character (CHOCH) - Major Reversal Signals
What It Is: A Change of Character represents the most significant shift in market dynamics—when the entire structural bias of the market flips from bullish to bearish or bearish to bullish. CHOCH signals are the crown jewel of SMC trading because they identify the exact moment when institutional positioning fundamentally changes.
The Anatomy of a CHOCH: A valid CHOCH requires a specific sequence:
Established Trend: A clear directional bias with multiple BOS in one direction
Liquidity Engineering: A sweep of structure in the current trend direction (the manipulation phase)
Structural Break: Price then breaks structure in the OPPOSITE direction (the revelation phase)
This combination shows that institutions have:
Completed their accumulation/distribution at favorable prices (via the sweep)
Shifted their positioning from bullish to bearish (or vice versa)
Begun a new directional campaign
Visual Presentation:
Bullish CHOCH (Cyan Triangle Up): Appears when bearish structure is broken after a low sweep, signaling the shift to bullish control
Bearish CHOCH (Red Triangle Down): Appears when bullish structure is broken after a high sweep, signaling the shift to bearish control
Prominent Markers: Larger and more visually distinct than BOS signals, reflecting their importance
Why CHOCH Signals Are So Powerful:
Trend Reversal Identification: They mark the earliest possible confirmation of a trend change
High Win Rate: When combined with proper risk management, CHOCH signals have among the highest success rates in SMC trading
Risk-Reward Ratio: Entering at CHOCH gives you the best possible risk-reward since you're entering at the beginning of a new trend
Institutional Confirmation: The sequence of sweep + structure break proves institutional repositioning, not just retail sentiment
Trading CHOCH Signals:
The Perfect CHOCH Setup:
Identify the Sweep: Watch for a liquidity sweep of structural lows (for bullish) or highs (for bearish)
Wait for the Break: Don't enter on the sweep—wait for structure to break in the opposite direction
CHOCH Confirmation: The indicator fires the CHOCH signal—this is your entry trigger
Entry Execution:
Aggressive: Enter immediately on CHOCH confirmation
Conservative: Wait for a pullback to the first Fair Value Gap or broken structure (now turned support/resistance)
Stop Placement: Beyond the swept liquidity point
Target Selection: Previous swing in the opposite direction, or let it run to the next CHOCH
Multiple Timeframe CHOCH Strategy: The most powerful setups occur when CHOCHs align across timeframes:
Daily CHOCH: Signals major institutional trend change, target 500+ pips (Forex) or significant point moves
4H CHOCH: Confirms daily direction, provides swing trade opportunities
1H CHOCH: Offers precise entry timing within the higher timeframe trend
15M CHOCH: Used for position scaling and intraday management
Example Trade Flow:
Daily Chart: Bullish CHOCH appears after weeks of downtrend
↓
4H Chart: Wait for pullback after the daily CHOCH, then catch the 4H bullish CHOCH
↓
1H Chart: Enter on the 1H bullish CHOCH that aligns with both higher timeframes
↓
Result: You've entered at the beginning of a major trend with multiple confirmations
CHOCH Quality Grading:
A-Grade CHOCH (Highest Probability):
Occurs at major higher timeframe structure
Following a clear liquidity sweep
Volume spike on the structural break
Multiple timeframe alignment
Creates a large Fair Value Gap on the break
B-Grade CHOCH (Good Probability):
Valid sweep and structure break
Single timeframe signal
Moderate volume
Occurs at minor structure
C-Grade CHOCH (Lower Probability):
Choppy, ranging market context
Weak sweep or unclear structure
Counter to higher timeframe trend
Low volume confirmation
Common Mistakes with CHOCH Trading: ❌ Entering on the sweep instead of waiting for the structure break
❌ Ignoring higher timeframe context
❌ Taking every CHOCH regardless of quality
❌ Not waiting for pullbacks on aggressive trends
❌ Placing stops too tight, getting caught in volatility
Advanced CHOCH Concepts:
Failed CHOCH: Occasionally, what appears to be a CHOCH will fail (price reverses back into the previous trend). This often indicates:
Insufficient institutional conviction for the reversal
Fake-out to grab liquidity in the opposite direction
Need to wait for a higher timeframe CHOCH for confirmation
When a CHOCH fails, it often sets up an even stronger continuation of the original trend.
CHOCH vs BOS Decision Matrix:
If in doubt about trend direction → wait for CHOCH
If confident in trend → trade BOS continuations
After a CHOCH → next signals in the new direction are BOS
5. Fair Value Gaps (FVG) - Institutional Retracement Zones
What It Is: Fair Value Gaps represent price imbalances where the market moved so quickly that it left behind inefficient pricing. These gaps form when there's no overlap between the current candle's wick and the candle from two bars ago—a void in the price action that creates a "gap" in the order flow.
The Institutional Logic: When institutions execute large market orders, they can push price rapidly through levels without allowing normal two-way trading. This creates unfilled orders and imbalanced order books. Institutions often return to these gaps to:
Fill additional orders at more favorable prices
Allow the market to "breathe" before the next push
Create support/resistance at the gap for the next move
Restore balance to the order book
FVG Formation Criteria: This indicator uses enhanced FVG detection logic:
Bullish FVG (Upward Gap):
Current candle's low is above the high from 2 candles ago
Creates a visible gap where no trading occurred
Gap size must exceed 30% of ATR (filtering minor gaps)
Typically forms on strong bullish momentum candles
Market moved up so fast it left unfilled sell orders
Bearish FVG (Downward Gap):
Current candle's high is below the low from 2 candles ago
Creates a visible gap where no trading occurred
Gap size must exceed 30% of ATR
Typically forms on strong bearish momentum candles
Market moved down so fast it left unfilled buy orders
Visual Presentation:
Bullish FVG Zones: Semi-transparent cyan boxes extending from gap bottom to top
Bearish FVG Zones: Semi-transparent red boxes extending from gap top to bottom
Dynamic Management: Gaps automatically removed when filled or expired
Clean Display: Only active, unfilled gaps shown to prevent chart clutter
FVG Trading Strategies:
Strategy 1: FVG Retracement Entries After a CHOCH or strong BOS, wait for price to retrace into the FVG for entry:
Identify trend direction via CHOCH or BOS
Locate the nearest FVG in the direction of the trend
Set limit orders within the FVG zone
Stop loss beyond the FVG
Target the next structural level or previous swing
Strategy 2: FVG Breakout Confirmation When price breaks through an FVG without filling it:
Signals extreme institutional urgency
Indicates the move is likely to continue strongly
The unfilled gap becomes a "no-go zone" for counter-trend entries
Strategy 3: Multiple FVG Management When multiple FVGs form in sequence:
The first FVG is most likely to be filled
If price skips the first FVG, it signals exceptional strength
Sequential gaps create a "gap ladder" for scaling into positions
FVG Quality Assessment:
High-Quality FVGs (Best Trading Zones):
Large gap size (1.5x+ ATR)
Formed on high volume impulse moves
Aligned with higher timeframe structure
Created during CHOCH or strong BOS
Positioned between current price and key structure
Low-Quality FVGs (Use Caution):
Small gaps (< 0.5 ATR)
Formed during choppy, ranging conditions
Multiple overlapping gaps in the same area
Counter to higher timeframe trend
Very old gaps (50+ bars ago)
FVG Lifecycle Management:
The indicator intelligently manages FVG zones:
Gap Filling:
Bullish FVG is "filled" when price touches the bottom of the gap
Bearish FVG is "filled" when price touches the top of the gap
Filled gaps are automatically removed from the chart
Partial fills count as complete fills (institutions got their orders)
Gap Expiration:
Gaps older than the extension period (default 10 bars) are removed
This keeps the chart clean and focuses on relevant levels
Adjustable from 5-50 bars based on timeframe and trading style
Gap Priority: When multiple gaps exist, closest gap to current price is most relevant
Advanced FVG Concepts:
Nested FVGs: Sometimes FVGs form within larger FVGs. The smaller, more recent gap typically gets filled first, providing a secondary entry within the larger gap.
FVG Clusters: When 3+ FVGs stack in the same zone, this area becomes a major institutional reaccumulation zone—excellent for swing entries.
Inverted FVGs: Bullish FVGs in downtrends or bearish FVGs in uptrends can act as resistance/support where rallies/dips fail.
FVG + Liquidity Sweep Combination: The ultimate entry setup:
Liquidity sweep occurs
CHOCH confirms reversal
Price retraces into FVG created during the CHOCH move
Enter with exceptional risk-reward ratio
FVG Statistics & Probabilities:
Research on FVG behavior shows:
Approximately 70% of FVGs get filled within 20 bars
FVGs formed during CHOCH have 80%+ fill rate
Larger gaps (2x+ ATR) have lower but higher-quality fill rates
Higher timeframe FVGs are more magnetic than lower timeframe
Timeframe Considerations:
Daily FVGs:
Can remain unfilled for weeks
Major institutional zones
Often mark the absolute best entry prices for swing trades
When filled, usually result in strong reactions
4H FVGs:
Typically fill within 3-7 days
Excellent for swing trading
Balance between frequency and reliability
1H FVGs:
Usually fill within 1-3 days
Good for short-term position trading
More frequent signals
15M FVGs:
Often fill same day
Best used for intraday refinement
Should align with higher timeframe gaps
🔧 Customization & Settings Guide
Structure Detection Settings
Swing Lookback Period (3-50 bars): This is arguably the most important setting as it determines what the indicator considers "structure."
Low Values (3-7):
Identifies minor swings and frequent structure points
More BOS and CHOCH signals
Better for scalping and day trading
Risk: More false signals in choppy markets
Best for: 15M-1H charts, active traders
Medium Values (8-15):
Balanced approach capturing meaningful swings
Default setting works well for most traders
Good signal-to-noise ratio
Best for: 1H-4H charts, swing traders
High Values (16-50):
Only major structural points identified
Fewer but higher-quality signals
Cleaner charts with less noise
Better for trending markets
Best for: 4H-Daily charts, position traders
ATR Period (1-50): Controls how volatility is measured for liquidity sweep detection.
Shorter Periods (7-14):
More responsive to recent volatility changes
Better during high volatility events
May overreact to short-term spikes
Longer Periods (15-30):
Smoother, more stable volatility measurement
Better for swing trading
Reduces sensitivity to short-term noise
Liquidity Sweep Multiplier (0.5-3.0): Determines how far beyond structure price must move to qualify as a sweep.
Low Multiplier (0.5-0.9):
Catches smaller, more frequent sweeps
More signals but lower reliability
Good for scalping or high-frequency trading
Use in ranging markets
Medium Multiplier (1.0-1.5):
Balanced sensitivity
Default 1.2 works for most situations
Good signal quality
High Multiplier (1.6-3.0):
Only major, obvious sweeps detected
Fewer but very high-quality signals
Best for trending markets
Use when you want only the clearest setups
Display Options
Toggle Controls: Each component can be individually enabled/disabled:
Show Market Structure:
Turn off when chart becomes too cluttered
Essential for understanding context, generally keep ON
Disable only when you know structure from higher timeframe
Show Liquidity Zones:
Highlights swept areas with boxes
Can be disabled if you prefer cleaner charts
Keep ON when learning to spot manipulation
Show Break of Structure:
BOS labels can be disabled if trading only reversals
Keep ON for trend following strategies
Show Change of Character:
Core SMC signal, usually keep ON
Only disable if focusing purely on continuation trading
Show Fair Value Gaps:
OFF by default to prevent overwhelming new users
Turn ON once comfortable with basic structure
Can generate many zones on lower timeframes
FVG Extension Period (5-50 bars): Determines how long unfilled gaps remain displayed.
Short Extension (5-10):
Keeps charts very clean
Only shows very recent gaps
Good for day trading
May remove gaps before they fill
Medium Extension (11-25):
Balanced approach
Captures most gap fills
Good for swing trading
Long Extension (26-50):
Shows historical gap context
Better for position trading
Higher timeframe analysis
Can make charts busy on lower timeframes
Color Scheme Customization
Why Colors Matter: Visual clarity is crucial for quick decision-making. The color scheme should:
Clearly distinguish bullish vs bearish elements
Work well with your chart background (dark/light mode)
Be visible but not distracting
Match your personal preference for aesthetics
Default Colors:
Bullish: Cyan (
#00ffff) - visibility and association with "cool" buying
Bearish: Red (
#ff0051) - visibility and universal danger/selling association
FVG Bullish: 85% transparent cyan - visible but not overpowering
FVG Bearish: 85% transparent red - visible but not overpowering
Customization Tips:
Increase transparency if zones overwhelm price action
Use higher contrast colors on light backgrounds
Keep bullish/bearish colors visually distinct
Test colors across different market conditions
Optimization by Market Type
Forex (24-hour markets):
Structure Lookback: 10-15
ATR Period: 14-21
Sweep Multiplier: 1.0-1.5
Best Timeframes: 15M, 1H, 4H
Stocks (Session-based):
Structure Lookback: 8-12
ATR Period: 14
Sweep Multiplier: 1.2-1.8
Best Timeframes: 5M, 15M, 1H, Daily
Note: Gaps at market open/close aren't FVGs
Cryptocurrency (High volatility):
Structure Lookback: 12-20 (filter noise)
ATR Period: 10-14 (responsive to volatility)
Sweep Multiplier: 1.5-2.5 (larger sweeps)
Best Timeframes: 15M, 1H, 4H
Indices (Moderate volatility):
Structure Lookback: 10-15
ATR Period: 14-20
Sweep Multiplier: 1.0-1.5
Best Timeframes: 1H, 4H, Daily
📈 Complete Trading System & Strategies
The Complete SMC Trading Process
Step 1: Higher Timeframe Analysis (Daily/4H) Begin every trading session by analyzing higher timeframes:
Identify the prevailing market structure (bullish or bearish)
Mark key swing highs and lows
Note any recent CHOCHs that signal trend changes
Identify major Fair Value Gaps that could act as targets or entry zones
Determine areas of liquidity (obvious highs/lows where stops cluster)
Step 2: Trading Timeframe Setup (1H/4H) Move to your primary trading timeframe:
Wait for alignment with higher timeframe bias
Look for CHOCH signals if expecting reversal
Look for BOS signals if expecting continuation
Identify liquidity sweeps that create trading opportunities
Note nearby FVGs for entry refinement
Step 3: Entry Timeframe Execution (15M/1H) Use lower timeframe for precise entry:
After higher timeframe signal, wait for lower timeframe confirmation
Enter on FVG fills, structure breaks, or CHOCH signals
Place stop beyond swept liquidity or broken structure
Set targets at next structure level or opposite side of range
Step 4: Management Active trade management increases profitability:
Move stop to breakeven after price moves 1R (risk unit)
Take partial profits at first target (structure level)
Let remainder run to major targets
Trail stop using FVGs or structure breaks in your direction
Exit if a counter-trend CHOCH appears
High-Probability Trading Setups
Setup 1: The Classic CHOCH Reversal
Market Context:
Extended trend in one direction
Price reaching obvious highs/lows where liquidity pools
Setup Requirements:
Liquidity sweep of the high/low
CHOCH signal fires
(Optional) Wait for pullback to FVG
Entry: On CHOCH confirmation or FVG fill
Stop: Beyond swept liquidity
Target: Previous swing in opposite direction
Example (Bullish):
Market in downtrend for 2 weeks
Price sweeps below obvious daily low
Bullish CHOCH fires (breaks previous lower high)
Enter immediately or wait for pullback to bullish FVG
Stop below swept low
Target: Previous lower high, then previous high
Risk-Reward: Typically 1:3 to 1:5+
Setup 2: BOS Continuation with FVG Entry
Market Context:
Established trend with recent CHOCH
Strong momentum in trend direction
Setup Requirements:
Recent CHOCH established trend direction
BOS signal confirms continuation
Wait for pullback into FVG created on the BOS move
Entry: Limit order within FVG zone
Stop: Beyond FVG (invalid if exceeded)
Target: Next structural level
Example (Bearish):
Bearish CHOCH 2 days ago
Price makes BOS breaking new low
Large bearish FVG created during the break
Price retraces into FVG zone
Enter short at FVG fill
Stop above FVG
Target: Next major low or daily FVG below
Risk-Reward: 1:2 to 1:4
Setup 3: Liquidity Sweep Fade
Market Context:
Ranging market between defined highs/lows
Obvious liquidity on both sides of range
Setup Requirements:
Clear range established (minimum 20-30 bars)
Price sweeps one side of range (high or low)
Strong rejection back into range
Entry: After sweep rejection confirmed
Stop: Beyond swept level
Target: Opposite side of range
Example:
Range between 1.0850-1.0920 (EUR/USD)
Price sweeps above 1.0920 to 1.0935
Strong bearish rejection candle back below 1.0920
Enter short at 1.0915
Stop at 1.0940 (above sweep high)
Target: 1.0850 (range low)
Risk-Reward: 1:2.6
Setup 4: Multi-Timeframe CHOCH Alignment
Market Context:
Major trend change occurring
Multiple timeframes showing reversal signals
Setup Requirements:
Daily timeframe shows CHOCH
Wait for 4H CHOCH in same direction
Enter on 1H CHOCH that aligns
Entry: 1H CHOCH confirmation
Stop: Below 4H structure
Target: Daily structural level
Example (Bullish):
Daily bearish trend for months
Daily bullish CHOCH appears
4H shows bullish CHOCH next day
1H bullish CHOCH provides entry
Enter long on 1H signal
Stop: Below 4H swing low
Target: Daily previous high
Risk-Reward: 1:5 to 1:10+
Position: Larger size due to alignment
Setup 5: Failed CHOCH Continuation
Market Context:
Strong trend temporarily looks like reversing
"False" CHOCH creates trap for counter-trend traders
Setup Requirements:
Apparent CHOCH against main trend
Price fails to follow through
Original trend resumes with strong BOS
Entry: On BOS in original trend direction
Stop: Recent swing
Target: Extension of original trend
Example:
Strong daily uptrend
Bearish CHOCH appears (potential reversal)
Price consolidates but doesn't follow through down
Bullish BOS breaks above recent consolidation
Enter long on BOS
Stop: Below failed CHOCH low
Target: New high extension
Risk-Reward: 1:3 to 1:6
Note: Failed reversals often lead to explosive continuations
Risk Management Framework
Position Sizing: Never risk more than 1-2% of account per trade, even on A+ setups.
Risk Calculation:
Position Size = (Account Size × Risk %) / (Entry - Stop Loss in pips/points)
Example:
Account: $10,000
Risk: 1% = $100
Entry: 1.0900
Stop: 1.0870 (30 pips)
Position Size: $100 / 30 pips = $3.33 per pip
Lot Size (Forex): 0.33 lots
Stop Loss Placement:
For CHOCH Reversals:
Place stop 5-10 pips beyond swept liquidity
Gives room for volatility while protecting capital
If swept liquidity is violated, setup is invalidated
For BOS Continuations:
Place stop beyond the FVG or structure that provided entry
Typically tighter stops (closer to entry)
Can trail stop to breakeven quickly
For Range Trading:
Stop beyond the swept level
Generally tight stops work well in ranges
Exit quickly if range boundaries break
Take Profit Strategy:
Scaling Out Method (Recommended):
First Target (50% of position): First structural level (1:1 to 1:2)
Second Target (30% of position): Major structure (1:3 to 1:5)
Trail Stop (20% of position): Let run to full extension
Full Exit Method:
Hold entire position to predetermined target
Requires more discipline
Higher reward but also higher risk of giveback
Trade Management Rules:
Breakeven Rule: Move stop to breakeven after 1R profit
Partial Profit Rule: Take partials at structure levels
Trailing Rule: Trail stop

cephxs / New X Opening Gaps [Pro +]NWOG & NDOG - OPENING GAPS
Smart Gap Detection with Intelligent Filtering
Visualizes New Week Opening Gaps (NWOGs) and New Day Opening Gaps (NDOGs) with built-in intelligence to show you only what matters. No more cluttered charts with gaps from 3 months ago that price will never revisit.
THE PROBLEM WITH GAP INDICATORS
Most gap indicators dump every single gap on your chart and call it a day. You end up with 50 boxes cluttering your screen, half of which are miles away from current price and the other half are so tiny they're basically noise.
This one's different and I explain why below.
SMART FILTERING (THE GOOD STUFF)
Two filters work together to keep your chart clean:
Size Filter: Uses ATR-based detection to filter out insignificant gaps, dynamic with less volatile time periods
- Filter None: Show everything (if you really want chaos)
- Filter Insignificant: Hide the micro-gaps that don't matter
- Juicy Gaps Only: Only show gaps worth paying attention to
Distance Filter: Only displays gaps within range of current price
- Really Close: 0.5 ATR - tight focus on immediate levels
- Balanced: 1 ATR - sweet spot for most traders
- Slightly Far: 3 ATR - wider view for swing traders
Cleanup Interval: Controls how quickly out-of-range gaps disappear
- Immediately: Gaps hide/show every bar as price moves
- 5 / 15 / 30 Minutes: Gaps only update visibility at interval boundaries - reduces visual noise during choppy price action
The magic: gaps appear and disappear as price moves toward or away from them. Old gaps that price has left behind fade out, and gaps that become relevant fade back in. Use delayed cleanup intervals if you want gaps to "stick around" a bit longer before disappearing.
GAP TYPES EXPLAINED
New Week Opening Gaps (NWOGs):
The gap between Friday's close and Monday's open. These form over the weekend when markets are closed and often act as significant support/resistance.
Two classifications:
Void Gaps: Gap direction aligns with Friday's candle direction (continuation)
Overlap Gaps: Gap direction conflicts with Friday's candle (potential reversal)
New Day Opening Gaps (NDOGs):
The gap between one day's close and the next day's open. Smaller but frequent - useful for intraday traders looking for fill targets.
FEATURES
Automatic Week/Day Detection: Handles forex (17:00 ET open) and futures (18:00 ET open) correctly
DST-Aware: Uses New York timezone with automatic daylight saving adjustments
50% Equilibrium Line: Marks the midpoint of each gap - key level for entries
Days Ago Labels: Shows how old each gap is at a glance
Extension Modes: Choose between live-extending boxes or fixed-width boxes
Separate Color Schemes: Different colors for void vs overlap NWOGs, bullish vs bearish NDOGs
INPUTS
NWOG Display
Show NWOGs: Master toggle
Extension Mode: "Extend Live" or "Extend to Week Close"
Maximum NWOGs: Limit displayed gaps (1-50)
Show Void/Overlap Gaps: Toggle each type independently
Show NWOG Labels: Toggle gap labels
NDOG Display
Show NDOGs: Master toggle
Extension Mode: "Extend Live" or "Extend to Day Close"
Maximum NDOGs: Limit displayed gaps (1-50)
Show NDOG Labels: Toggle gap labels
Filter Settings
Size Filter: Filter None / Filter Insignificant / Juicy Gaps Only
Only Show Near Price: Enable/disable distance filtering
Distance Filter: Really Close / Balanced / Slightly Far
Cleanup Interval: Immediately / 5 Minutes / 15 Minutes / 30 Minutes - controls how often gaps update visibility
ATR Period: Period for ATR calculation (default: 14)
Right Edge Offset: How many bars ahead boxes extend
Styling
Box Transparency: Fill and border opacity
Midline Style: Solid / Dotted / Dashed
Label Style: Simple ("NWOG, 5d ago") or Descriptive ("NWOG (Void Bull), 5d ago")
Label Size: Tiny / Small / Normal / Large
RECOMMENDED SETTINGS
For intraday (1m-15m):
Size Filter: Filter Insignificant
Distance Filter: Really Close or Balanced
Show NDOGs: On
Maximum NDOGs: 5-10
For swing trading (1H-4H):
Size Filter: Juicy Gaps Only
Distance Filter: Balanced or Slightly Far
Show NWOGs: On
Maximum NWOGs: 10-20
TIMEFRAME NOTES
Works on daily timeframe and below. Above daily, the indicator disables itself since NWOG/NDOG gap detection requires daily open/close data.
ASSET SUPPORT
Automatically handles different market open times:
Forex: Week opens Sunday 17:00 ET, closes Friday 17:00 ET
Futures: Week opens Sunday 18:00 ET, closes Friday 16:15 ET
Stocks/Other: Uses session-based detection
FAQ
Why do gaps appear and disappear?
That's the distance filter working. As price moves, gaps that were far away become relevant and appear. Gaps that price leaves behind disappear. This keeps your chart focused on actionable levels.
What's the difference between void and overlap gaps?
Void gaps continue Friday's direction (trend continuation). Overlap gaps conflict with Friday's direction (potential reversal setup). Different traders prefer different types.
Why can't I see any gaps?
Check your filter settings. "Juicy Gaps Only" with "Really Close" distance filter is very selective. Try "Filter Insignificant" with "Balanced" for more gaps.
DISCLAIMER
This indicator is for educational purposes only. Opening gaps are one tool among many - they don't guarantee fills or reversals. Always use proper risk management and never trade based on a single indicator. Past gap fills don't guarantee future performance. Do your own analysis.
CHANGELOG
Pro +: Added smart size/distance filtering, void/overlap classification, NDOG support, DST-aware timezone handling
Base: Initial NWOG visualization
Made with ❤️ by fstarlabs

VSA Trading SystemMaster Reference Guide
📚 TABLE OF CONTENTS
PART 1: Core VSA Framework & Philosophy
PART 2: Volume Analysis Deep Dive
PART 3: Key VSA Setups (Complete)
PART 4: Wyckoff Accumulation & Distribution
PART 5: Multi-Timeframe Analysis
PART 6: Candle & Spread Analysis
PART 7: Entry, Stop Loss & Take Profit Rules
PART 8: Position Sizing & Risk Management
PART 9: Complete Trade Checklists
PART 10: Common Mistakes & Quick Reference
PART 11: Trade Journal Template
PART 1: CORE VSA FRAMEWORK & PHILOSOPHY
The Foundation Principle
╔════════════════════════════════════════════════════════════════╗
║ VSA FOUNDATION PRINCIPLE ║
╠════════════════════════════════════════════════════════════════╣
║ ║
║ "Smart Money leaves footprints in VOLUME" ║
║ ║
║ • Institutions cannot hide their activity ║
║ • Large orders create volume anomalies ║
║ • Price can lie, but volume confirms truth ║
║ • Volume is the FUEL, Price is the VEHICLE ║
║ • No fuel = No real move ║
║ ║
╚════════════════════════════════════════════════════════════════╝
The Golden Rule: Effort vs. Result
┌─────────────────────────────────────────────────────────────┐
│ HARMONY = TREND CONTINUATION │
│ ANOMALY = TREND REVERSAL │
└─────────────────────────────────────────────────────────────┘
Volume-Price Harmony Matrix
Price Action Volume Signal Interpretation
Rising ↑ Rising ↑ ✅ STRONG BULLISH Healthy uptrend, buyers in control
Rising ↑ Falling ↓ ⚠️ WEAK BULLISH Fuel running out, reversal near
Falling ↓ Rising ↑ ✅ STRONG BEARISH Aggressive selling, downtrend healthy
Falling ↓ Falling ↓ ⚠️ WEAK BEARISH Sellers exhausted, bottom forming
Effort vs. Result Complete Matrix
╔══════════════════════════════════════════════════════════════════╗
║ EFFORT VS RESULT MATRIX ║
╠═══════════════╦══════════════════╦════════════════════════════════╣
║ EFFORT ║ RESULT ║ INTERPRETATION ║
║ (Volume) ║ (Price Move) ║ ║
╠═══════════════╬══════════════════╬════════════════════════════════╣
║ ║ ║ ║
║ HIGH Volume ║ WIDE Spread ║ ✅ Normal - Trend healthy ║
║ ║ ║ ║
╠═══════════════╬══════════════════╬════════════════════════════════╣
║ ║ ║ ║
║ HIGH Volume ║ NARROW Spread ║ ⚠️ Absorption - Reversal soon ║
║ ║ ║ ║
╠═══════════════╬══════════════════╬════════════════════════════════╣
║ ║ ║ ║
║ LOW Volume ║ WIDE Spread ║ ⚠️ Fake move - Will reverse ║
║ ║ ║ ║
╠═══════════════╬══════════════════╬════════════════════════════════╣
║ ║ ║ ║
║ LOW Volume ║ NARROW Spread ║ 😐 No interest - Wait ║
║ ║ ║ ║
╚═══════════════╩══════════════════╩════════════════════════════════╝
PART 2: VOLUME ANALYSIS DEEP DIVE
Volume Classification (Compare to 20-period MA):
━━━━━━━━━━━━━━━━━━━━━━━━━━━━━━━━━━━━━━━━━━━━━━━━━━━
ULTRA HIGH ▓▓▓▓▓▓▓▓▓▓▓▓▓▓▓▓ (>200% of 20-period average)
→ Major institutional activity
→ Potential climax or absorption
HIGH ▓▓▓▓▓▓▓▓▓▓▓▓ (150-200% of average)
→ Significant interest
→ Breakout/breakdown confirmation
ABOVE AVERAGE ▓▓▓▓▓▓▓▓▓ (100-150% of average)
→ Healthy trend participation
→ Normal directional moves
AVERAGE ▓▓▓▓▓▓ (80-120% of average)
→ Baseline activity
→ Consolidation periods
LOW ▓▓▓ (50-80% of average)
→ Lack of interest
→ Test bars, pullbacks
ULTRA LOW ▓ (<50% of average)
→ No participation
→ Holiday/pre-news quiet
Volume Bar Colors & Meanings
┌─────────────────────────────────────────────────────────────┐
│ VOLUME BAR ANALYSIS │
├─────────────────────────────────────────────────────────────┤
│ │
│ GREEN Volume Bar (Buying Volume Dominant) │
│ ▓▓▓▓▓▓▓▓▓ │
│ + Green Candle = Healthy Buying │
│ + Red Candle = Possible Accumulation (watch for reversal) │
│ │
├─────────────────────────────────────────────────────────────┤
│ │
│ RED Volume Bar (Selling Volume Dominant) │
│ ░░░░░░░░░ │
│ + Red Candle = Healthy Selling │
│ + Green Candle = Possible Distribution (watch for drop) │
│ │
└─────────────────────────────────────────────────────────────┘
Volume Context Analysis
┌─────────────────────────────────────────────────────────────────┐
│ CONTEXT IS EVERYTHING │
├─────────────────────────────────────────────────────────────────┤
│ │
│ Same high volume candle means DIFFERENT things: │
│ │
│ AT SUPPORT: AT RESISTANCE: │
│ ┌─────────────┐ ┌─────────────┐ │
│ │ High Volume │ │ High Volume │ │
│ │ Small Body │ │ Small Body │ │
│ │ = BUYING │ │ = SELLING │ │
│ │ (Bullish) │ │ (Bearish) │ │
│ └─────────────┘ └─────────────┘ │
│ │
│ IN UPTREND: IN DOWNTREND: │
│ ┌─────────────┐ ┌─────────────┐ │
│ │ High Volume │ │ High Volume │ │
│ │ Small Body │ │ Small Body │ │
│ │ = Potential │ │ = Potential │ │
│ │ TOP │ │ BOTTOM │ │
│ └─────────────┘ └─────────────┘ │
│ │
└─────────────────────────────────────────────────────────────────┘
Volume Spike Interpretation
SCENARIO 1: Volume Spike at Support
─────────────────────────────────────
│
↓ ← Price drops to support
═════════════ Support Line
▼
▓▓▓▓▓▓▓▓▓▓▓▓ ← ULTRA HIGH Volume
→ INTERPRETATION: Absorption/Accumulation
→ ACTION: Prepare for LONG entry after confirmation
─────────────────────────────────────
SCENARIO 2: Volume Spike at Resistance
─────────────────────────────────────
▓▓▓▓▓▓▓▓▓▓▓▓ ← ULTRA HIGH Volume
▲
═════════════ Resistance Line
↑ ← Price rises to resistance
│
→ INTERPRETATION: Churning/Distribution
→ ACTION: Prepare for SHORT entry OR exit longs
─────────────────────────────────────
SCENARIO 3: Volume Spike on Breakout
─────────────────────────────────────
↗ ← Price breaks out
═════════════════════════════ Resistance
│
▓▓▓▓▓▓▓▓▓ ← HIGH Volume on breakout
→ INTERPRETATION: Valid Breakout
→ ACTION: ENTER in breakout direction
─────────────────────────────────────
SCENARIO 4: Low Volume on Breakout
─────────────────────────────────────
↗ ← Price breaks out
═════════════════════════════ Resistance
│
▓▓ ← LOW Volume on breakout
→ INTERPRETATION: FAKE Breakout
→ ACTION: DO NOT ENTER, wait for failure
─────────────────────────────────────
Recommended Volume Indicators
ESSENTIAL INDICATORS:
━━━━━━━━━━━━━━━━━━━━━━━━━━━━━━━━━━━━━━━
1. STANDARD VOLUME
└─ Basic but essential
└─ Color-coded by candle direction
2. VOLUME MOVING AVERAGE (20-period)
└─ Shows average volume
└─ Helps identify "high" vs "low" volume
└─ CRITICAL: Only consider signals where Volume > 1.5x MA
└─ Ultra High = Volume > 2x MA
3. VOLUME WEIGHTED AVERAGE PRICE (VWAP)
└─ Intraday fair value
└─ Institutional reference point
OPTIONAL BUT USEFUL:
━━━━━━━━━━━━━━━━━━━━━
• On-Balance Volume (OBV) - Cumulative flow, good for divergences
• Accumulation/Distribution Line - Money flow direction
• Volume Profile - Price levels with most volume
• Money Flow Index - Volume-weighted RSI
PART 3: KEY VSA SETUPS (COMPLETE)
Setup 1: Test No Supply (Bullish)
VISUAL:
Prior Uptrend
↗
↗
↗
↗
↗
↗ ┌───┐
↗ │ R │ ← Small RED candle (Test)
↗ └───┘
↗ │
↗ │ LOW VOLUME
↗ │
↗ ══════╧══════
COMPLETE CHECKLIST:
□ Existing uptrend (HH + HL pattern)
□ Small pullback candle (red/bearish)
□ Volume BELOW average (ideally <70% of 20-MA)
□ Volume LESS than previous 2 bars
□ Spread (range) is NARROW
□ Candle closes near its high (upper half)
□ Doesn't break previous swing low
□ Wicks are small (no heavy selling)
ENTRY TRIGGER:
→ Next candle closes green above test candle high
→ Volume on entry candle is average or above
STOP LOSS:
→ Below the test candle low
→ OR below the previous swing low
WHY IT WORKS:
Smart money "tests" to see if sellers remain.
Low volume = No sellers left = Safe to push higher
Setup 2: Test No Demand (Bearish)
VISUAL:
┌───┐
│ G │ ← Small GREEN candle (Test)
└───┘
│ LOW VOLUME
↗ │
↗ ══════════╧══════
↗ ↘
↗ ↘
↘
↘ Downtrend continues
COMPLETE CHECKLIST:
□ UP bar (close > open) - Green candle
□ Volume LESS than previous 2 bars
□ Volume BELOW average (ideally <70% of 20-MA)
□ Spread (range) is NARROW
□ Close in MIDDLE or LOW of bar
□ Located at resistance OR after uptrend
□ Price struggling to make new highs
ENTRY TRIGGER:
→ Next candle closes red below test candle low
STOP LOSS:
→ Above the test candle high
WHY IT WORKS:
Buyers tried but professionals not interested.
Low volume = No demand = Prepare for drop
Setup 3: Spring (Bull Trap Reversal)
VISUAL:
Support Line
═══════════════════════════════
↓↗ ← Spring (false breakdown + quick recovery)
Spring
(Bear Trap)
Price Chart:
════════════════════ Support
↓
↓ ← Break below support
▼
SPRING ← Ultra low point
↗
↗ ← Quick recovery above support
════════════════════
↗
↗ ← Uptrend begins
Volume Pattern:
On Spring: ▓▓▓ (Can be high or low)
On Test: ▓ (Must be LOW)
On Breakout: ▓▓▓▓▓▓▓ (High)
CHECKLIST:
□ Price dipped below support (Spring)
□ Quickly reversed back above support
□ Pullback test shows LOW VOLUME
□ Test candle doesn't break spring low
ENTRY:
→ Enter LONG on low volume test after spring
→ OR enter when price closes above spring high
STOP LOSS:
→ Below the spring low
Setup 4: Upthrust (Bear Trap Reversal)
VISUAL:
↑ False breakout above resistance
═══════════════════════════════ Resistance
↗↓ ← Upthrust (break above + fail)
Upthrust
(Bull Trap)
Price Chart:
↗
↗ ← Price rises
════════════════════ Resistance
↗
UPTHRUST ← Ultra high point (false break)
↓
↓ ← Quick rejection below resistance
════════════════════
↓
↘ ← Downtrend begins
Volume Pattern:
On Upthrust: ▓▓▓▓▓ (Often high - sucking in buyers)
On Test: ▓ (Must be LOW)
On Breakdown: ▓▓▓▓▓▓▓ (High)
CHECKLIST:
□ Price broke ABOVE resistance
□ Quickly FAILED and fell back below
□ Pullback test (rally) shows LOW VOLUME
□ Test candle doesn't break upthrust high
ENTRY:
→ Enter SHORT on low volume test after upthrust
→ OR enter when price closes below upthrust low
STOP LOSS:
→ Above the upthrust high
Setup 5: Absorption (Churning)
BEARISH ABSORPTION (Distribution at Top):
━━━━━━━━━━━━━━━━━━━━━━━━━━━━━━━━━━━━━━━
Price: ──────────────── Resistance
│ ▲ │
│ █ │ ← Small GREEN body
│ ▼ │ (buyers trying to push up)
─────┴───┴─────
Volume: ▓▓▓▓▓▓▓▓▓▓▓▓▓▓▓▓ ← MASSIVE (>200% average)
COMPLETE CHECKLIST:
□ Small/Medium GREEN candle
□ Volume > 2x average
□ Close in MIDDLE or LOWER half of candle
□ Located at resistance OR after extended uptrend
□ Price NOT making significant new highs despite volume
INTERPRETATION:
• Price tries to go up
• Huge volume BUT small price movement
• Where did all that buying go?
• Answer: Institutions ABSORBED it by selling
CONFIRMATION:
□ Next candle should be RED
RESULT: Expect price drop
═══════════════════════════════════════════════════
BULLISH ABSORPTION (Accumulation at Bottom):
━━━━━━━━━━━━━━━━━━━━━━━━━━━━━━━━━━━━━━━━━━━
│ ▼ │
│ █ │ ← Small RED body
│ ▲ │ (sellers trying to push down)
─────┴───┴─────
Price: ──────────────── Support
Volume: ▓▓▓▓▓▓▓▓▓▓▓▓▓▓▓▓ ← MASSIVE (>200% average)
COMPLETE CHECKLIST:
□ Small/Medium RED candle
□ Volume > 2x average
□ Close in MIDDLE or UPPER half of candle
□ Located at support OR after extended downtrend
□ Price NOT making significant new lows despite volume
INTERPRETATION:
• Price tries to go down
• Huge volume BUT small price movement
• Where did all that selling go?
• Answer: Institutions ABSORBED it by buying
CONFIRMATION:
□ Next candle should be GREEN
RESULT: Expect price rise
Setup 6: Climactic Action
BUYING CLIMAX (Marks the TOP):
━━━━━━━━━━━━━━━━━━━━━━━━━━━━━━
▲
/│\ ← WIDEST candle in uptrend
/ │ \ + Close near HIGH
/ │ \
/ │ \
▓▓▓▓▓▓▓▓▓▓▓▓▓ ← HIGHEST volume in uptrend
CHARACTERISTICS:
□ Widest spread (range) in the trend
□ Highest volume in the trend
□ Usually closes near the high
□ Euphoria/FOMO buying
□ Professionals SELLING to public
→ Signals END of Uptrend
→ Distribution phase begins
→ DO NOT BUY - Wait for short setup
═══════════════════════════════════════════
SELLING CLIMAX (Marks the BOTTOM):
━━━━━━━━━━━━━━━━━━━━━━━━━━━━━━━━━━
\ │ /
\ │ /
\ │ /
\│/ ← WIDEST candle in downtrend
▼ + Often closes OFF the lows
▓▓▓▓▓▓▓▓▓▓▓▓▓ ← HIGHEST volume in downtrend
CHARACTERISTICS:
□ Widest spread (range) in the trend
□ Highest volume in the trend
□ Often closes in middle or upper half (key difference!)
□ Panic selling
□ Professionals BUYING from public
→ Signals END of Downtrend
→ Accumulation phase begins
→ DO NOT SELL - Wait for long setup after TEST
Setup 7: Stopping Volume
STOPPING VOLUME (Bottom Formation):
━━━━━━━━━━━━━━━━━━━━━━━━━━━━━━━━━━━
Price falling...
↓
↓
↓
┌───────────┐
│ ███████ │ ← Wide spread DOWN bar
│ ███████ │ BUT closes OFF the lows
│ │ │ (Close in UPPER half - KEY!)
└─────│─────┘
│
▓▓▓▓▓▓▓▓▓▓▓▓▓▓ ← ULTRA HIGH volume
CHECKLIST:
□ Downtrend in progress
□ Wide spread (large range) candle
□ Ultra high volume (>200% of average)
□ Closes in UPPER HALF of the bar (critical!)
□ May have long lower wick
INTERPRETATION:
→ Professionals absorbing all selling
→ Supply being removed from market
NEXT STEPS:
→ Expect sideways consolidation
→ Wait for LOW VOLUME TEST before entry
→ Do NOT enter immediately - wait for confirmation
Setup 8: Breakout Confirmation
VALID BREAKOUT: FAKE BREAKOUT:
─────────────── ───────────────
│ ↑ HIGH VOLUME │ ↑ LOW VOLUME
─────│───────── ─────│─────────
│ │
▓▓▓▓▓▓▓▓▓ (Volume >150% avg) ▓▓▓ (Volume <100% avg)
✅ ENTER TRADE ❌ DO NOT ENTER
(Wait for failure/retest)
VALID BREAKOUT CHECKLIST:
□ Price closes ABOVE resistance (for long) or BELOW support (for short)
□ Volume > 150% of 20-period average
□ Candle closes near the extreme (high for long, low for short)
□ Preferably preceded by low volume consolidation
□ Higher timeframes support the direction
ENTRY:
→ Enter on close of breakout candle
→ OR enter on low volume retest of breakout level
STOP LOSS:
→ Below breakout level (for longs)
→ Above breakout level (for shorts)
PART 4: WYCKOFF ACCUMULATION & DISTRIBUTION
WYCKOFF ACCUMULATION
Price:
│
│ PS SC
│ ↘ ↓
│ ↘ ↓ AR
│ ↘ ↓ ↗
│ ↘ ↓ ↗ ST
│ ↓↗──────────┐ LPS
│ PHASE A │ PHASE B │ ↘ ↗ SOS
│ │ │ ↘ ↗ ↗
│ │ │ ↓ ↗
│ │ │ SPRING↗
│ │ PHASE C│ │↗ PHASE D
│ │ │ ↗
└────────────┴─────────┴────┴──────────→
PHASE DEFINITIONS:
━━━━━━━━━━━━━━━━━━
PHASE A - Stopping the Downtrend:
PS = Preliminary Support (first buying appears)
SC = Selling Climax (panic selling absorbed - HIGH volume)
AR = Automatic Rally (dead cat bounce)
ST = Secondary Test (retest of SC lows - lower volume than SC)
PHASE B - Building the Cause:
→ Sideways accumulation
→ Volume generally decreasing
→ Multiple tests of support and resistance
→ "Backing up to the creek" patterns
PHASE C - The Test:
SPRING = False breakdown below support (bear trap)
→ Can be high or low volume
→ Key: Quick recovery above support
TEST = Low volume retest after spring (CRITICAL ENTRY POINT)
PHASE D - Markup Begins:
SOS = Sign of Strength (strong rally with high volume)
LPS = Last Point of Support (final low volume pullback)
→ This is the LAST safe entry before markup
PHASE E - Markup (Not shown):
→ Strong uptrend with increasing volume
→ Higher highs and higher lows
VOLUME PATTERN:
━━━━━━━━━━━━━━━
▓▓▓▓▓▓ ▓▓ ▓▓ ▓▓▓▓▓
(High) (Lower) (Low on) (High on
at SC during Spring SOS)
Phase B Test
Key Accumulation Entry Point
ENTRY CHECKLIST - THE SPRING + TEST:
━━━━━━━━━━━━━━━━━━━━━━━━━━━━━━━━━━━━━
□ Phase A complete (SC and AR visible)
□ Phase B complete (sideways range established)
□ Spring occurred (price dipped below support)
□ Price quickly recovered above support
□ Test pullback has LOW VOLUME (critical!)
□ Test doesn't break spring low
ENTRY TRIGGER:
→ Enter LONG after low volume test
→ OR enter on break above spring high with volume
STOP LOSS:
→ Below spring low
TARGET:
→ Measure the range (support to resistance)
→ Project that distance above resistance
Wyckoff Distribution Schematic--
WYCKOFF DISTRIBUTION
Price:
│ PSY
│ ↗ BC
│ ↗ ↗ ↘
│ PHASE D ↗ ↗ ↘ UTAD
│ ↘ ↗ ↗ ↘ ↗↘
│ ↘ ↗ ↗────────↘↗ ↘
│ ↘ ↗ │ PHASE B │ ↘ SOW
│ ↘ ↗ │ │ ↘
│ ↘ │ PHASE C │ ↘
│ LPSY │ │ ↘
│ │ │ ↘
└────────────────┴─────────┴─────────→
PHASE DEFINITIONS:
━━━━━━━━━━━━━━━━━━
PHASE A - Stopping the Uptrend:
PSY = Preliminary Supply (first selling appears)
BC = Buying Climax (euphoric buying absorbed - HIGH volume)
AR = Automatic Reaction (first drop)
ST = Secondary Test (retest of BC highs - lower volume than BC)
PHASE B - Building the Cause:
→ Sideways distribution
→ Volume patterns show supply entering on rallies
→ Multiple tests of support and resistance
PHASE C - The Test:
UTAD = Upthrust After Distribution (false breakout above resistance)
→ Bull trap
→ Often high volume (sucking in late buyers)
TEST = Low volume retest after upthrust (ENTRY POINT FOR SHORTS)
PHASE D - Markdown Begins:
SOW = Sign of Weakness (strong drop with high volume)
LPSY = Last Point of Supply (final low volume rally)
→ This is the LAST safe short entry before markdown
PHASE E - Markdown (Not shown):
→ Strong downtrend with increasing volume
→ Lower highs and lower lows
PART 5: MULTI-TIMEFRAME ANALYSIS
The 4-Step Alignment Process
╔════════════════════════════════════════════════════════════════╗
║ 4-HOUR CHART (MACRO VIEW) ║
╠════════════════════════════════════════════════════════════════╣
║ ║
║ PURPOSE: Determine the PRIMARY trend direction ║
║ ║
║ ANALYZE: ║
║ □ Overall trend (Uptrend/Downtrend/Range) ║
║ □ Major support/resistance levels ║
║ □ Volume trend (increasing/decreasing with price) ║
║ □ Any divergences forming (Price↑ Volume↓ = warning) ║
║ □ Look for Accumulation/Distribution phases ║
║ ║
║ SIGNALS TO NOTE: ║
║ • Climax volume at extremes ║
║ • Trend line breaks ║
║ • Higher timeframe absorption patterns ║
║ ║
║ RULE: Only trade in the direction of 4H trend ║
║ ║
╚════════════════════════════════════════════════════════════════╝
↓ ALIGNED?
╔════════════════════════════════════════════════════════════════╗
║ 1-HOUR CHART (STRUCTURE) ║
╠════════════════════════════════════════════════════════════════╣
║ ║
║ PURPOSE: Confirm trend and identify key levels ║
║ ║
║ ANALYZE: ║
║ □ Trend alignment with 4H ║
║ □ Key swing highs and lows ║
║ □ Support/resistance zones ║
║ □ Moving average positions (if used) ║
║ □ Current Wyckoff phase ║
║ □ Volume pattern on recent moves ║
║ ║
║ SIGNALS TO NOTE: ║
║ • Structure breaks (BOS - Break of Structure) ║
║ • Change of character (CHoCH) ║
║ • Volume spikes at key levels ║
║ ║
║ RULE: Structure must support trade direction ║
║ ║
╚════════════════════════════════════════════════════════════════╝
↓ ALIGNED?
╔════════════════════════════════════════════════════════════════╗
║ 30-MIN CHART (SETUP) ║
╠════════════════════════════════════════════════════════════════╣
║ ║
║ PURPOSE: Identify specific trade setups ║
║ ║
║ ANALYZE: ║
║ □ Pullback/rally quality ║
║ □ Is pullback volume DECREASING? (Required for entry) ║
║ □ Approach to key levels ║
║ □ VSA patterns forming ║
║ □ Price action quality ║
║ ║
║ SIGNALS TO NOTE: ║
║ • Test patterns (No Supply/No Demand) ║
║ • Absorption at levels ║
║ • Volume drying up on counter-moves ║
║ ║
║ RULE: Wait for low volume pullback before entry ║
║ ║
╚════════════════════════════════════════════════════════════════╝
↓ ALIGNED?
╔════════════════════════════════════════════════════════════════╗
║ 15-MIN CHART (ENTRY TRIGGER) ║
╠════════════════════════════════════════════════════════════════╣
║ ║
║ PURPOSE: Precise entry timing ║
║ ║
║ ANALYZE: ║
║ □ Entry trigger candle forming ║
║ □ Volume on trigger candle ║
║ □ Exact stop loss placement ║
║ □ Immediate support/resistance ║
║ ║
║ ENTRY TRIGGERS (Need one): ║
║ • Test No Supply / Test No Demand ║
║ • Spring/Upthrust + Test ║
║ • Absorption + Confirmation candle ║
║ • Breakout with High Volume ║
║ ║
║ CRITICAL RULE: Wait for candle CLOSE before entering ║
║ ║
╚════════════════════════════════════════════════════════════════╝
↓ ALL ALIGNED?
═══════════════════════════
✅ EXECUTE TRADE
═══════════════════════════
PART 6: CANDLE & SPREAD ANALYSIS
Candle Close Position Analysis
WHERE DOES THE CANDLE CLOSE?
Strong Bullish: Neutral: Bearish:
┌─────────┐ ┌─────────┐ ┌─────────┐
│ ████████│ ← Close │ │ │ │ │
│ ████████│ at TOP │ │ │ ← Close │ │ │
│ ████████│ (Upper │ ████ │ MIDDLE │ │ │
│ │ │ third) │ ████ │ │ ████████│ ← Close
│ │ │ │ │ │ │ ████████│ BOTTOM
└─────────┘ └─────────┘ └─────────┘
✅ Buyers won ⚠️ Struggle ❌ Sellers won
decisively (indecision) decisively
APPLICATION RULES:
━━━━━━━━━━━━━━━━━━
□ Close in UPPER 1/3 + High Volume = Strong Buying
□ Close in LOWER 1/3 + High Volume = Strong Selling
□ Close in MIDDLE + High Volume = Battle (Wait for clarity)
FOR ABSORPTION SIGNALS:
□ Bearish Absorption: Green candle closes in MIDDLE or LOWER half
□ Bullish Absorption: Red candle closes in MIDDLE or UPPER half
Spread (Range) Analysis-
SPREAD = High - Low of Candle
┌──────────────────────────────────────────────────────────────┐
│ SPREAD ANALYSIS │
├──────────────────────────────────────────────────────────────┤
│ │
│ WIDE SPREAD + HIGH VOLUME: │
│ ┌─────────────────────┐ │
│ │ │ │ │
│ │ ███████████ │ → HEALTHY momentum │
│ │ ███████████ │ → Trend continuation │
│ │ │ │ → Strong commitment │
│ └─────────────────────┘ │
│ ▓▓▓▓▓▓▓▓▓▓▓▓▓▓▓▓▓▓▓▓▓ │
│ │
├──────────────────────────────────────────────────────────────┤
│ │
│ NARROW SPREAD + HIGH VOLUME: │
│ ┌───────────┐ │
│ │ ████ │ ← Small body │
│ │ ████ │ │
│ └───────────┘ → ABSORPTION warning! │
│ ▓▓▓▓▓▓▓▓▓▓▓▓ → Effort with no result │
│ → Expect reversal │
│ │
├──────────────────────────────────────────────────────────────┤
│ │
│ WIDE SPREAD + LOW VOLUME: │
│ ┌─────────────────────┐ │
│ │ │ │ │
│ │ ███████████ │ → FAKE MOVE warning! │
│ │ ███████████ │ → No commitment │
│ │ │ │ → Will likely reverse │
│ └─────────────────────┘ │
│ ▓▓▓ │
│ │
├──────────────────────────────────────────────────────────────┤
│ │
│ NARROW SPREAD + LOW VOLUME: │
│ ┌───────────┐ │
│ │ ████ │ → No interest │
│ │ ████ │ → Consolidation │
│ └───────────┘ → WAIT for signal │
│ ▓▓ │
│ │
└──────────────────────────────────────────────────────────────┘
PART 7: ENTRY, STOP LOSS & TAKE PROFIT RULES
╔═══════════════════════════════════════════════════════════════╗
║ LONG ENTRY CRITERIA ║
╠═══════════════════════════════════════════════════════════════╣
║ ║
║ MULTI-TIMEFRAME CHECK: ║
║ ──────────────────── ║
║ □ 4H: Uptrend + Rising Volume (or no bearish divergence) ║
║ □ 1H: Uptrend + Price holding above support ║
║ □ 30M: Pullback with DECREASING volume ║
║ □ 15M: Entry trigger present ║
║ ║
║ VOLUME CONFIRMATION: ║
║ ─────────────────── ║
║ □ Pullback candles have LOW volume ║
║ □ No bearish absorption at highs ║
║ □ Prior trend showed harmony (price↑ + volume↑) ║
║ □ Volume compared to 20-MA (signal volume significant?) ║
║ ║
║ CANDLE CONFIRMATION: ║
║ ─────────────────── ║
║ □ Entry candle closes in upper half ║
║ □ No abnormally wide spread with low volume (fake move) ║
║ □ Test candle had appropriate close position ║
║ ║
║ ENTRY TRIGGERS (Any One): ║
║ ──────────────────────── ║
║ ○ Test No Supply confirmed (low vol red, next green) ║
║ ○ Spring + Low Volume Test ║
║ ○ Breakout with High Volume (>150% of average) ║
║ ○ Bullish Absorption at support + green confirmation ║
║ ○ Stopping volume + Test ║
║ ║
║ WAIT FOR CANDLE CLOSE BEFORE ENTERING! ║
║ ║
╚═══════════════════════════════════════════════════════════════╝
Short Entry Criteria-
╔═══════════════════════════════════════════════════════════════╗
║ SHORT ENTRY CRITERIA ║
╠═══════════════════════════════════════════════════════════════╣
║ ║
║ MULTI-TIMEFRAME CHECK: ║
║ ──────────────────── ║
║ □ 4H: Downtrend OR Bearish Divergence (price↑ volume↓) ║
║ □ 1H: Lower Highs forming OR at resistance ║
║ □ 30M: Rally with DECREASING volume ║
║ □ 15M: Entry trigger present ║
║ ║
║ VOLUME CONFIRMATION: ║
║ ─────────────────── ║
║ □ Rally candles have LOW volume ║
║ □ No bullish absorption at lows ║
║ □ Bearish Absorption visible at resistance ║
║ □ Anomaly present (price↑ but volume↓) ║
║ ║
║ CANDLE CONFIRMATION: ║
║ ─────────────────── ║
║ □ Entry candle closes in lower half ║
║ □ No abnormally wide spread with low volume (fake move) ║
║ □ Test candle had appropriate close position ║
║ ║
║ ENTRY TRIGGERS (Any One): ║
║ ──────────────────────── ║
║ ○ Test No Demand confirmed (low vol green, next red) ║
║ ○ Upthrust + Low Volume Test ║
║ ○ Sign of Weakness (SOW) - Big red + High Volume ║
║ ○ Breakdown with High Volume (>150% of average) ║
║ ○ Bearish Absorption at resistance + red confirmation ║
║ ║
║ WAIT FOR CANDLE CLOSE BEFORE ENTERING! ║
║ ║
╚═══════════════════════════════════════════════════════════════╝
Stop Loss Placement Rules-
╔════════════════════════════════════════════════════════════╗
║ STOP LOSS PLACEMENT RULES ║
╠════════════════════════════════════════════════════════════╣
║ ║
║ FOR LONG TRADES: ║
║ ───────────────── ║
║ Option A: Below the TEST candle low ║
║ Option B: Below the Spring low (if Spring setup) ║
║ Option C: Below support zone + ATR buffer ║
║ ║
║ BUFFER FORMULA: ║
║ SL = Support Level - (0.5 × ATR of entry timeframe) ║
║ ║
║ VISUAL: ║
║ ─────────────────────────────── Support/Demand Zone ║
║ ← Entry Point ║
║ ║
║ ─────────────────────────────── SL: Below Support ║
║ │← 1-2% below zone OR below spring low ║
║ ║
╠════════════════════════════════════════════════════════════╣
║ ║
║ FOR SHORT TRADES: ║
║ ────────────────── ║
║ Option A: Above the TEST candle high ║
║ Option B: Above the Upthrust high (if Upthrust setup) ║
║ Option C: Above resistance zone + ATR buffer ║
║ ║
║ BUFFER FORMULA: ║
║ SL = Resistance Level + (0.5 × ATR of entry timeframe) ║
║ ║
║ VISUAL: ║
║ │← SL: Above resistance/recent high ║
║ ─────────────────────────────── Resistance Zone ║
║ ← Entry Point (Short) ║
║ ║
╚════════════════════════════════════════════════════════════╝
Take Profit Rules-
╔════════════════════════════════════════════════════════════╗
║ TAKE PROFIT RULES ║
╠════════════════════════════════════════════════════════════╣
║ ║
║ MINIMUM RISK:REWARD = 1:2 ║
║ ║
║ TP LEVELS (Based on Structure): ║
║ ──────────────────────────── ║
║ TP1: First resistance/support level = Aim for 1R ║
║ TP2: Second resistance/support level = Aim for 2R ║
║ TP3: Major level OR measured move = Aim for 3R+ ║
║ ║
║ SCALING OUT METHOD: ║
║ ───────────────────── ║
║ □ TP1 (33-40%): Close first portion at 1R ║
║ → Move SL to breakeven after TP1 hit ║
║ ║
║ □ TP2 (33-40%): Close second portion at 2R ║
║ → Trail SL to 1R profit level ║
║ ║
║ □ TP3 (20-34%): Close final portion at 3R or trail ║
║ → Use trailing stop below each new swing ║
║ ║
║ TRAILING STOP METHOD: ║
║ ────────────────────────────── ║
║ Longs: Trail SL below each new Higher Low ║
║ Shorts: Trail SL above each new Lower High ║
║ ║
║ VISUAL (Long Trade): ║
║ ║
║ TP3 ─────────────── (Major Resistance: 3R) ║
║ ║
║ TP2 ─────────────── (Next Resistance: 2R) ║
║ ║
║ TP1 ─────────────── (First Resistance: 1R) ║
║ ║
║ ENTRY ────────────── ║
║ ║
║ SL ───────────────── ║
║ ║
╠════════════════════════════════════════════════════════════╣
║ ║
║ EXIT ON VSA WEAKNESS SIGNALS: ║
║ ───────────────────────────── ║
║ Exit immediately if you see: ║
║ □ Climactic volume against your position ║
║ □ Absorption candle against your position ║
║ □ Break of structure on entry timeframe ║
║ □ Test No Demand (if long) or Test No Supply (if short) ║
║ ║
╚════════════════════════════════════════════════════════════╝
PART 8: POSITION SIZING & RISK MANAGEMENT
Position Size Calculator-
╔════════════════════════════════════════════════════════════════╗
║ POSITION SIZE CALCULATOR ║
╠════════════════════════════════════════════════════════════════╣
║ ║
║ STEP 1: Define Account Risk ║
║ ───────────────────────────── ║
║ Account Size: $__________ ║
║ Risk Per Trade: ____% (Recommended: 1-2%) ║
║ Dollar Risk: $__________ (Account × Risk%) ║
║ ║
║ STEP 2: Define Trade Risk ║
║ ──────────────────────── ║
║ Entry Price: $__________ ║
║ Stop Loss: $__________ ║
║ Risk Per Unit: $__________ (Entry - SL, absolute value) ║
║ ║
║ STEP 3: Calculate Position ║
║ ───────────────────────── ║
║ ║
║ Dollar Risk ║
║ Position Size = ───────────────── ║
║ Risk Per Unit ║
║ ║
║ ═══════════════════════════════════════════════════════════ ║
║ EXAMPLE: ║
║ ═══════════════════════════════════════════════════════════ ║
║ ║
║ Account: $10,000 ║
║ Risk: 1% = $100 ║
║ Entry: $50.00 ║
║ Stop Loss: $48.00 ║
║ Risk Per Share: $2.00 ║
║ ║
║ Position Size = $100 ÷ $2.00 = 50 shares ║
║ ║
╚════════════════════════════════════════════════════════════════╝
Risk Management Rules-
╔════════════════════════════════════════════════════════════╗
║ RISK MANAGEMENT RULES ║
╠════════════════════════════════════════════════════════════╣
║ ║
║ CAPITAL PROTECTION: ║
║ ─────────────────── ║
║ □ Never risk more than 1-2% per trade ║
║ □ Maximum 3 trades open at same time ║
║ □ Maximum 5% total portfolio risk at any time ║
║ □ Reduce size by 50% after 2 consecutive losses ║
║ □ Stop trading after 3 consecutive losses (review) ║
║ ║
║ CORRELATION AWARENESS: ║
║ ────────────────────── ║
║ □ Don't take same-direction trades in correlated pairs ║
║ □ Treat correlated positions as single larger position ║
║ ║
║ DRAWDOWN RULES: ║
║ ─────────────── ║
║ □ 5% daily drawdown = Stop trading for the day ║
║ □ 10% weekly drawdown = Review and reduce size ║
║ □ 20% monthly drawdown = Pause and full strategy review ║
║ ║
╚════════════════════════════════════════════════════════════╝
Position Scaling Strategy-
ENTRY SCALING (Building Position):
━━━━━━━━━━━━━━━━━━━━━━━━━━━━━━━━━━━━━━━
┌─────────────────────────────────────┐
│ │
│ Initial Entry: 50% of position │
│ First Add: 25% of position │
│ Second Add: 25% of position │
│ │
│ Add ONLY when: │
│ • Price moves in your favor │
│ • Volume confirms the move │
│ • Move SL to breakeven first │
│ • New VSA confirmation present │
│ │
└─────────────────────────────────────┘
EXIT SCALING (Taking Profits):
━━━━━━━━━━━━━━━━━━━━━━━━━━━━━━━━
┌─────────────────────────────────────┐
│ │
│ TP1 (1R): Close 40% of position │
│ → Move SL to breakeven │
│ │
│ TP2 (2R): Close 40% of position │
│ → Trail SL to 1R │
│ │
│ TP3 (3R+): Close remaining 20% │
│ → Trail or let run │
│ │
└─────────────────────────────────────┘
PART 9: COMPLETE TRADE CHECKLISTS
Pre-Trade Validation Checklist-
╔════════════════════════════════════════════════════════════════════╗
║ COMPLETE VSA TRADE CHECKLIST ║
╠════════════════════════════════════════════════════════════════════╣
║ ║
║ TRADE TYPE: □ LONG □ SHORT ║
║ DATE: ___________ PAIR/ASSET: ___________ ║
║ ║
║ ═══════════════════════════════════════════════════════════════ ║
║ SECTION A: MULTI-TIMEFRAME ALIGNMENT (Must have 4/4) ║
║ ═══════════════════════════════════════════════════════════════ ║
║ ║
║ 4H CHART: ║
║ □ Trend aligned with trade direction ║
║ □ Volume confirms trend (harmony) ║
║ □ No major resistance/support blocking immediately ║
║ □ No bearish/bullish divergence against trade ║
║ ║
║ 1H CHART: ║
║ □ Trend aligned with trade direction ║
║ □ Structure intact (HH/HL for long, LH/LL for short) ║
║ □ Key level identified and respected ║
║ □ Wyckoff phase supports trade ║
║ ║
║ 30M CHART: ║
║ □ Trend aligned with trade direction ║
║ □ Pullback/Rally has DECREASING volume (LOW volume) ║
║ □ Near support zone (long) or resistance zone (short) ║
║ □ VSA setup forming ║
║ ║
║ 15M CHART: ║
║ □ Entry signal clearly present ║
║ □ Volume confirming the signal ║
║ □ Candle close position supports trade ║
║ □ Waiting for candle CLOSE before entry ║
║ ║
║ ═══════════════════════════════════════════════════════════════ ║
║ SECTION B: VOLUME ANALYSIS (Must have 4/4) ║
║ ═══════════════════════════════════════════════════════════════ ║
║ ║
║ □ Volume compared to 20-MA (is signal volume significant?) ║
║ □ Volume and Price in Harmony OR Clear reversal signal ║
║ □ Pullback/Rally has LOW volume (below average) ║
║ □ No absorption signals against trade direction ║
║ ║
║ ═══════════════════════════════════════════════════════════════ ║
║ SECTION C: CANDLE/SPREAD ANALYSIS (Must have 3/3) ║
║ ═══════════════════════════════════════════════════════════════ ║
║ ║
║ □ Spread (range) appropriate for the signal ║
║ □ Close position supports trade direction ║
║ □ No wide spread + low volume moves (fake move warning) ║
║ ║
║ ═══════════════════════════════════════════════════════════════ ║
║ SECTION D: ENTRY SIGNAL (Must have 1 confirmed) ║
║ ═══════════════════════════════════════════════════════════════ ║
║ ║
║ □ Test No Supply / Test No Demand ║
║ □ Spring / Upthrust + Low Volume Test ║
║ □ Absorption at key level + Confirmation candle ║
║ □ Breakout with High Volume (>150% average) ║
║ □ Stopping Volume + Test ║
║ ║
║ ═══════════════════════════════════════════════════════════════ ║
║ SECTION E: RISK MANAGEMENT (Must have 5/5) ║
║ ═══════════════════════════════════════════════════════════════ ║
║ ║
║ □ Risk ≤ 1-2% of account ║
║ □ Risk:Reward ≥ 1:2 ║
║ □ Stop Loss placed at logical structure level ║
║ □ Position size calculated correctly ║
║ □ Not during major news event (checked economic calendar) ║
║ ║
║ Entry Price: _______________ ║
║ Stop Loss: _______________ ║
║ Risk Per Unit: _______________ ║
║ Position Size: _______________ ║
║ TP1 (1R): _______________ ║
║ TP2 (2R): _______________ ║
║ TP3 (3R): _______________ ║
║ ║
║ ═══════════════════════════════════════════════════════════════ ║
║ SECTION F: FINAL CONFIRMATION ║
║ ═══════════════════════════════════════════════════════════════ ║
║ ║
║ □ Wait for candle CLOSE (don't enter mid-candle) ║
║ □ Check spread/slippage acceptable ║
║ □ Trade noted in journal before entering ║
║ ║
║ ════════════════════════════════════════════════════════════ ║
║ MINIMUM REQUIREMENTS: ║
║ • Section A: 4/4 timeframes aligned ║
║ • Section B: 4/4 volume checks passed ║
║ • Section C: 3/3 candle checks passed ║
║ • Section D: 1+ entry signal confirmed ║
║ • Section E: 5/5 risk checks passed ║
║ • Section F: All final checks done ║
║ ║
║ TOTAL: 17+ checks must be YES to execute ║
║ ════════════════════════════════════════════════════════════ ║
║ ║
║ ════════════════════════════ ║
║ ✅ EXECUTE TRADE ║
║ ════════════════════════════ ║
║ ║
╚════════════════════════════════════════════════════════════════════╝
Quick Decision Flowchart-
┌─────────────────┐
│ POTENTIAL │
│ TRADE SPOTTED │
└────────┬────────┘
│
▼
┌──────────────────────────┐
│ Is 4H trend in your │
│ trade direction? │
└──────────────┬───────────┘
│ │
YES NO
│ │
▼ ▼
┌──────────────┐ ┌─────────────┐
│ Check 1H │ │ NO TRADE │
│ alignment │ │ ─────── │
└──────┬───────┘ └─────────────┘
│
ALIGNED?
│ │
YES NO → NO TRADE
│
▼
┌───────────────────┐
│ Is 30M showing │
│ LOW VOLUME │
│ pullback/rally? │
└─────────┬─────────┘
│
YES │ NO
│ │
│ ▼
│ ┌────────────┐
│ │ WAIT │
│ │ for setup │
│ └────────────┘
│
▼
┌───────────────────┐
│ VSA Signal on │
│ 15M Chart? │
│ (Candle CLOSED?) │
└─────────┬─────────┘
│
YES │ NO → WAIT
│
▼
┌───────────────────┐
│ R:R at least 1:2? │
└─────────┬─────────┘
│
YES │ NO → NO TRADE
│
▼
┌───────────────────┐
│ Risk ≤ 2% of │
│ account? │
└─────────┬─────────┘
│
YES │ NO → REDUCE SIZE
│
▼
┌───────────────────┐
│ Major news │
│ within 30 min? │
└─────────┬─────────┘
│
NO │ YES → WAIT
│
▼
╔═════════════════════╗
║ EXECUTE TRADE ║
║ ═══════════════ ║
║ • Set Entry ║
║ • Set Stop Loss ║
║ • Set Targets ║
║ • Log in Journal ║
╚═════════════════════╝
PART 10: COMMON MISTAKES & QUICK REFERENCE
Top 10 VSA Mistakes to Avoid-
╔════════════════════════════════════════════════════════════╗
║ TOP 10 VSA MISTAKES ║
╠════════════════════════════════════════════════════════════╣
║ ║
║ 1. ❌ Analyzing volume in ISOLATION ║
║ ✅ Always combine volume + price + location + context ║
║ ║
║ 2. ❌ Entering on HIGH volume pullback ║
║ ✅ Only enter on LOW volume pullback (Test) ║
║ ║
║ 3. ❌ Ignoring the CLOSE position of candle ║
║ ✅ Where it closes matters as much as volume ║
║ ║
║ 4. ❌ Trading VSA signals against higher TF trend ║
║ ✅ Always align with 4H/1H direction first ║
║ ║
║ 5. ❌ Chasing breakouts without volume confirmation ║
║ ✅ Wait for high volume OR don't enter ║
║ ║
║ 6. ❌ Entering during NEWS events ║
║ ✅ Volume is distorted during news - wait 30min ║
║ ║
║ 7. ❌ Misreading climax volume as continuation ║
║ ✅ Recognize climax = potential reversal ║
║ ║
║ 8. ❌ Not waiting for TEST confirmation ║
║ ✅ Wait for Spring/Upthrust to be TESTED (low volume) ║
║ ║
║ 9. ❌ Ignoring spread (candle range) ║
║ ✅ Wide spread + Low volume = FAKE MOVE warning ║
║ ║
║ 10. ❌ Not using relative volume ║
║ ✅ Compare to 20-period volume MA ║
║ ║
╚════════════════════════════════════════════════════════════╝
Critical Rules - Never Break These-
╔═══════════════════════════════════════════════════════════════╗
║ NEVER BREAK THESE RULES ║
╠═══════════════════════════════════════════════════════════════╣
║ ║
║ 1. NEVER enter without volume confirmation ║
║ ║
║ 2. NEVER trade against the higher timeframe trend ║
║ ║
║ 3. NEVER chase breakouts with low volume ║
║ ║
║ 4. ALWAYS wait for the TEST after accumulation/distribution ║
║ ║
║ 5. ALWAYS use stop loss - no exceptions ║
║ ║
║ 6. ALWAYS confirm 4H → 1H → 30M → 15M alignment ║
║ ║
║ 7. ALWAYS wait for candle CLOSE before entering ║
║ ║
║ 8. When Volume and Price DIVERGE → Expect REVERSAL ║
║ ║
║ 9. High Volume + Small Candle = Smart Money Activity ║
║ ║
║ 10. Low Volume on Pullback = Healthy Trend (entry zone) ║
║ ║
║ 11. High Volume on Pullback = Warning Sign (don't enter) ║
║ ║
║ 12. NEVER risk more than 2% on any single trade ║
║ ║
╚═══════════════════════════════════════════════════════════════╝
PART 11: TRADE JOURNAL TEMPLATE
Trade Journal Entry--
╔════════════════════════════════════════════════════════════════════╗
║ TRADE JOURNAL ║
╠════════════════════════════════════════════════════════════════════╣
║ ║
║ TRADE #: _____ DATE: ___________ TIME: ___________ ║
║ ║
║ PAIR/ASSET: _______________ DIRECTION: □ LONG □ SHORT ║
║ ║
║ ═══════════════════════════════════════════════════════════════ ║
║ PRE-TRADE ANALYSIS ║
║ ═══════════════════════════════════════════════════════════════ ║
║ ║
║ TIMEFRAME ALIGNMENT: ║
║ 4H: _____________________________________________ ║
║ 1H: _____________________________________________ ║
║ 30M: ____________________________________________ ║
║ 15M: ____________________________________________ ║
║ ║
║ VSA SETUP TYPE: ________________________________ ║
║ ║
║ VOLUME OBSERVATION: ____________________________ ║
║ _________________________________________________ ║
║ ║
║ CANDLE/SPREAD NOTES: ___________________________ ║
║ _________________________________________________ ║
║ ║
║ ═══════════════════════════════════════════════════════════════ ║
║ TRADE PARAMETERS ║
║ ═══════════════════════════════════════════════════════════════ ║
║ ║
║ Entry Price: _______________ ║
║ Stop Loss: _______________ ║
║ Position Size: _______________ ║
║ Risk Amount: $_____________ (____% of account) ║
║ ║
║ TP1: _______________ (1R) ║
║ TP2: _______________ (2R) ║
║ TP3: _______________ (3R) ║
║ ║
║ ═══════════════════════════════════════════════════════════════ ║
║ POST-TRADE ANALYSIS ║
║ ═══════════════════════════════════════════════════════════════ ║
║ ║
║ RESULT: □ WIN □ LOSS □ BREAKEVEN ║
║ ║
║ Exit Price: _______________ ║
║ P&L: $_____________ (____R) ║
║ ║
║ WHAT WENT WELL: ║
║ _________________________________________________ ║
║ _________________________________________________ ║
║ ║
║ WHAT COULD IMPROVE: ║
║ _________________________________________________ ║
║ _________________________________________________ ║
║ ║
║ DID I FOLLOW MY RULES? □ YES □ NO ║
║ If NO, which rule was broken? _____________________ ║
║ ║
║ SCREENSHOT SAVED: □ YES ║
║ ║
║ LESSONS LEARNED: ║
║ _________________________________________________ ║
║ _________________________________________________ ║
║ _________________________________________________ ║
║ ║
╚════════════════════════════════════════════════════════════════════╝
Weekly Review Template-
╔════════════════════════════════════════════════════════════════════╗
║ WEEKLY REVIEW ║
╠════════════════════════════════════════════════════════════════════╣
║ ║
║ WEEK OF: _______________ ║
║ ║
║ STATISTICS: ║
║ ─────────── ║
║ Total Trades: _____ ║
║ Wins: _____ (____%) ║
║ Losses: _____ (____%) ║
║ Breakeven: _____ ║
║ Total R Gained/Lost: _____R ║
║ P&L: $_____ ║
║ ║
║ BEST TRADE THIS WEEK: ║
║ Setup: ______________ R Gained: _____R ║
║ Why it worked: ____________________________________ ║
║ ║
║ WORST TRADE THIS WEEK: ║
║ Setup: ______________ R Lost: _____R ║
║ Why it failed: ____________________________________ ║
║ ║
║ RULES FOLLOWED: _____% ║
║ RULES BROKEN: _____% ║
║ ║
║ PATTERNS NOTICED: ║
║ _________________________________________________ ║
║ _________________________________________________ ║
║ ║
║ GOALS FOR NEXT WEEK: ║
║ 1. _______________________________________________ ║
║ 2. _______________________________________________ ║
║ 3. _______________________________________________ ║
║ ║
╚════════════════════════════════════════════════════════════════════╝
FINAL SUMMARY
╔════════════════════════════════════════════════════════════════╗
║ THE VSA TRADING PROCESS ║
╠════════════════════════════════════════════════════════════════╣
║ ║
║ 1. SCAN for volume anomalies on charts ║
║ ║
║ 2. IDENTIFY the pattern (Test, Absorption, Spring, etc.) ║
║ ║
║ 3. CONFIRM across multiple timeframes (4H → 1H → 30M → 15M) ║
║ ║
║ 4. ANALYZE candle close position and spread ║
║ ║
║ 5. WAIT for trigger (don't anticipate, react to confirmation) ║
║ ║
║ 6. CALCULATE position size based on stop distance ║
║ ║
║ 7. EXECUTE with predefined entry, stop, and targets ║
║

Star SMC and Price action [ARule]This script is a Smart Money Concepts (SMC) + Price Action + VWAP + Swing Zones indicator.
It detects and draws:
✅ Fair Value Gaps (FVG)
✅ Imbalances (HTF FVG)
✅ BOS / CHoCH (Market Structure)
✅ Internal & Swing Structure
✅ Order Blocks (Internal + Swing)
✅ Equal High / Equal Low (EQH / EQL)
✅ Premium / Discount Zones
✅ Multi-Timeframe High & Low levels
✅ VWAP trend filter
✅ Swing High / Low zones with volume/count filter
✅ Alerts for all major SMC events
👉 Basically:
💎 “All-in-one institutional trading indicator”
✅ 1) HTF FVG / Imbalance System (First Part)
This part:
Uses multiple higher timeframes:
5m, 15m, 1H, 4H, 1D, 1W
Detects imbalance (FVG-like gaps)
Draws boxes on chart
Marks mitigated zones
Adds labels like: 5m, 15m, 1H etc.
Logic:
An imbalance forms when:
current high < previous low (gap down)
or
current low > previous high (gap up)
Then it draws a box 📦
✅ 2) Mitigation Logic (Very Important)
Your script checks when FVG is filled:
Options:
Wick filled
Body filled
Half filled
None
Example:
"Wick filled" => low <= imb.open
Meaning:
👉 Price touched the FVG → mark as mitigated.
✅ 3) Smart Money Concepts (SMC Core)
This huge section detects:
🔹 BOS (Break of Structure)
When price breaks previous swing high/low.
🔹 CHoCH (Change of Character)
Trend reversal signal.
Example:
Uptrend → break low → CHoCH bearish
Downtrend → break high → CHoCH bullish
✅ 4) Internal vs Swing Structure
Internal Structure:
Small moves (lower timeframe)
Fast signals ⚡
Swing Structure:
Major trend structure
Strong signals 💪
You can enable/disable both in settings.
✅ 5) Order Blocks (OB)
Detected when structure breaks.
Two types:
🟢 Bullish OB
🔴 Bearish OB
Logic:
Script finds last opposite candle before BOS/CHoCH.
Then draws OB box 📦
Also checks mitigation:
close > OB high → bearish OB broken
close < OB low → bullish OB broken
✅ 6) Equal High / Equal Low (Liquidity)
Detects liquidity zones:
EQH = Equal High
EQL = Equal Low
Logic:
If two highs/lows are close within ATR threshold.
Used for:
👉 Liquidity grab / stop hunt zones.
✅ 7) Fair Value Gaps (FVG) – Another System
This is separate from HTF imbalance.
Condition:
currentLow > high → bullish FVG
currentHigh < low → bearish FVG
Draws 2 boxes per FVG.
✅ 8) Premium / Discount Zones
Based on latest swing high & low:
Premium zone = top 50%
Discount zone = bottom 50%
Equilibrium = middle
Used in SMC for entries.
✅ 9) Multi-Timeframe High/Low Levels
Draws:
Previous Day High/Low
Previous Week High/Low
Previous Month High/Low
✅ 10) VWAP Filter (Your Added Block)
You added:
VWAP Line
vwapValue = ta.vwap(close)
Trend Filter
Bullish → price above VWAP
Bearish → price below VWAP
ATM / ITM / OTM logic
atm_condition = abs(close - vwap) <= 25
Meaning:
ATM = price near VWAP
ITM / OTM = based on VWAP direction
💡 This is NOT real option ATM — it's a conceptual filter.
✅ 11) Swing High / Low Zones (Last Part)
This part:
Detects swing highs & lows using pivot logic
Creates zones (boxes)
Counts touches or volume inside zone
Filters strong zones
Example:
More touches = stronger support/resistance
More volume = institutional interest
✅ What makes this script powerful 💎
It combines:
Concept Purpose
FVG / Imbalance Institutional gaps
BOS / CHoCH Trend change
Order Blocks Smart money zones
EQH/EQL Liquidity
Premium/Discount Entry zones
VWAP Trend filter
Swing Zones Support/Resistance
👉 This is almost like ICT + SMC + Volume + VWAP hybrid.
✅ If you want, I can help you:
I can:
✅ Simplify this script (remove heavy parts)
✅ Add NIFTY / BANKNIFTY option logic
✅ Add Buy/Sell signals
✅ Add scanner (BOS + VWAP + FVG)
✅ Add dashboard table
✅ Optimize performance (reduce lag)
✅ Convert VWAP → real ATM strike logic
✅ Explain any part line-by-line

SMT + BOS + RR This indicator implements a Smart Money Theory (SMT) + Break of Structure (BOS) strategy with a fixed risk/reward ratio, synchronized between two assets. The main idea is to detect discrepancies in the movements of two symbols to identify potential accumulation and reversal zones driven by institutional activity.
Key Features:
SMT Signals:
Automatically identifies divergences between two assets (e.g., BTC and ETH), highlighting potential smart money activity.
Detects trend direction through sweeps of recent highs and lows.
BOS (Break of Structure):
Filters signals based on structure break: higher highs/lower lows.
Additional ATR-based candle size check to avoid false signals.
Entry & Position Management:
Supports long, short, or both directions.
Entry type selection: on candle close (bos_close) or retest (bos_retest).
Automatic calculation of Stop Loss at the last extreme and Take Profit based on the specified risk/reward ratio (RR).
Visualization:
Arrows displayed on the chart for buy and sell signals.
SL and TP lines for clear risk management.
SMT signals marked at the top and bottom of the chart.
Settings:
Symbol A / Symbol B — choose assets for SMT analysis.
Side — trading direction: long, short, or both.
Swing Size — pivot size for detecting local highs and lows.
Risk/Reward — RR ratio for automatic TP calculation.
Min BOS Body ATR — minimum candle body size for BOS confirmation.
Best Suited For:
Traders following Smart Money concepts and looking for market structure-based signals with controlled risk.

Advanced Trend finder by S B PrasadAdvanced Trend finder – by S B Prasad
A Professional Multi-Engine Trend, Breakout & Scalping System
Advanced Trend Navigator is a powerful all-in-one trading indicator that fuses smart EMA trend detection, adaptive multi-filters, ribbon trend analysis, automatic trend channels, divergence detection, and built-in SL/Target projection into a single, visually intuitive system.
It is engineered for both scalpers and swing traders, with special optimization for 1-minute and 5-minute charts, while remaining highly reliable on higher timeframes.
🔹 What Makes This Indicator Unique?
Unlike single-logic indicators, Advanced Trend Navigator uses a dual-engine + structure-based approach:
EMA Smart Signal Engine → detects trend, reversals, and momentum shifts
Ribbon + Trend Channel Engine → confirms structure, breakouts, and continuation
Adaptive Filters + Divergence → remove noise and boost confidence
Risk Engine (SL/TP) → projects structured trade exits
This confluence-based design dramatically reduces false signals.
🔹 Core Features
1️⃣ Smart EMA Trend Engine
Dual EMA crossover system (Fast & Slow)
Automatic optimization for 1-minute timeframe
Detects:
Trend direction
Trend reversals
Momentum shifts
2️⃣ Multi-Layer Signal Filters
Signals are validated using a powerful adaptive filter stack:
Volume Filter (above-average volume confirmation)
RSI Filter with dynamic buy/sell thresholds
Bollinger Bands (overbought / oversold zones)
Momentum Filter (ROC-based strength detection)
Volatility Adaptation (ATR-based regime detection)
These filters dramatically reduce noise and false entries.
3️⃣ RSI Divergence Detection (1-Minute Optimized)
Bullish and bearish divergence detection
Automatic confidence boost when divergence appears
Helps identify early reversals and exhaustion zones
4️⃣ Enhanced Signal Logic
Signals are generated using a confluence of:
EMA crossovers
Candle direction
Volume + RSI + BB + Momentum
Divergence + trend-change logic
Separate logic is used for:
1-minute scalping
Higher-timeframe trend trading
5️⃣ Ribbon Trend System (CoraWave + LazyLine)
Advanced smoothed ribbon using:
CoraWave (fast line)
LazyLine (slow line)
Dynamic color-changing trend visualization
Ribbon fill highlights:
Strong bullish zones
Strong bearish zones
Neutral / transition phases
6️⃣ Automatic Trend Channel
Pivot-based dynamic trend channels
ATR-adjusted channel width
Auto-extended support & resistance structure
Visual map of evolving trend direction
7️⃣ Buy / Sell Breakout Signals (No-Spam Logic)
Signals only when:
Ribbon trend agrees
Price breaks channel boundaries
Built-in cooldown filter to prevent over-trading
Separate engine from EMA signals for dual confirmation
8️⃣ Built-In SL / Target Projection
Automatic Stop-Loss based on channel boundary
Risk-based Target 1 and Target 2 (R-multiples)
Dynamic plotting of:
SL line
Target 1 line
Target 2 line
9️⃣ Smart Time & Profit Projection
ATR-based time-to-move estimation
Dynamic profit potential estimation
Displays:
Expected move duration (minutes)
Approximate profit projection
🔟 Confidence Scoring System
Dynamic confidence % for each signal
Automatically increases when:
Divergence is detected
Bollinger extremes are triggered
🎨 Visual & Usability Features
Color-coded:
EMA lines
Ribbon trend
Trend channels
Background trend bias
Dynamic:
LONG / SHORT arrows
Signal labels with confidence + projection
Current trend status box
🔔 Alerts Included
EMA-based LONG / SHORT alerts
Ribbon fast/slow trend change alerts
Channel breakout BUY / SELL alerts
Alert messages include:
Symbol
Confidence %
Time projection
⚡ Recommended Presets
🟢 1-Minute Scalping
Fast EMA: 3 | Slow EMA: 8
Volume Filter: ON (1.1)
RSI: ON
Bollinger Bands: ON
Momentum: ON
Volatility Adaptation: ON
Ribbon: 10 / 3 / 15
Channel: Pivot 5 | ATR 14 | Width 1.5
Cooldown: 20
Targets: 1R & 2R
🔵 5-Minute Scalping (Author Preset)
Fast EMA: 5 | Slow EMA: 13
Volume Filter: ON (1.2)
RSI: OFF
Bollinger Bands: ON
Momentum: OFF
Volatility Adaptation: OFF
Ribbon: 12 / 3 / 18
Channel: Pivot 7 | ATR 14 | Width 1.7
Cooldown: 25
Targets: 1R & 2.5R
🟣 Swing Trading (15m–1H)
Fast EMA: 9 | Slow EMA: 21
Filters: All OFF
Ribbon: 15 / 5 / 25
Channel: Pivot 10 | ATR 14 | Width 2.0
Cooldown: 40
Targets: 1.5R & 3R
🎯 How to Trade This Indicator
BUY Setup:
Fast EMA > Slow EMA
Ribbon is green and rising
Price breaks above upper channel
Volume filter passes
Buy arrow appears
SELL Setup:
Fast EMA < Slow EMA
Ribbon is red and falling
Price breaks below lower channel
Volume filter passes
Sell arrow appears
❌ Avoid Trades When
Ribbon is flat or mixed colors
Channel is very narrow
Price is inside the channel
Volume filter fails
Market is extremely choppy
⚠️ Disclaimer
This indicator is a technical analysis tool, not financial advice.
Always use proper risk management and confirm signals with market context.
Past performance does not guarantee future results.

Advanced Trend Navigator by S B PrasadAdvanced Trend Navigator – by S B Prasad
A Professional Multi-Engine Trend & Breakout Trading System
Advanced Trend Navigator is a powerful, all-in-one trading indicator that combines smart EMA trend detection, adaptive filters, ribbon trend analysis, automatic trend channels, divergence detection, and built-in SL/Target projection into a single, visually intuitive system.
It is designed for both scalpers and swing traders, with special optimization for 1-minute charts and robust performance on higher timeframes.
🔹 Core Features
1️⃣ Smart EMA Trend Engine
Dual EMA crossover system (Fast & Slow)
Automatic optimization for 1-minute timeframe
Detects:
Trend direction
Trend reversals
Momentum shifts
2️⃣ Multi-Layer Signal Filters
Signals are validated using a powerful filter stack:
Volume Filter (above-average volume confirmation)
RSI Filter with dynamic buy/sell thresholds
Bollinger Bands (overbought / oversold zones)
Momentum Filter (ROC-based strength detection)
Volatility Adaptation (ATR-based regime detection)
These filters dramatically reduce false signals and noise.
3️⃣ RSI Divergence Detection (1-Minute Optimized)
Bullish and bearish divergence detection
Automatic confidence boost when divergence appears
Helps identify early trend reversals and exhaustion zones
4️⃣ Enhanced Signal Logic
Signals are generated using a confluence of:
EMA crossovers
Candle direction
Volume + RSI + BB + Momentum
Divergence + trend-change logic
Separate logic is used for:
1-minute scalping
Higher-timeframe trend trading
5️⃣ Ribbon Trend System (CoraWave + LazyLine)
Advanced smoothed ribbon using:
CoraWave (fast line)
LazyLine (slow line)
Dynamic color-changing trend visualization
Ribbon fill highlights:
Strong bullish zones
Strong bearish zones
Neutral / transition phases
6️⃣ Automatic Trend Channel
Pivot-based dynamic trend channels
ATR-adjusted channel width
Auto-extended support & resistance structure
Visual map of evolving trend direction
7️⃣ Buy / Sell Breakout Signals (No-Spam Logic)
Signals only when:
Ribbon trend agrees
Price breaks channel boundaries
Built-in cooldown filter to prevent over-trading
Separate engine from EMA signals for dual confirmation
8️⃣ Built-In SL / Target Projection
Automatic Stop-Loss based on channel boundary
Risk-based Target 1 and Target 2 (R-multiples)
Dynamic plotting of:
SL line
Target 1 line
Target 2 line
9️⃣ Smart Time & Profit Projection
ATR-based time-to-move estimation
Dynamic profit potential estimation
Displays:
Expected move duration (minutes)
Approximate profit projection
🔟 Confidence Scoring System
Dynamic confidence % for each signal
Automatically increases when:
Divergence is detected
Bollinger extremes are triggered
🎨 Visual & Usability Features
Color-coded:
EMA lines
Ribbon trend
Trend channels
Background trend bias
Dynamic:
LONG / SHORT arrows
Signal labels with confidence + projection
Current trend status box
🔔 Alerts Included
EMA-based LONG / SHORT alerts
Ribbon fast/slow trend change alerts
Channel breakout BUY / SELL alerts
Alert messages include:
Symbol
Confidence %
Time projection
🛠 Recommended Usage
Scalping:
1-minute or 3-minute charts
Enable Volume, RSI, Momentum, and Volatility filters
Intraday / Swing Trading:
5-minute to Daily charts
Use EMA + Ribbon + Channel confluence
5-Minute Scalping Settings
(High-probability intraday trades)
🔹 EMA Settings
Fast EMA: 5
Slow EMA: 13
🔹 Filters
Volume Filter
Use Volume Filter: ✅ ON
Volume Threshold: 1.2
RSI Filter
Use RSI Filter: ❌ OFF
(Turn ON only in very choppy markets)
RSI Length: 14
RSI Buy Level: 30
RSI Sell Level: 70
Bollinger Bands
Use Bollinger Bands: ✅ ON
BB Length: 20
BB Multiplier: 2.0
Momentum Filter (ROC)
Use Momentum: ❌ OFF
(Turn ON only for breakout-only trading)
Momentum Length: 3
Momentum Threshold %: 0.10
Volatility Adaptation
Use Volatility Adaptation: ❌ OFF
(Enable only for highly volatile stocks / crypto)
Volatility Multiplier: 1.5
🔹 Ribbon Settings
Fast Length: 12
Fast Smooth: 3
Slow Length: 18
Show Ribbon Fill: ✅ ON
🔹 Trend Channel
Pivot Length: 7
ATR Length: 14
Channel Width (ATR): 1.7
🔹 Buy / Sell Signals
Show Buy / Sell Signals: ✅ ON
Signal Cooldown (Bars): 25
🔹 SL / Target Projection
Show SL / Target Projection: ✅ ON
Target 1 (R): 1.0
Target 2 (R): 2.5
🔹 Visual / Display (Optional)
Show BB on Chart: ❌ OFF (keep chart clean)
Background Transparency: 80
Value to Display: Time (recommended for scalping)
🎯 How to Trade (5-Minute Mode)
Take BUY when:
Fast EMA > Slow EMA
Ribbon is green + rising
Price breaks above upper channel
Volume filter passes
Buy arrow appears
Take SELL when:
Fast EMA < Slow EMA
Ribbon is red + falling
Price breaks below lower channel
Volume filter passes
Sell arrow appears
❌ Avoid Trades When
Ribbon is flat or mixed colors
Channel is very narrow
Price is inside the channel
Volume filter fails
⚠️ Disclaimer
This indicator is a technical analysis tool, not financial advice.
Always use proper risk management and confirm signals with market context.
Past performance does not guarantee future results.

RS Score (1-100) vs NQ/ES/YM - TP# RS Score (1–100) vs NQ/ES/YM — How to Use & Interpret
## What this indicator is doing
It gives you a **single score from 1 to 100** that tells you whether a stock is acting like a **leader** or a **laggard** compared to the **overall U.S. market** (Nasdaq + S&P + Dow), using about **1 year of data**.
---
## The core idea: “Is this stock beating the market?”
This script compares your stock to a blended benchmark of:
* **Nasdaq futures (NQ)**
* **S&P futures (ES)**
* **Dow futures (YM)**
### Why that matters
A stock can be going up, but if the market is going up faster, the stock is **not a leader**.
This tool answers:
* “Is this stock outperforming the big market?”
* “Is it doing it consistently, or is it just wild and noisy?”
---
## What the 1–100 score means
Think of **50** as the “middle line.”
### The most important rule
* **Above 50 = outperforming the market blend**
* **Below 50 = underperforming**
* **Around 50 = roughly market-like**
### Easy interpretation bands
* **80–100 (Strong Leader):** stock is outperforming the market clearly and consistently
* **60–80 (Healthy):** generally outperforming, decent leadership
* **45–60 (Neutral-ish):** not special, close to market performance
* **30–45 (Weak):** lagging the market
* **1–30 (Very Weak):** strong underperformance
**Think “leaders live above 50,” and “real leaders tend to stay 70+.”**
---
## Why this score is “smarter” than just comparing returns
This script doesn’t just ask *“did it outperform?”*
It also asks *“did it outperform in a clean, steady way?”*
So it penalizes:
* choppy, unstable performance
* “one lucky spike” moves
That’s why it’s great for finding **higher-quality leadership**.
---
## Timeframe consistency: why it works on Daily, Weekly, Monthly
You added **Lock to last completed Daily bar**.
That means:
* it uses the **same daily reference point** no matter what chart timeframe you switch to
* your RS score won’t “walk around” just because the current day/week/month is still forming
**Practical meaning:**
If your score says 72, it should be 72 whether you’re looking at Daily, Weekly, or Monthly (as of the last completed day).
---
## The “RS New High” marker (NH) — what it’s telling you
The marker shows when your RS score hits a **new high** over your chosen lookback period (default ~252 trading days).
### In plain terms:
> “This stock is now showing its strongest relative performance vs the market (in about a year).”
### Why it’s powerful
A lot of the best leaders:
* show RS new highs **before** price breaks out
* or show RS new highs **during** breakouts
**So NH is a “leadership confirmation” signal.**
### How to use NH in real life
* **Best case:** RS hits a new high **while price is near breakout levels**
→ this often means institutions are accumulating and the stock is acting like a leader
* **Okay case:** price makes new highs but RS does not
→ stock is rising, but it’s not leading (could still work, but less attractive)
---
## Divergences: when RS and price disagree
This is one of the most useful ways to use RS.
### Bearish divergence (warning)
**Price makes a higher high, but RS makes a lower high.**
In simple terms:
> “The stock is still going up, but it’s losing leadership versus the market.”
This often shows up before:
* pullbacks
* breakout failures
* trend weakening
* rotation into stronger names
**It’s a caution sign, not an automatic sell.**
### Bullish divergence (early strength)
**Price makes a lower low, but RS makes a higher low.**
In simple terms:
> “The stock is holding up better than the market — strength is building underneath.”
This can happen before:
* reversals
* strong bounce setups
* early leadership emergence
---
## How to use this indicator in a simple trading workflow
### 1) Screening (finding leaders)
When scanning charts:
* Prefer stocks **above 50**
* Strong candidates are typically **70+**
* Bonus points if you see **NH markers** recently
**Quick rule:**
If RS < 50, it’s usually not worth your time unless you’re hunting deep value turnarounds.
---
### 2) Breakouts (confirming quality)
When a stock is near a breakout point:
* You want RS to be **rising**
* Ideally RS is near highs or prints **NH**
If price breaks out but RS is weak:
* it’s more likely to be a “meh breakout”
* sometimes it works, but it’s less “leader-like”
---
### 3) Managing positions (leadership health check)
If you’re already holding:
* RS staying high and rising = healthy leadership
* RS rolling over while price still rises = **possible early warning**
* RS plunging under 50 = the stock is now **lagging the market** (big red flag)
---
## Common “mistakes” and how to avoid them
### Mistake 1: Thinking RS > 50 means “guaranteed winner”
No — it means it’s acting **stronger than the market**, but price action still matters.
Use it with:
* trend structure
* volume/accumulation
* breakout levels
### Mistake 2: Overreacting to one divergence
One divergence is a warning.
You want confirmation like:
* failed breakout
* heavy sell volume
* loss of key moving averages
* repeated RS lower highs
### Mistake 3: Comparing RS values across totally different markets without context
RS works best when:
* comparing stocks within the same broad market environment
* keeping the same benchmark blend and same lookback
---
## Simple cheat sheet
* **RS > 50:** outperforming market (good)
* **RS 70–100:** leader zone
* **NH marker:** strongest relative strength in lookback window (leadership confirmation)
* **Price HH + RS LH:** bearish divergence (leadership weakening)
* **Price LL + RS HL:** bullish divergence (strength building)
Thank you!

RSI Divergence Indicator (Multi-Time Frame Confirmation)This custom-built RSI indicator blends traditional divergence detection with multi-timeframe trend confirmation, offering traders a smarter way to spot meaningful momentum shifts.

EEQI [Environment Quality Index] PyraTime The Problem: Why Good Strategies Fail
The number one reason traders lose capital is not a lack of strategy—it is forced execution in poor environments.
Most indicators (RSI, MACD, Stochastic) are continuously active, generating signals even when the market is dead, choppy, or chaotic. A breakout strategy that prints money in a trend will destroy your account in a consolidation range. A mean-reversion system that works in chop will fail during a parabolic expansion.
The Solution: PyraTime EEQI The Execution Environment Quality Index (EEQI) is a "Gatekeeper" layer for your trading. It does not tell you what to buy or sell; it tells you if you should be trading at all.
By aggregating Volatility, Price Structure, and Efficiency into a single composite score, the EEQI answers the most critical question in discretionary trading: "Is the market efficient enough to deploy capital right now?"
How It Works: The 3 Core Engines
The EEQI calculates a raw "Environment Score" (from -2 to +4) by analyzing three distinct dimensions of price action.
1. Volatility Engine (Usability)
The Logic: Measures the "Alive-ness" of the market using ATR Percentiles.
The Filter: It detects "Dead Zones" (where price is too flat to hit targets) and "Chaos Zones" (where volatility is too dangerous).
Smart Feature (Parabolic Override): If price moves significantly (>2x ATR) in a single candle, the engine recognizes this as "High Momentum" rather than chaos, unlocking Green signals during breakouts.
2. Structure Engine (Bar Quality)
The Logic: Analyzes the relationship between candle bodies, wicks, and overlap.
The Filter: It penalizes "Barbed Wire" price action—candles with long wicks and high overlap—which indicate indecision and algo-chop.
The Goal: We want to trade during "Clean Flow," where candle bodies are large and overlap is low.
3. Efficiency Engine (Directional Flow)
The Logic: Compares Net Displacement (start-to-finish distance) vs. Total Distance Traveled.
The Filter: Identifies "Whipsaw" conditions where price moves a lot but goes nowhere.
Smart Feature (Velocity Lock): If price travels a massive distance quickly, the efficiency requirement is relaxed to catch explosive moves that might otherwise look "messy."
The "Smart Gatekeepers"
Even if the Core Engines look good, the EEQI applies three final safety checks before granting a PRIME status.
Regime Persistence (Stability Check): The market must hold a high score for a set number of bars (default: 1) before the signal turns Green. This prevents "fake-outs" where a single anomaly candle tricks you into entering a bad trend.
Volume Validation (Liquidity Check): Price movement without participation is a trap. The EEQI checks Relative Volume (RVOL). If volume is below average (e.g., lunch hour, holidays, or late-night sessions), the score is capped at "Fair" or "Low Vol," preventing execution in thin liquidity.
Macro Context (HTF Filter): You cannot trade against the higher timeframe. The EEQI checks the trend and volatility of the Higher Timeframe (default: Weekly). If the macro view is compressed or dead, the local signal is vetoed.
How to Read the HUD
The Dashboard (Bottom Right) gives you an instant read on the market state.
🟢 PRIME (+4): Execution Optimal. The market is trending, efficient, and backed by volume. This is the "Green Light" for your strategy.
🔵 FAIR (+1 to +3): Tradeable. Conditions are decent, but one factor (e.g., volume or structure) is imperfect. Exercise caution.
⚪ NEUTRAL (0): Indecision. The market is transitioning. Stand aside.
🟡 BUILDING: Wait. The market is good, but hasn't proven itself yet (Persistence Check).
🟠 POOR / LOW VOL: Chop. Price is messy or lacking participation.
🔴 AVOID (-2): Danger Zone. The market is either dead flat or violently chaotic. Do not trade.
Settings & Customization
The indicator comes with calibrated presets for different asset classes:
Crypto: Tolerates higher volatility and requires stronger efficiency confirmation.
Forex: Stricter dead-zone filters to handle ranging sessions.
Indices: Balanced settings for standard equity hours.
Disclaimer
This tool is designed for environment analysis only. It does not provide buy or sell signals, entry prices, or stop-losses. It is intended to be used as a filter to improve the performance of your own discretionary strategies.
