PROTECTED SOURCE SCRIPT
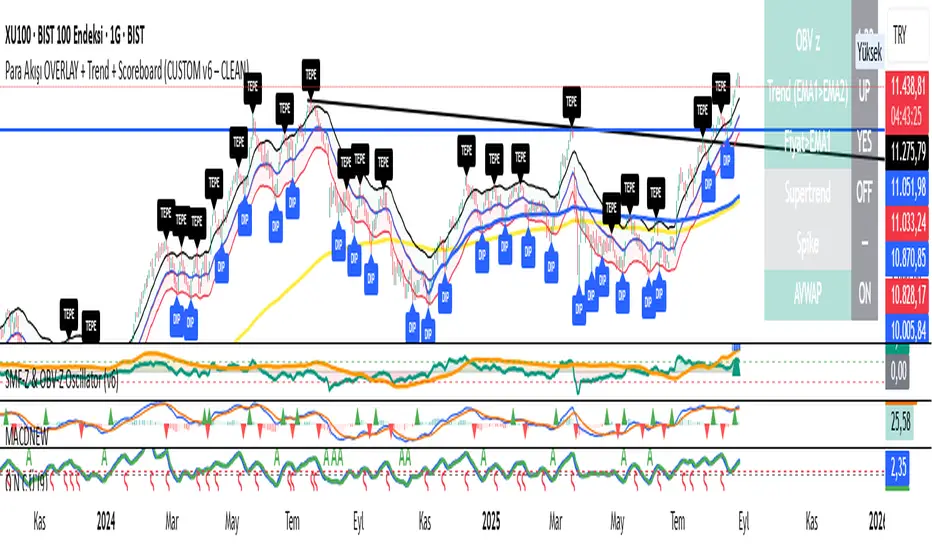
SMF-Z & OBV-Z Oscillator (v6)

🧭 Quick Reference
• SMF-Z (teal): flow of money.
• OBV-Z (orange): volume support for price moves.
• Zero line (0): neutral. Positive side = bullish bias, negative side = bearish bias.
• ±2 levels: “extreme” zone (unusual inflow/outflow).
• IN/OUT triangles: short-term strong money inflow/outflow (spike signals).
✅ Core Rules
LONG (buy/hold)
Both SMF-Z and OBV-Z above zero and rising (upward slope).
Zero line crossover (especially if both cross around the same bar) + IN spike = strong confirmation.
Expansion toward +2 = momentum intact, let profits run.
EXIT / SELL (close long or consider short)
Either SMF-Z or OBV-Z drops below zero (especially both together).
OUT spike (heavy selling pressure) = aggressive exit signal.
Rolling over from +2 downward (especially if OBV-Z turns first) = momentum fading.
SHORT (sell side)
Both indicators below zero and falling; zero line crossunders + OUT spike = strong confirmation.
Expansion toward −2 shows trend strength; taking profit on reversal from −2 is reasonable.
♟️ Divergences (most reliable signal)
Positive divergence: Price makes a new low while SMF-Z/OBV-Z form a higher low → strong accumulation sign (especially if paired with an IN spike).
Negative divergence: Price makes a new high while SMF-Z/OBV-Z form a lower high → distribution/selling sign (confirmed with an OUT spike).
🔧 Parameter Effects
SMF z-window / OBV z-window: shorter (20–50) = more sensitive but noisier; longer (100–200) = slower but more reliable.
OBV EMA: smaller (10–13) = faster response; larger (34–55) = smoother.
Spike window & σ (spK): shorter window or smaller sigma = more frequent spikes; larger = fewer but more selective spikes.
📝 Simple Playbook
Filter: Check if both SMF-Z and OBV-Z are on the same side of zero before taking a trade.
Trigger: Zero line crossover + IN/OUT spike.
Management:
For longs: exit/reduce if OBV-Z falls below zero or an OUT spike appears.
For shorts: exit/reduce if SMF-Z rises above zero or an IN spike appears.
Extra confirmation: If Supertrend/EMA from the overlay indicator agrees with SMF-Z & OBV-Z, confidence is stronger.
⚠️ Cautions
In sideways markets, frequent whipsaws around zero are common → always wait for confirmation (both indicators + spike + trend filter).
+2/−2 zones do not guarantee reversal by themselves; in strong trends the indicators can stay there for a while.
Korumalı komut dosyası
Bu komut dosyası kapalı kaynak olarak yayınlanmaktadır. Ancak, özgürce ve herhangi bir sınırlama olmaksızın kullanabilirsiniz – daha fazla bilgi burada.
Feragatname
Bilgiler ve yayınlar, TradingView tarafından sağlanan veya onaylanan finansal, yatırım, işlem veya diğer türden tavsiye veya tavsiyeler anlamına gelmez ve teşkil etmez. Kullanım Şartları'nda daha fazlasını okuyun.